Creating a Workflow Role
A workflow role may be needed if the work process requires review/approval by a role, at some point in the workflow, that does not fall under any of the readily available, out-of-the-box manager roles (project, group, approval, functional), or that is designated to only specific users.
This article details how to create a workflow role. Though the example here illustrates a timesheet workflow role, the manner in which to create the other types of workflow roles is basically the same with the main difference being the navigation to access the Workflow Role Edit page:
- Timesheet Workflow Roles (Setup > Timesheet > Timesheet Workflows > Timesheet Roles)
- Leave Request Workflow Roles (Setup > Timesheet > Leave Request Workflows > Leave Request Roles)
- Expense Workflow Roles (Setup > Expense > System > Setup > Expense > System > Expense Roles)
- Project Workflow Roles (Setup > Work > Projects > Project Workflow Roles)
- Invoice Workflow Roles (Setup > Financial > System > Invoicing Roles)
- Work Processes Workflow Roles (Setup > Work Processes > Work Process Roles)
1. Access the Workflows page
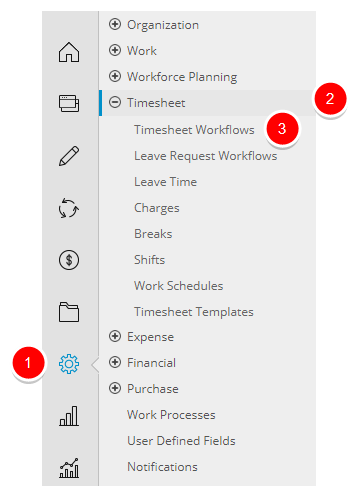
- Click Setup in the Icon Bar.
- Click Timesheet in the Navigation Menu.
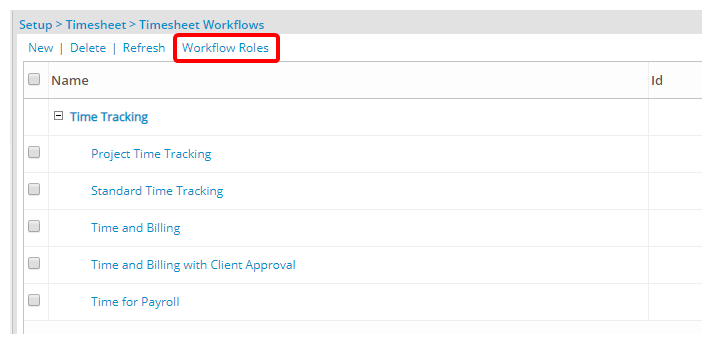
- Select Timesheet Workflows.
4. Enter the required information
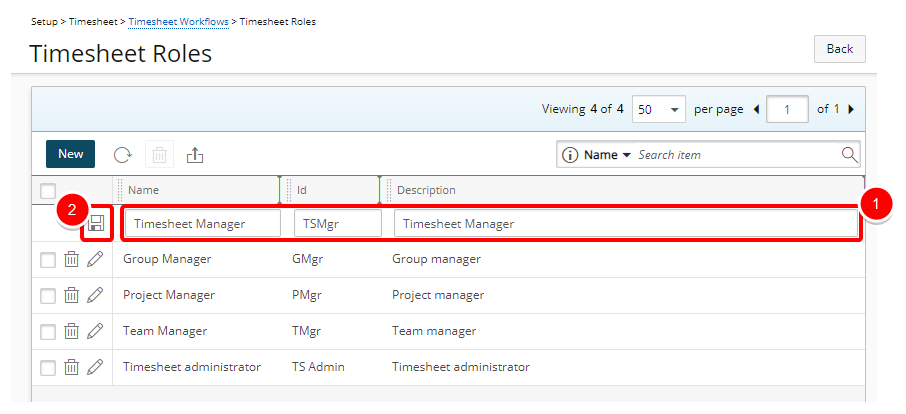
- Inline editing will be enabled allowing you to enter the following information:
- Name
- Id
- Description
- Click Save.
5. View the newly created workflow role in the list
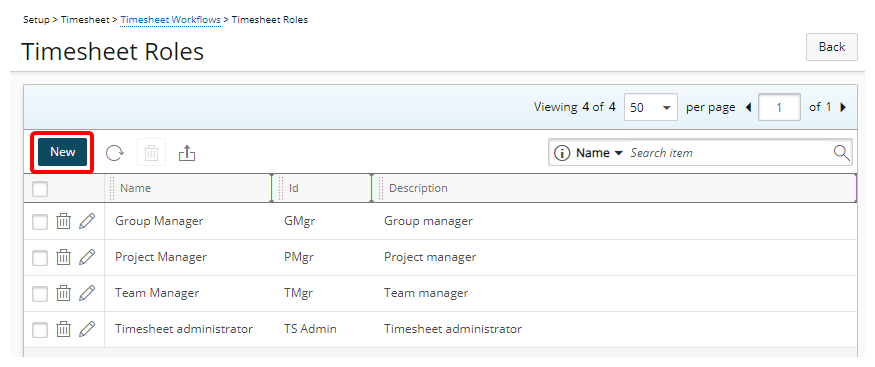
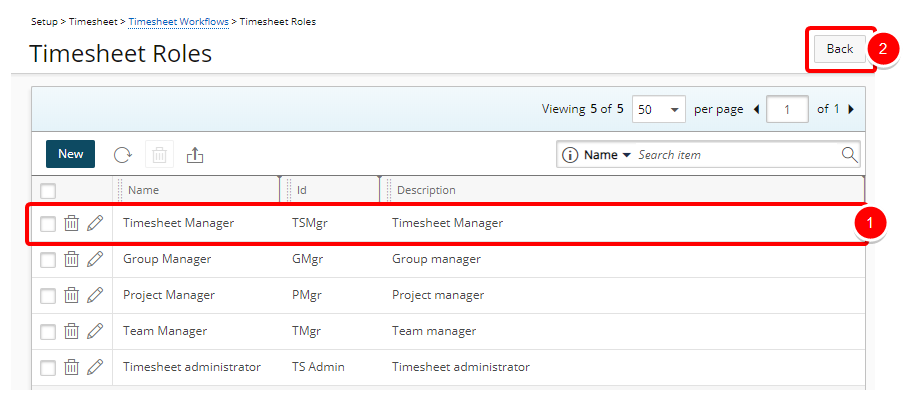
- Back on the Timesheet Roles list page, view the workflow role you just created.
- Click Back.
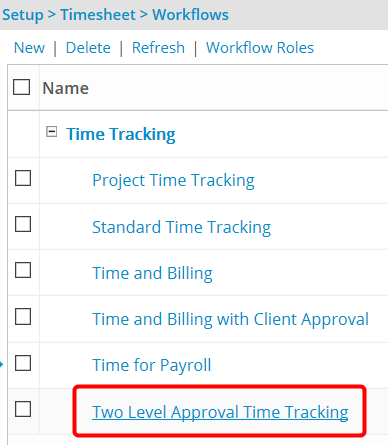
6. Select the workflow
- On the Workflows list page, select the workflow wherein you wish to use the workflow role.
7. Select the state to which the workflow role is to be attached
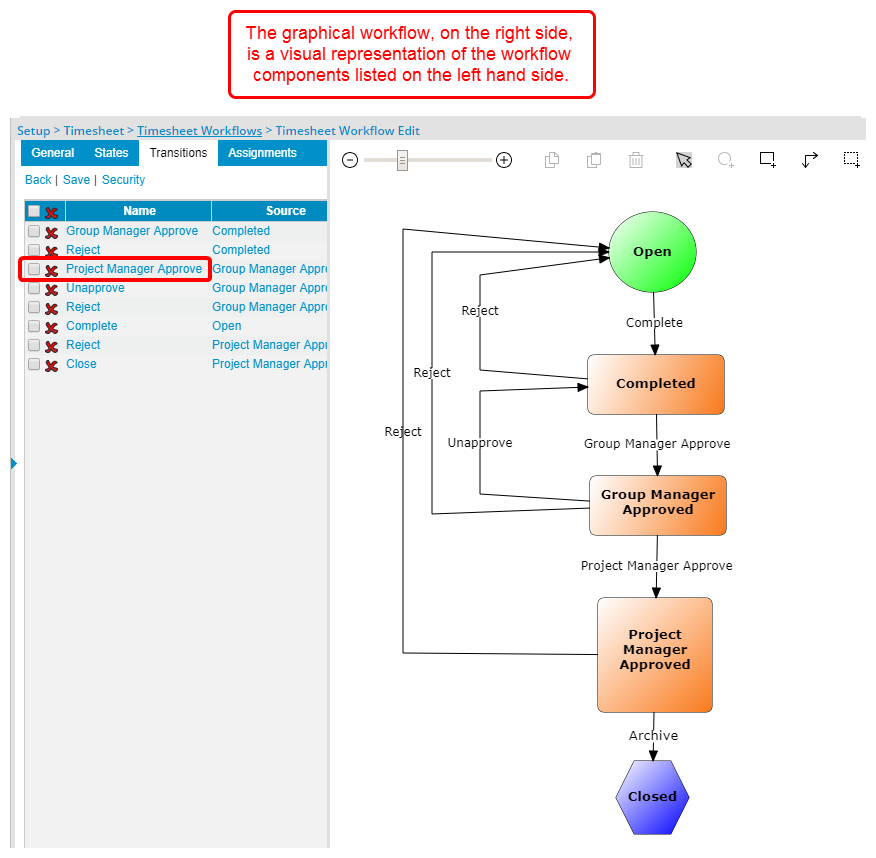
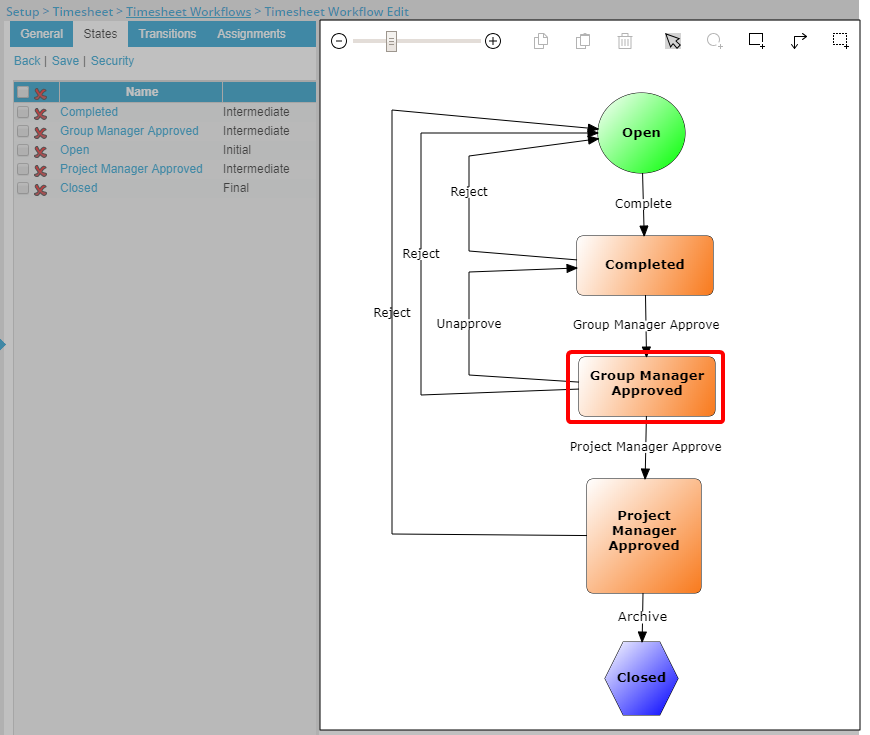
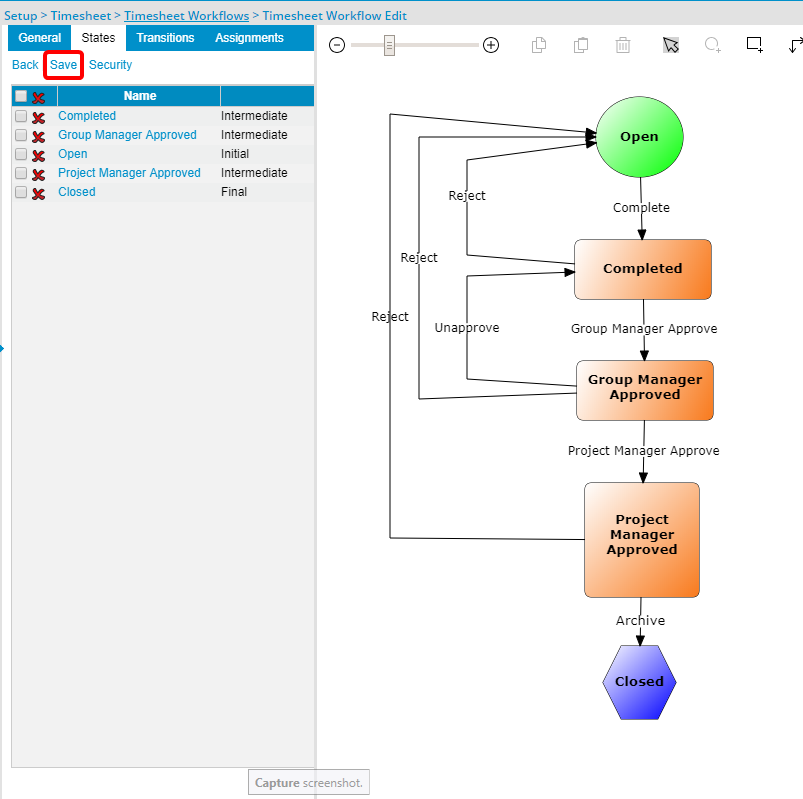
On the Timesheet Workflow Edit page, you can access the State to which the workflow role is to be attached through either of the following (the details of which are in the substeps below). Either way will open up the same Transition Edit dialog box.:
7.1 The States tab OR
7.2 The state box on the rendering.
The state you select in this step is where you can define which workflow role(s), more specifically which users who have been designated the chosen workflow role(s), can perform the transition.
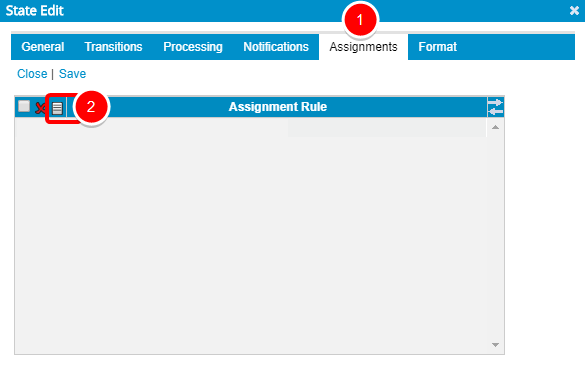
7.1 Click the Transitions tab
- From the left side of the Timesheet Workflow Edit page, where the tabs are, select the state under the State tab.
7.2 Click the state box
- From the workflow rendering, on the right side of the Timesheet Workflow Edit page, select the state box.
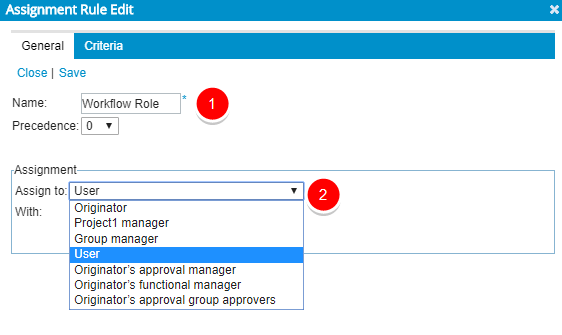
9. Select User
Define the assignment on the Assignment Rule Edit dialog box by:
- Naming it.
- Selecting the User from the Assign to list.
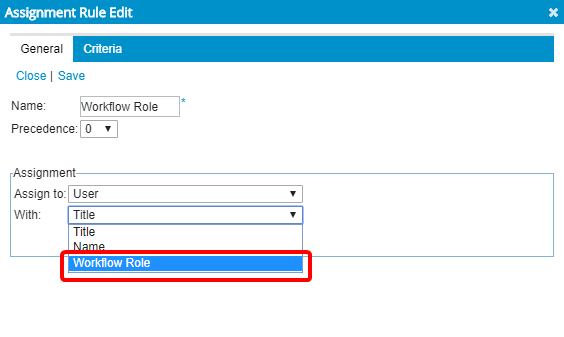
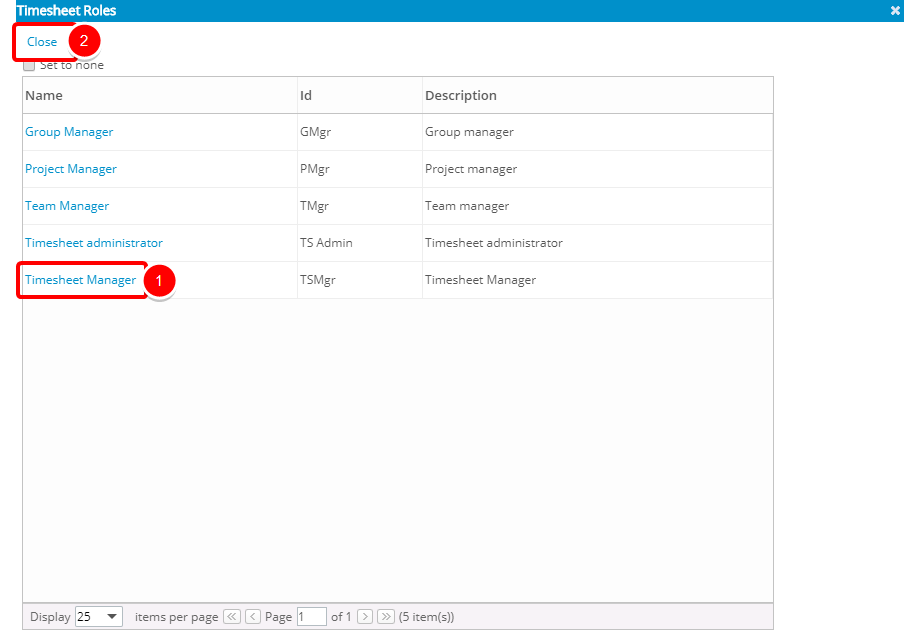
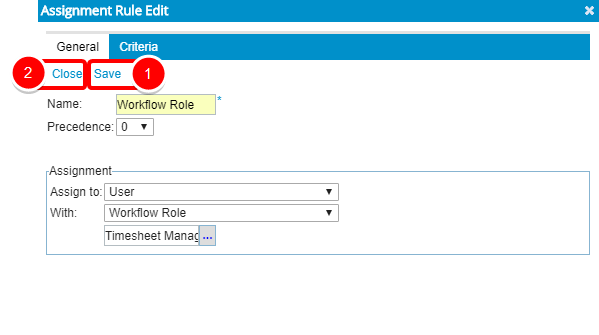
13. View the selected workflow role
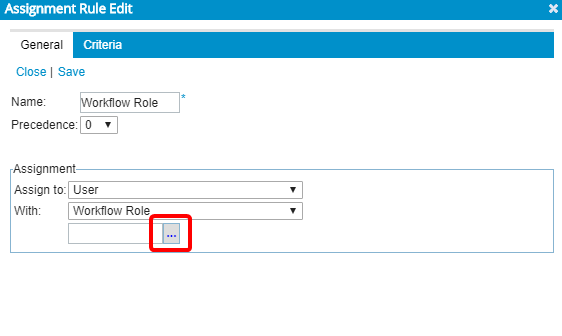
- Upon the Assignment Rule Edit dialog box displaying, view the selected workflow role.
- Click Save.
- Click Close.
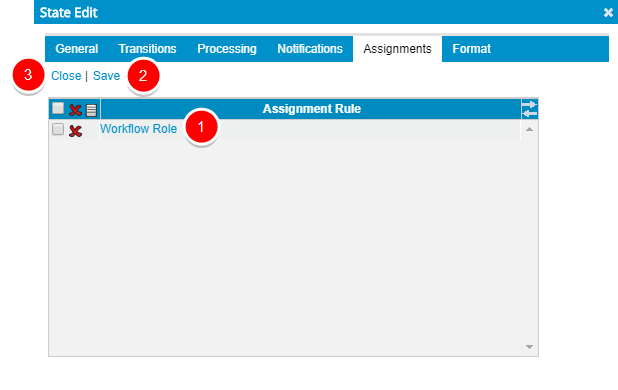
14. View the newly created assignment rule in the list
- Back on the Assignments tab, view the rule, you just created, in the list.
- Click Save.
- Click Close.
16. View assigned entry and the transition
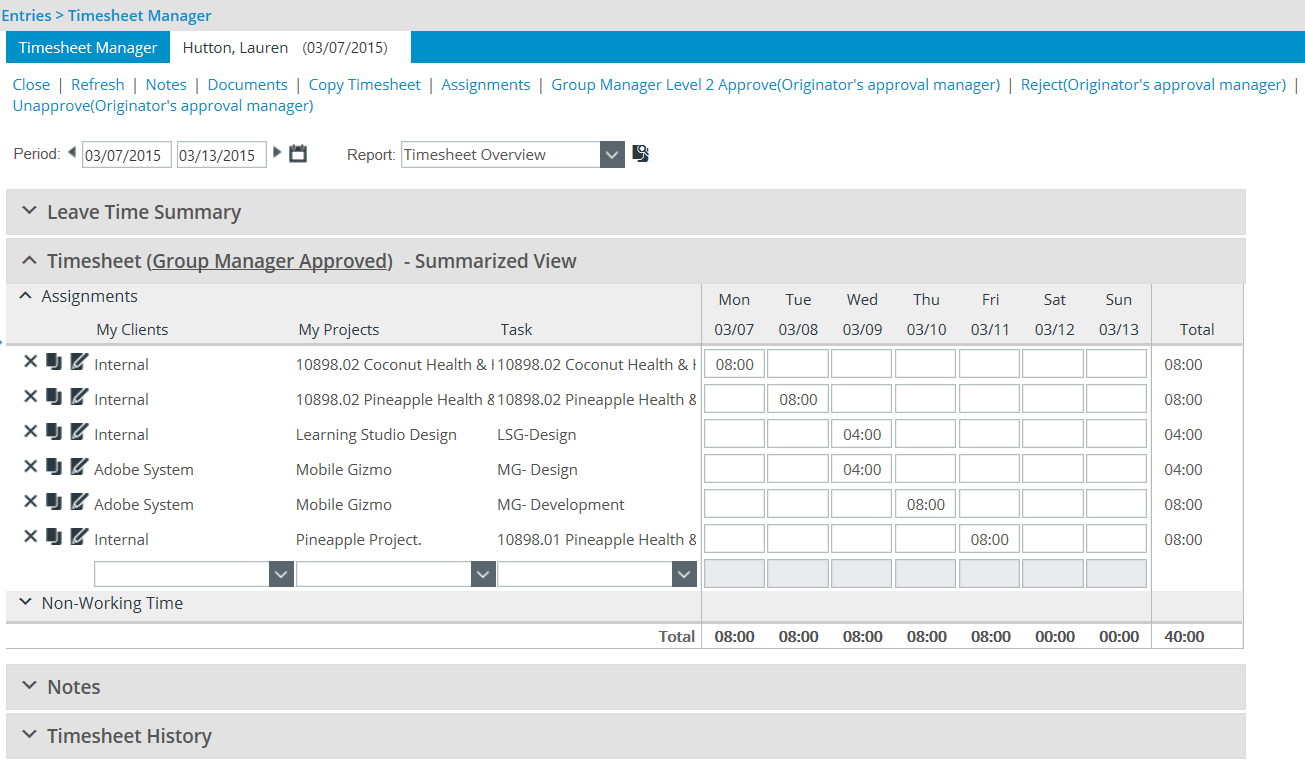
- With the workflow successfully revised, entries can be moved through the process, being transitioned from state to state. A user, who has been designated the workflow role, will be able to view the entry and select the transition.
Note: In this example, as it is a timesheet entry, with the appropriate rights, the entry and transition can be seen and selected from the Timesheet Manager page, in addition to the entry page (as shown below).
