Attaching Notes and Documents
Note: This article was authored in the former format, which includes functionality dating back to version 2013 R1 and earlier. The content will be converted to the current platform article format.
Version Note: Available as of Tenrox 2013 R1 Document and Link Attachment Changes
Replacement of the New link with the Upload File and Attach Link links for some modules.
A user can click Notes or Documents to their timesheets, for example, to attach, add, edit, delete, or examine notes already linked to that timesheet.
To attach a note:
- Click Notes, and on the Notes screen, click the highlighted link text New or the New icon (sheet of paper with down-turned corner).
- Type in the text required for the note.
- Decide what type of note it is from the pull-down menu: Alert, Invoice, Notice, etc.
- Decide whether the note should be public or not, and click the Is Public check box accordingly.
- Click Save to save the note.
To attach a document:
- Click Documents, and on the Documents screen, click the highlighted link text New or the New icon (sheet of paper with down-turned corner).
- Decide what type of document it is from the pull-down menu: File Link, Hyperlink, or Upload.
- If it is a File Link, Browse (...) to the exact path where the document file is located, i.e http://www.domain.com/document.pdf.
- If it is a Hyperlink, provide the URL or web address where the attached Document is to be found.
- If it is an Upload, Browse for the document either locally or on your network, and upload an actual copy of the document.
- Decide whether the note should be public or not, and click the Is Public check box accordingly.
- Click Save to save the note.
Version Note: Available as of Tenrox 2013 R1 Document and Link Attachment Changes
Replacement of the New link with the Upload File and Attach Link links for some modules.
- While a few modules still have Documents/Links attached in the manner described above, the following are the modules wherein the Document and Link attachment changes are implemented:
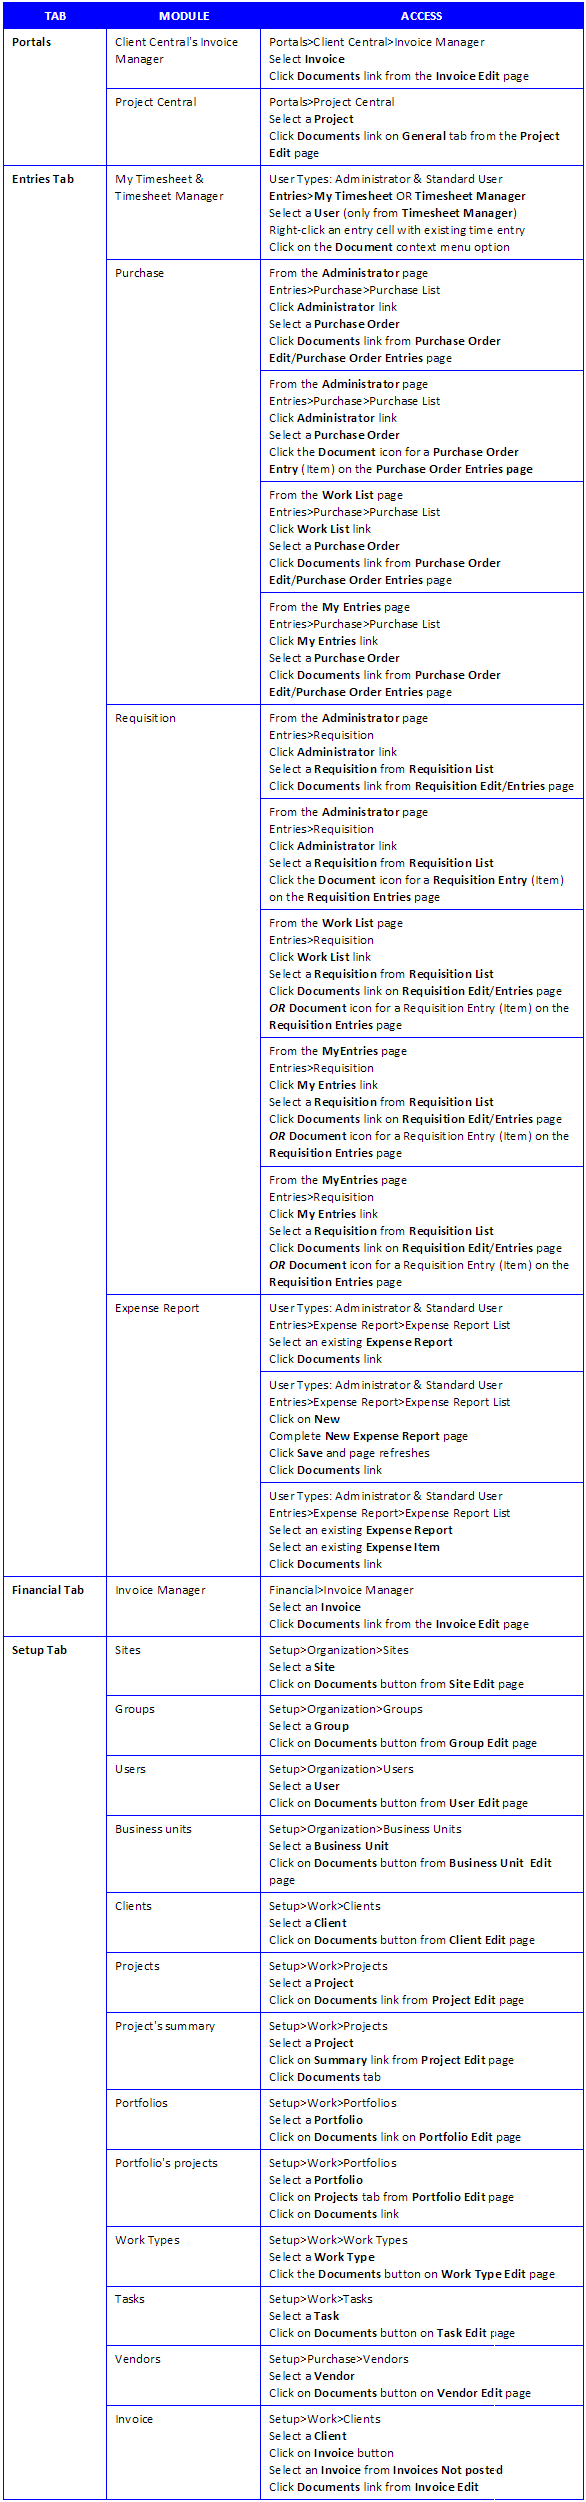
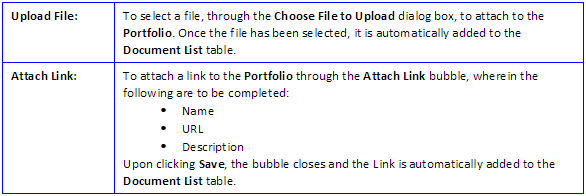
2. Click the Documents link/button/tab, depending on which page it is being accessed from, to open the Document List page and click either of the following links, depending on what action is required:
Note: The Document List page displays the documents that have been uploaded from Tenrox for each object and all document attachments. When SharePoint document management is enabled, the URL to the SharePoint site is also displayed as a link on the Document List page.
3. Upon the File orLink being added to the Document List table, the following can be done:
3a. Either can be viewed by clicking on the respective link within the Name link.
3b. The Description of either one can be edited directly on the table.
3c. The File or Link can be deleted by clicking the respective selection box to the far left then clicking the Delete link.
4. Click the Back link to return to the Portfolio Edit page.
To view, edit or modify notes or documents:
Either search for the Note/Document concerned by filling in Search fields and clicking the magnifying glass, OR locate the note/document in the pre-populated list.
Select and/or Click the Edit icon (sheet of paper with pencil) on the note/document.
Make the changes desired/required and click Save.
To delete a note or document:
Either search for the Note/Document concerned by filling in Search fields and clicking the magnifying glass, OR locate the note/document in the pre-populated list.
Select the check box and/or Click the Delete icon (red letter 'X') on the same list line as the note/document.
A dialog asks you whether you're sure you'd like to delete or not; say Yes.
The note/document is deleted.