The first step in task management is to create tasks. This might sound simple enough, but there are a number of important things to consider that will help set your teams up for more efficient collaboration.
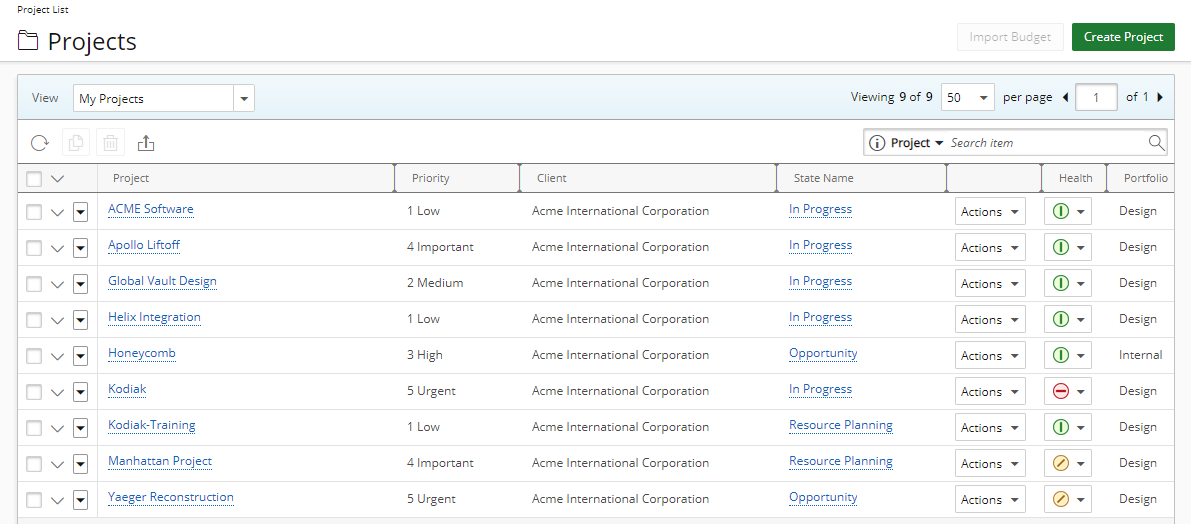
This article details the steps to creating Task(s) though the project Edit page.
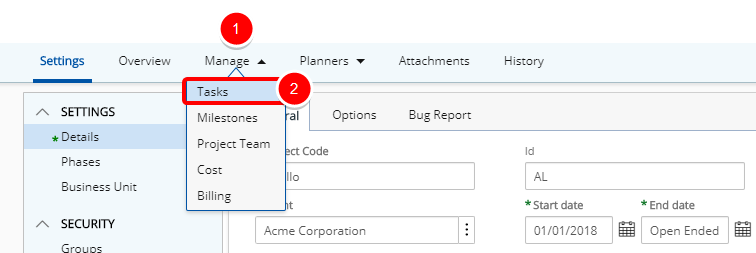
2. Click Tasks
- Hover over the Manage tab to access the available options.
- Click Tasks.
Version Note: Available as of Tenrox 2019 R1 SP3: Tab menus with associated sub menu items now readily expand just upon hovering the mouse pointer over them, thus removing the need to click to expand and action on the sub menu items.
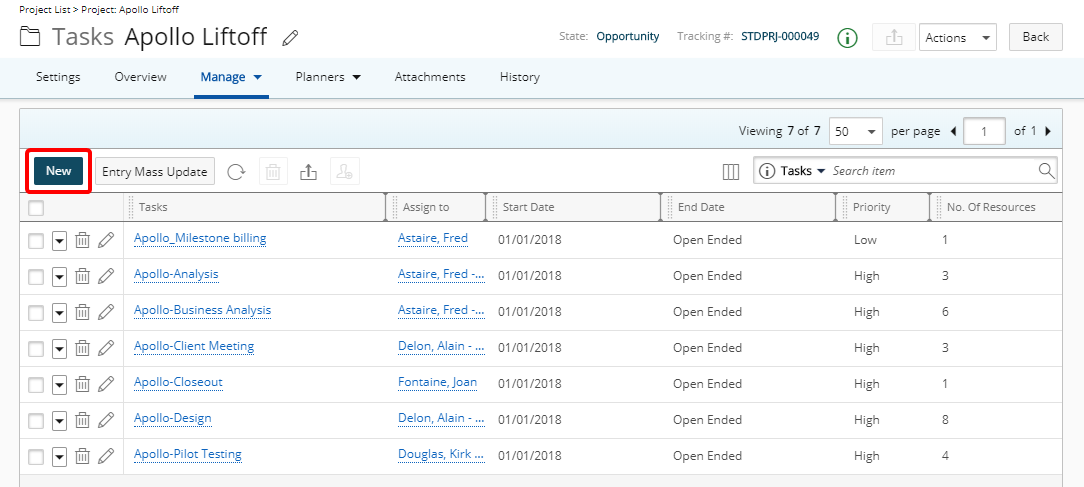
3. Click New
- From the Task list page click New.
Version Note: Available as of Tenrox 2019 R1 SP3: Column Selection option No. Of Resources which displays the number of users assigned to the Task.
4. Search for a work type
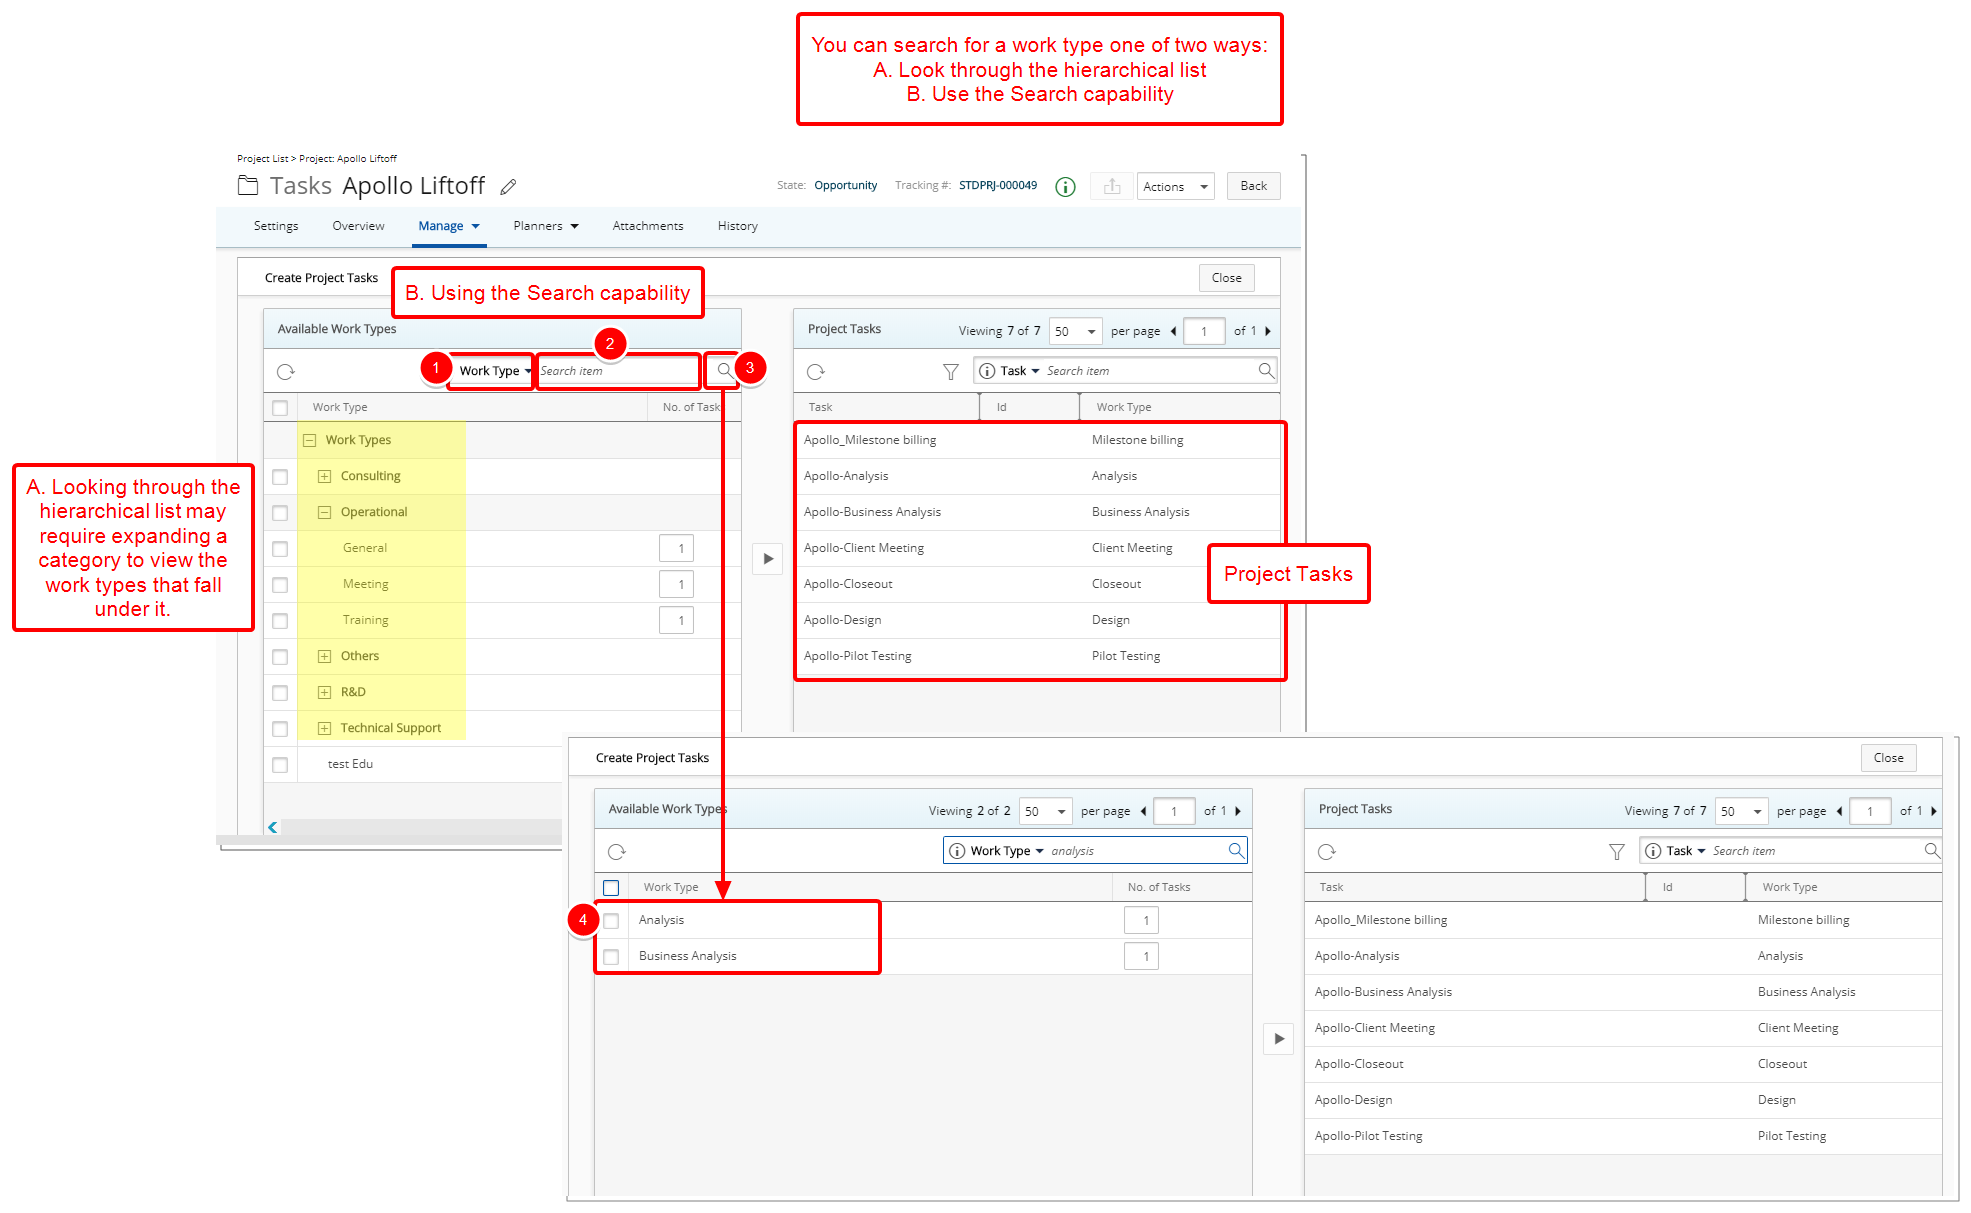
You can search for a work type in one of these two ways:
A. Look through the hierarchical list, which may require expanding a category to view the work types that fall under. OR
B. Use the Search capability:
- Select the Search Criteria.
- Enter the corresponding value in the For box.
- Click the Search button.
- View the search result.
Note:
- Suspended items are not returned in the search.
- Placeholder items are not returned in the search.
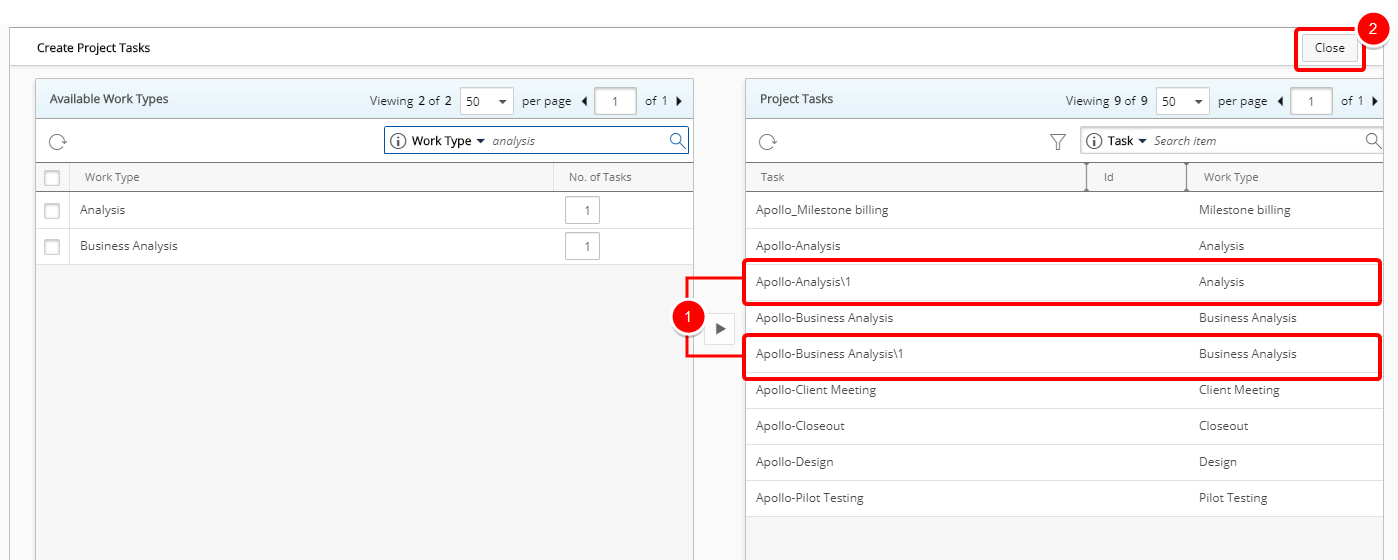
- The Add button to create Project Tasks will remain dimmed until a Work Type is selected from the Available Work Type section.
5. Select the work type(s)
- Select the Work Type(s).Note: Upon selecting the Work Type(s) the Project Tasks list is filtered and displaying the Project Tasks based on your selection. You can easily remove or apply the Filter by clicking on the Filter icon. The Filter icon turns blue, indicating that a Filter is applied.
- Change the No. of Tasks to be created for the given Work Type by entering a number in the box.
- Click the add button to create the Project Tasks
Note: When the work types are assigned to projects, the system automatically creates the new tasks that inherit the attributes set in the Project Attributes section. The new task names are a combination of the Project Code and the Work Type. The tasks are also created by selecting Setup>Work>Tasks; for more information, see Task Setup: Creating a Task.
7. View the message bar
- A message bar will appear informing you that the Task(s) were created successfully.
7. Click Close
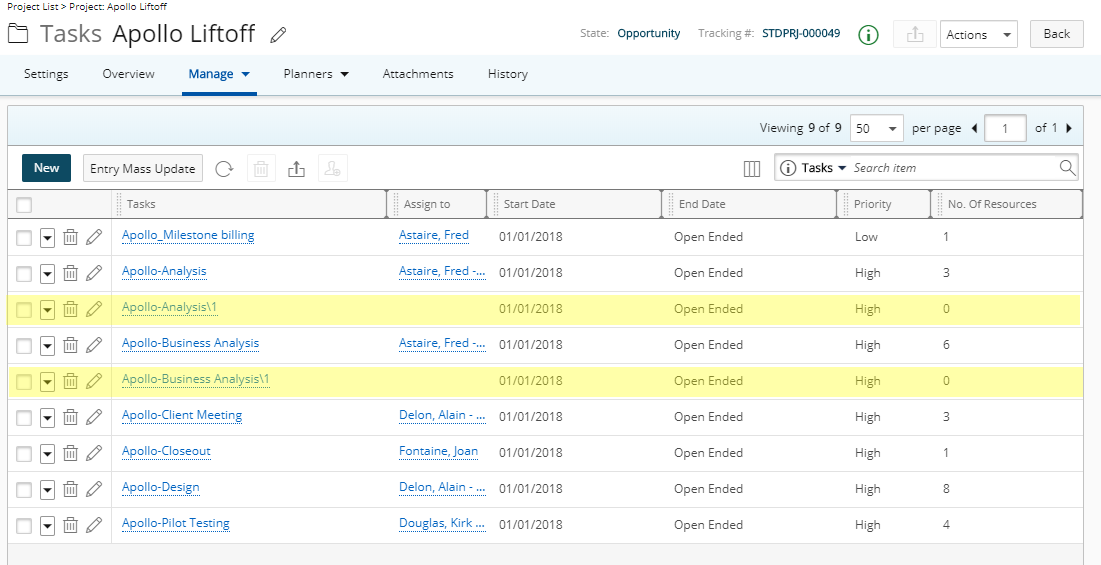
- The newly created Tasks will now be listed on the Project Tasks section.
- Click the Close button to return to the Tasks list page

