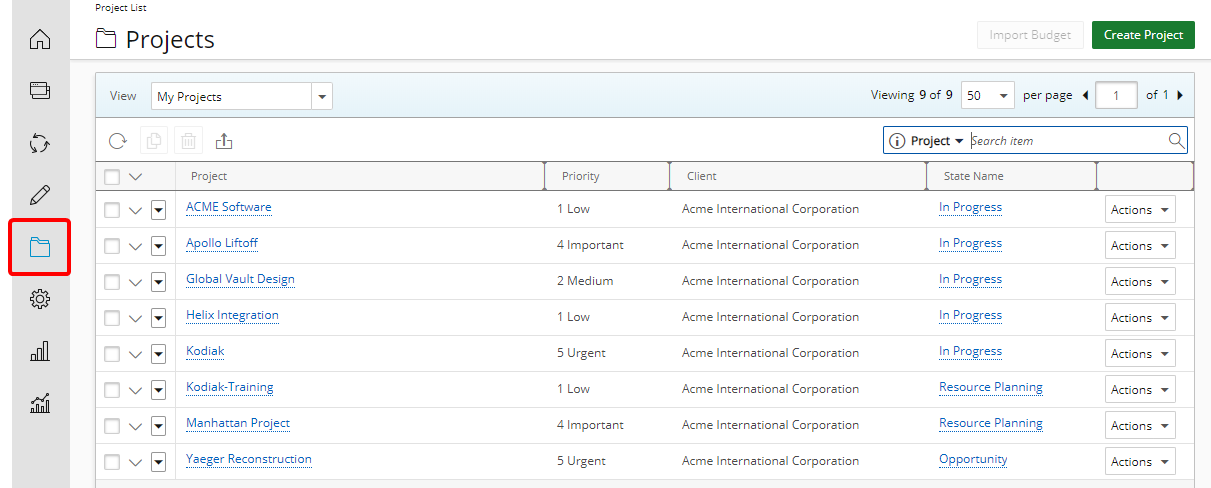
The improvements made to the Filters within the Project List allows for more clarity as to what the selected Field, within the Filter options, pertains to. Moreover, it allows 2 levels of Filter conditions that can be set up.
This article covers how to apply run-time filters and nested filters on the Project List.
Version Note: This feature is available as of Tenrox 2018 R1.
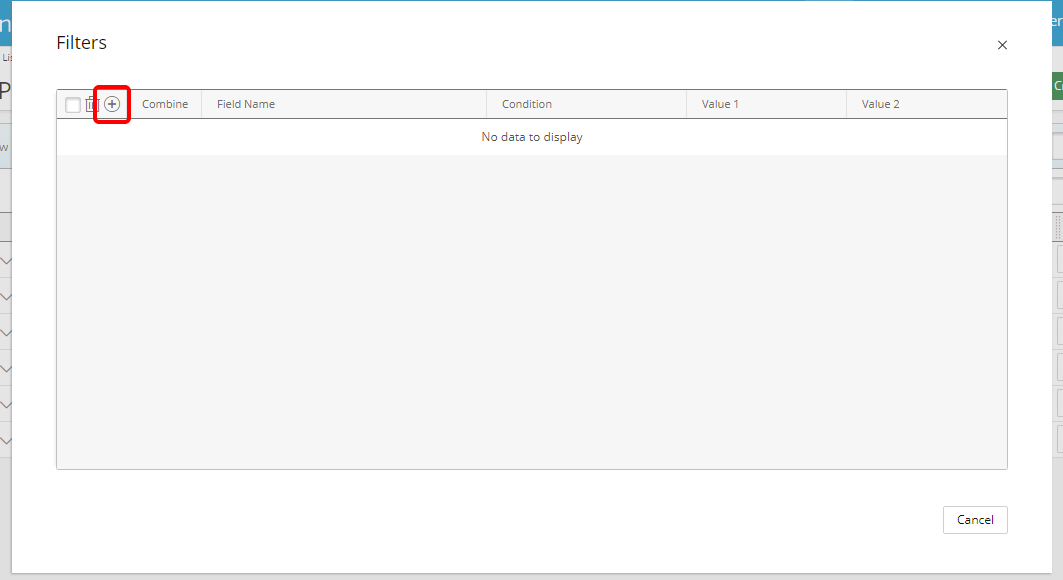
3. Click add
- In the Filters dialog click the Add button to add a new line item for the Filter you wish to create.
For more information on:
- The available Filter Field options click here.
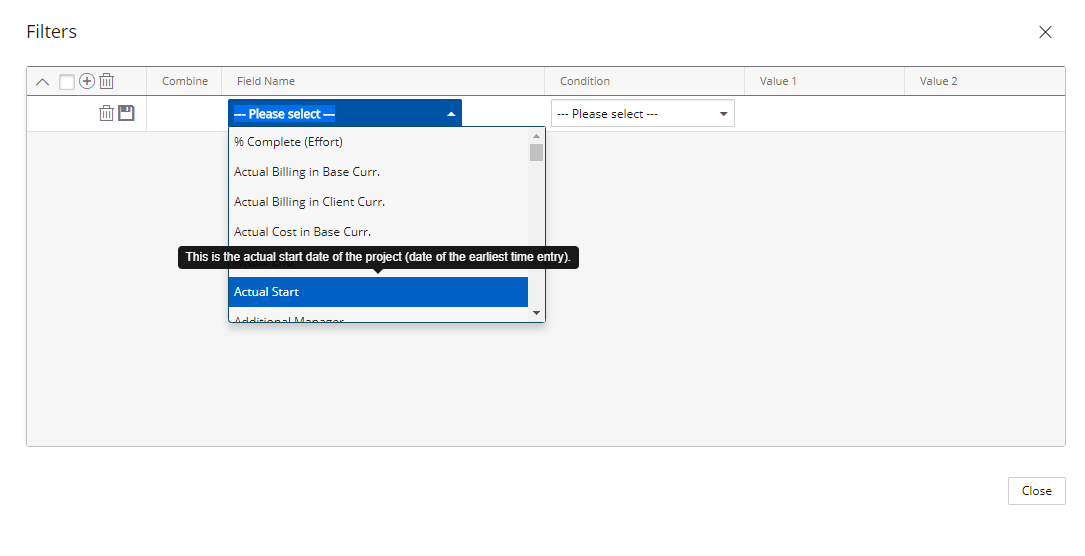
4. Select Filter criteria
- Select the required Filter Criteria from the lists
Version Note: available as of Tenrox 2018 R1 SP5: Upon creating or editing a Filter, a Tooltip will now display when hovering over a Field Name option, providing the user with a definition.
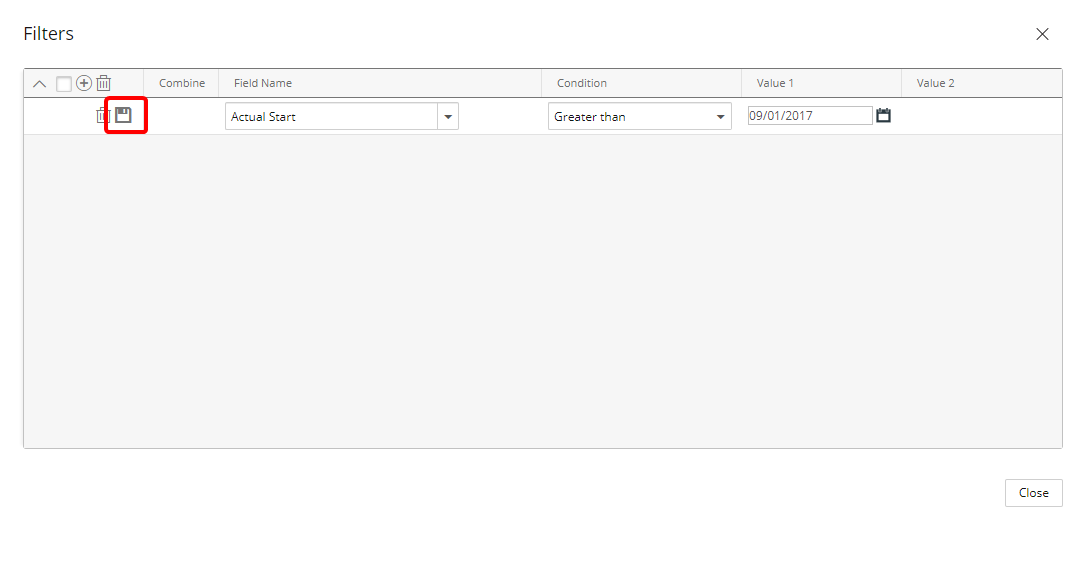
5. Click Save
- Click Save.
Note: If more then one Filter is added each Filter line item needs to be saved, otherwise the changes will be lost upon exit.
Tip: Additionally you can add a nested Filter which will allow for more complex filtering conditions. To learn more about nested Filters proceed to step 6 below.
6. Add a nested Filter (optional)
You can opt to add nested Filters which allow for more complex filtering conditions.
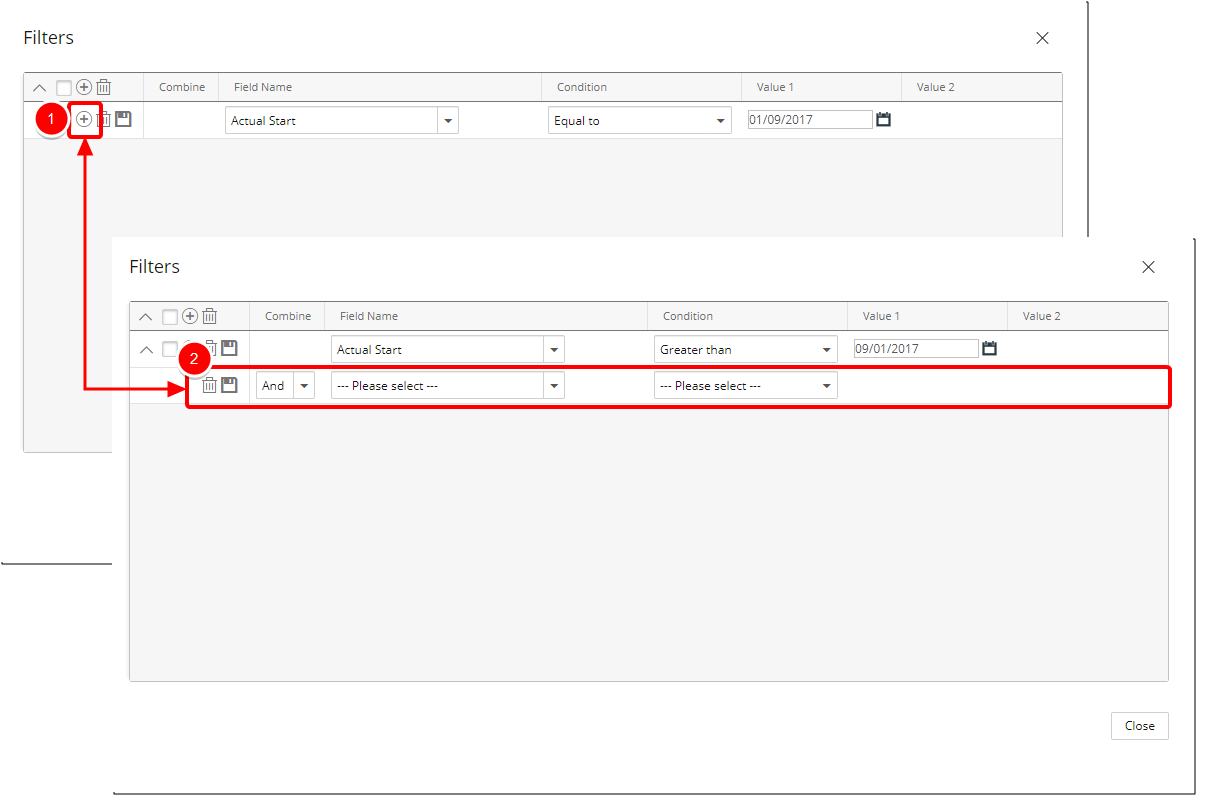
- Click the New button located on the left of your existing Filter.
- A new nested Filter will be added on a new line below your existing Filter.
Version Note: available as of Tenrox 2018 R1 SP5: Addition of a nested Filters functionality.
6.1. Choose the Nested Filter criteria
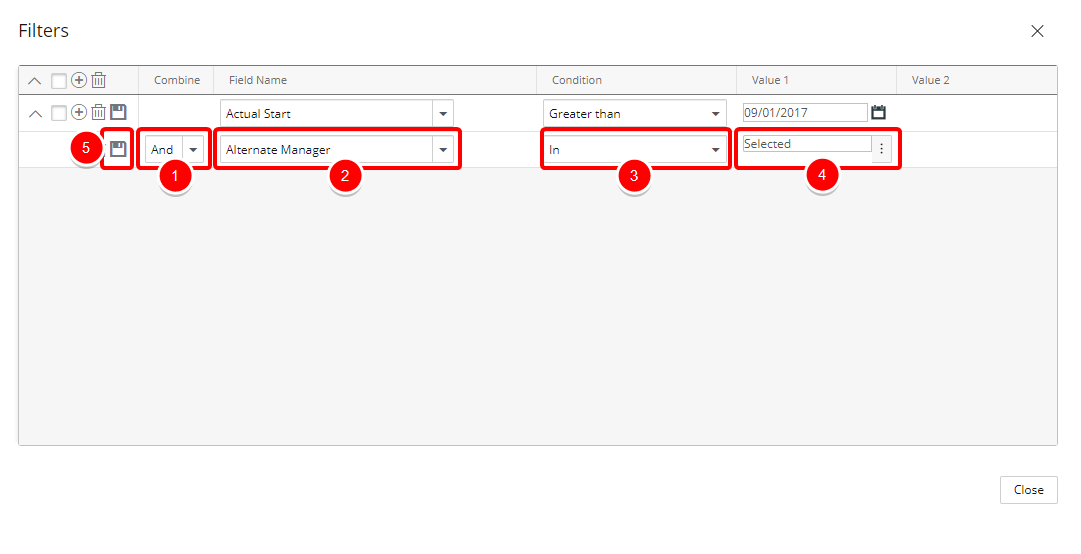
- Make a selection from the available Combine options: And, Or
- Select the desired field you want to use in the Field Name.
- Select the desired Condition from the available Condition options.
- If applicable select the desired Value from the available Value 1 and Value 2options.
- Click Save.
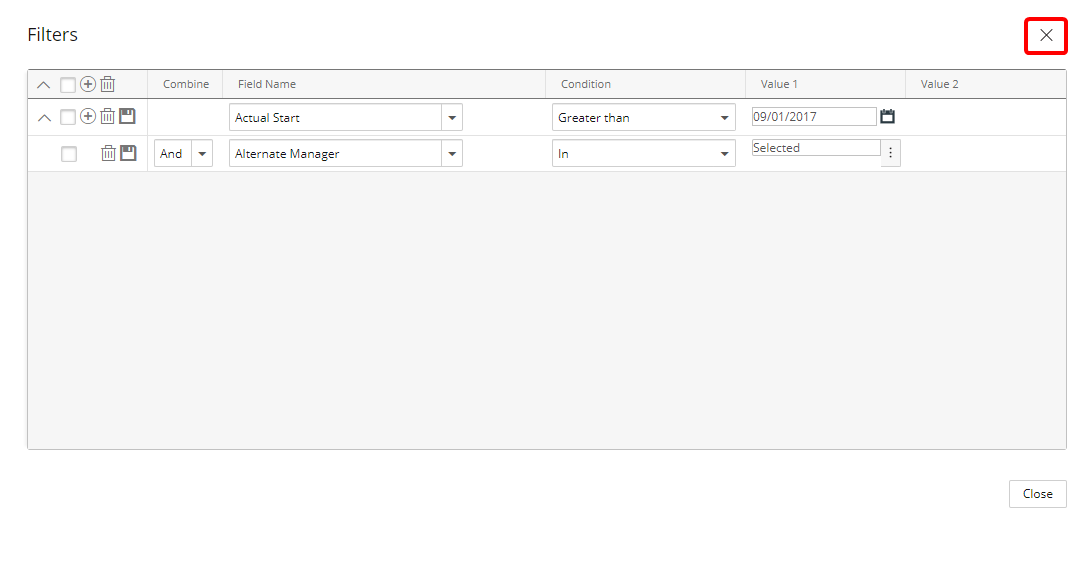
Tip: Repeat steps 6 to add more nested Filters as required.
