Within File Manager, you can upload a report.
Note: Each user's profile is uniquely configured and permissioned by the Account Administrator. Your view may differ slightly. Contact your Account Administrator for further assistance.
1. Access File Manager
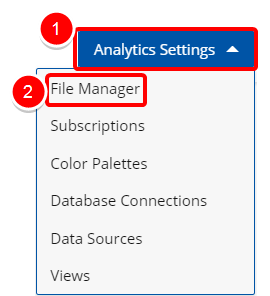
Access the File Manager:
- Click the Analytics Settings button from the Main Menu Bar.
- Then select File Manager from the menu.
2. Navigate to the folder
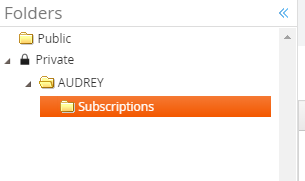
- Navigate to the folder where you wish to Upload a File by clicking the folder name in the Directory Listing section.
Note: Selected folder background changes to orange.
Tip:
If you want to jump to a folder that is buried in several other folders, use the Directory Listing. You can click the black triangle next to any folder name to see any folders within that directory, and navigate to the desired folder. Clicking on a folder will display its contents in the File Listing section.
3. Upload File
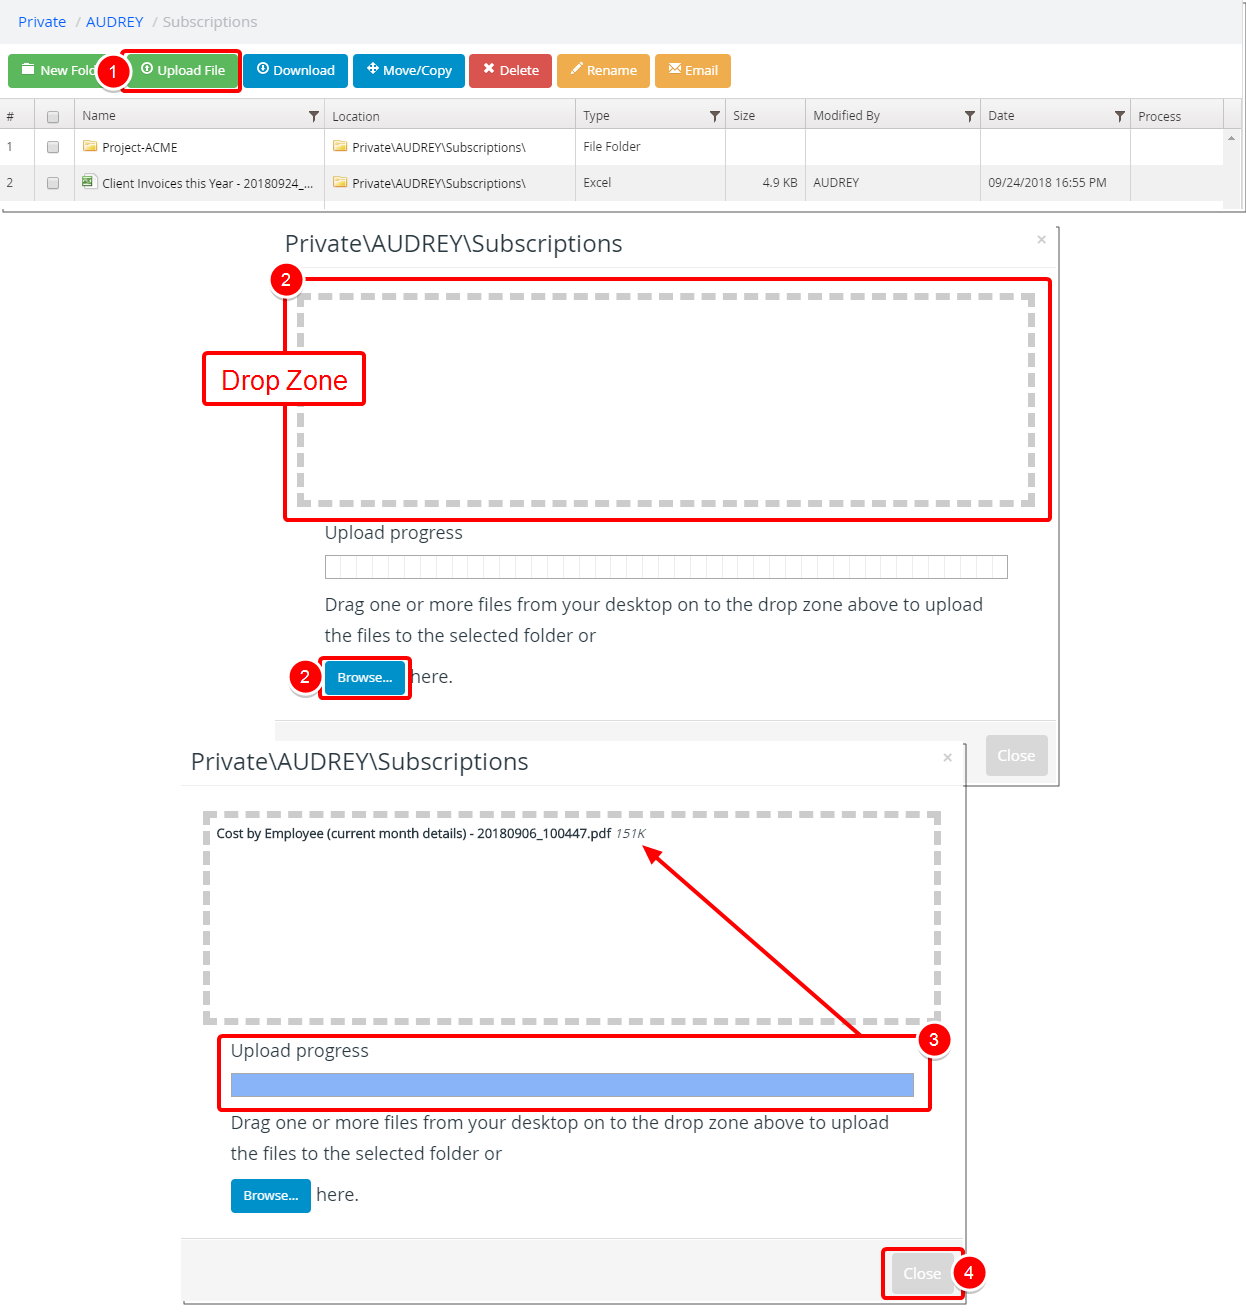
- Click the Upload File button located in the Toolbar.
- Add files:
- You can simply drag-and-drop files directly from your computer into to the drop zone to upload the files to the selected folder
- Or click the Browse button to search for the desired files.
- Select the file(s) you would like to upload.
- Click Open.
Note: Repeat Steps i & ii to upload additional files.
- You will see a box that shows the progress of your file upload.
- You will see an information box informing you that the File Upload is complete. Click Close when the Upload is complete
Warning:
Files uploaded to the Private folder will only be visible to you whereas files uploaded to the Public folder will be visible to everyone with the access rights to the module.
4. View Uploaded File

Menu