Create a Data Source
1. Access Upland Analytics Sources
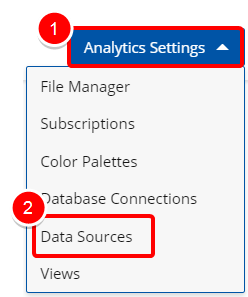
- Click the Analytic Settings button on the Main Menu Bar.
- Then select Data Sources from the menu.
2. Click New
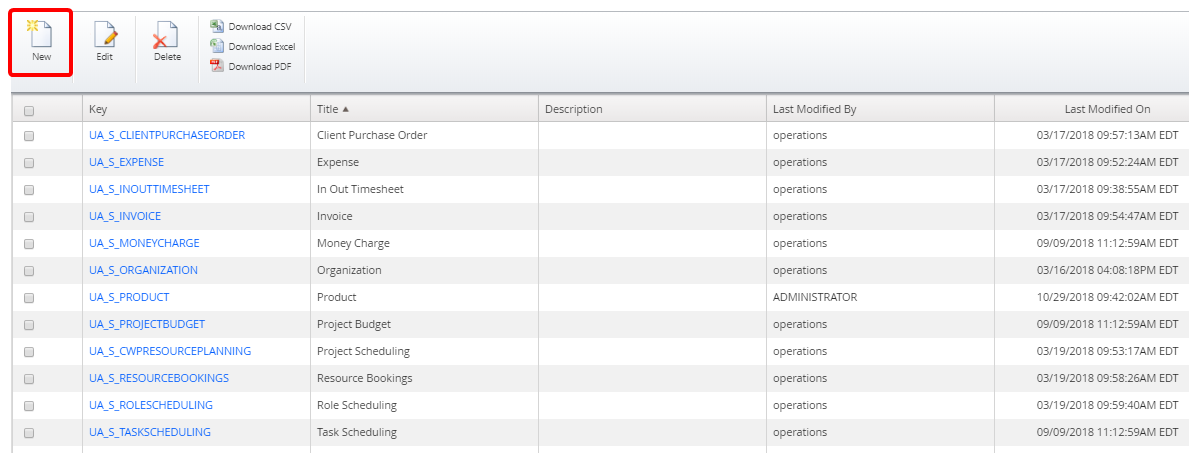
- Click New, upon accessing the Upland Analytics Sourceslist page.
3. Create New Data Source
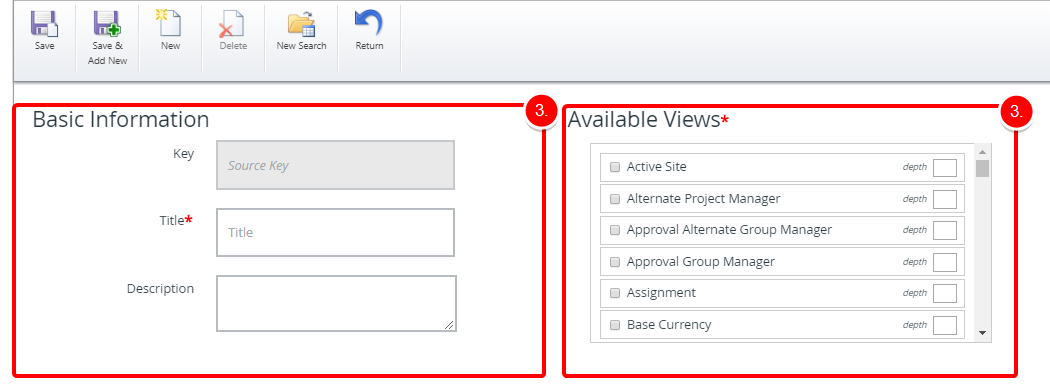
When Creating a new View there are two mandatory fields: Title and the Available Views.
Enter the following information:
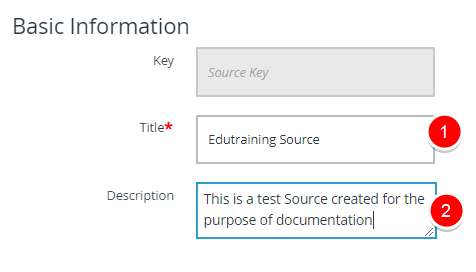
- Title: This is the name of the View, which is a required entry.
- Description: This field allows entering a description for the View.
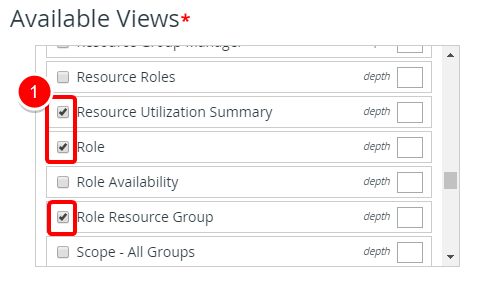
- Select one or more Views from the available list.
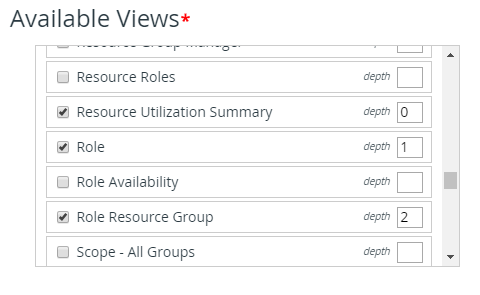
- Define the depth for each of the selected Views as follows:
- A depth of 0 is for the starting node. There can be only one node with a depth=0.
- Any other node that branches out of a node with a depth=0 will be depth=1.
- Any other node that branches out of a node with a depth=1 will be depth=2.
- Any other node that branches out of a node with a depth=2 will be depth=3 etc.
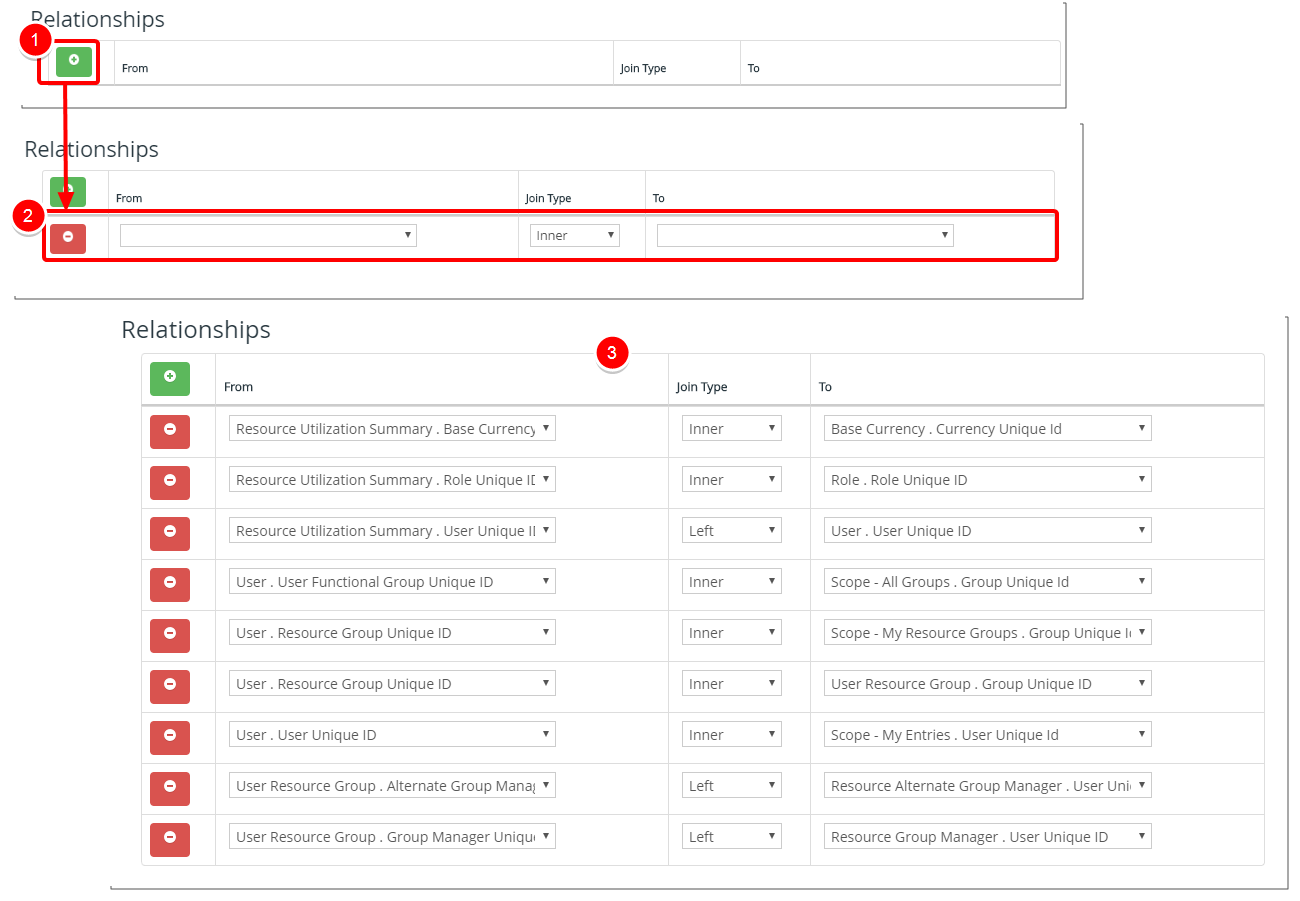
- Click add + button to add a new line item where you can define a new Relationship.
- Create the Relationships:
- Select the necessary option from the list of available From options.
- Select a Join Type from the list.
- Select the necessary option from the list of available To options.
- Repeat steps 1-2 to create more than one Relationship.
4. Click Save
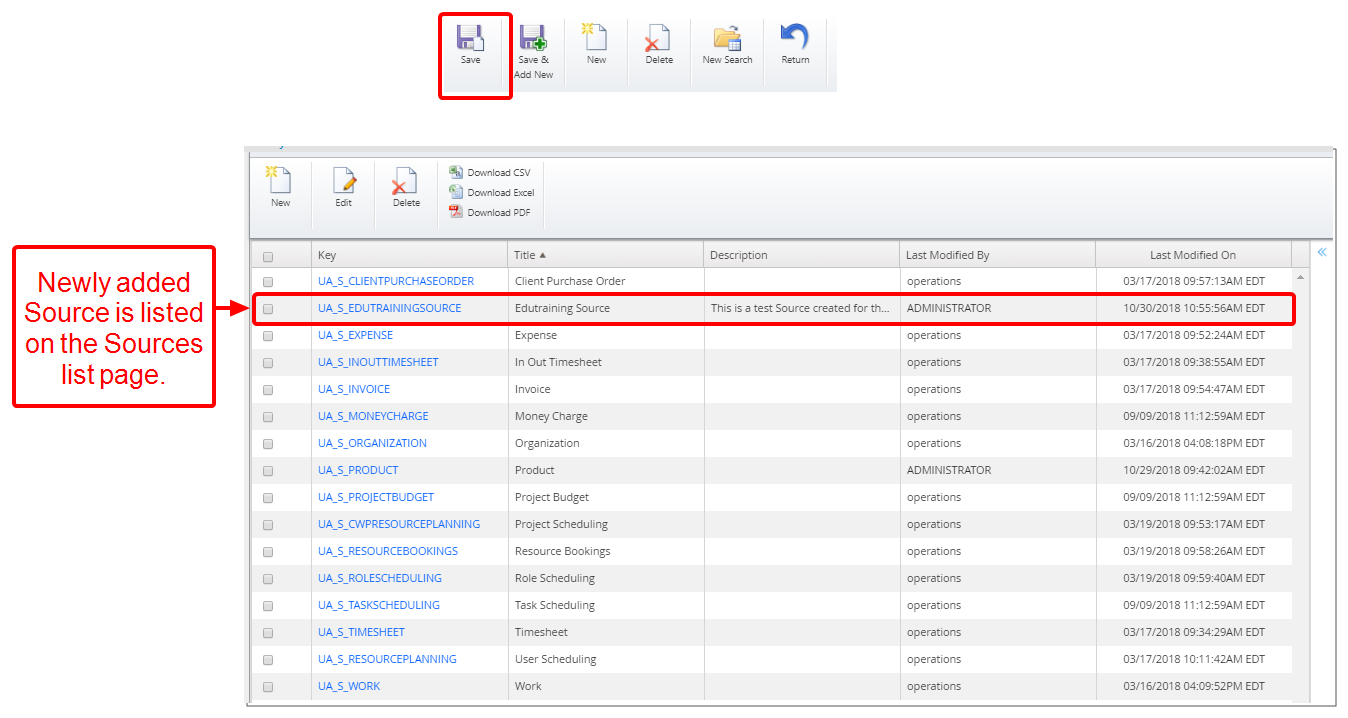
- Click Save to apply your changes.
5. Use Newly Created Source
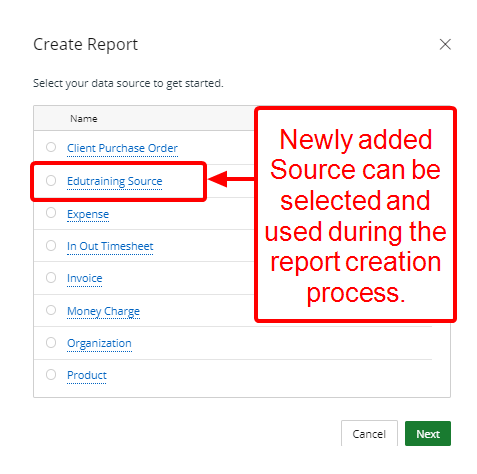
- When creating a new report you can now select your newly added Data Source.
Menu