Create or Edit a Date Function
Upland Analytics allows you to define your own powerful custom fields to meet your specific reporting requirements.
Date Functions can be used to calculate the difference between two dates or to add / subtract a number of days to or from a date.
A number of options are available to you when choosing the Date Function Type. This topic details each of the available Condition with examples.
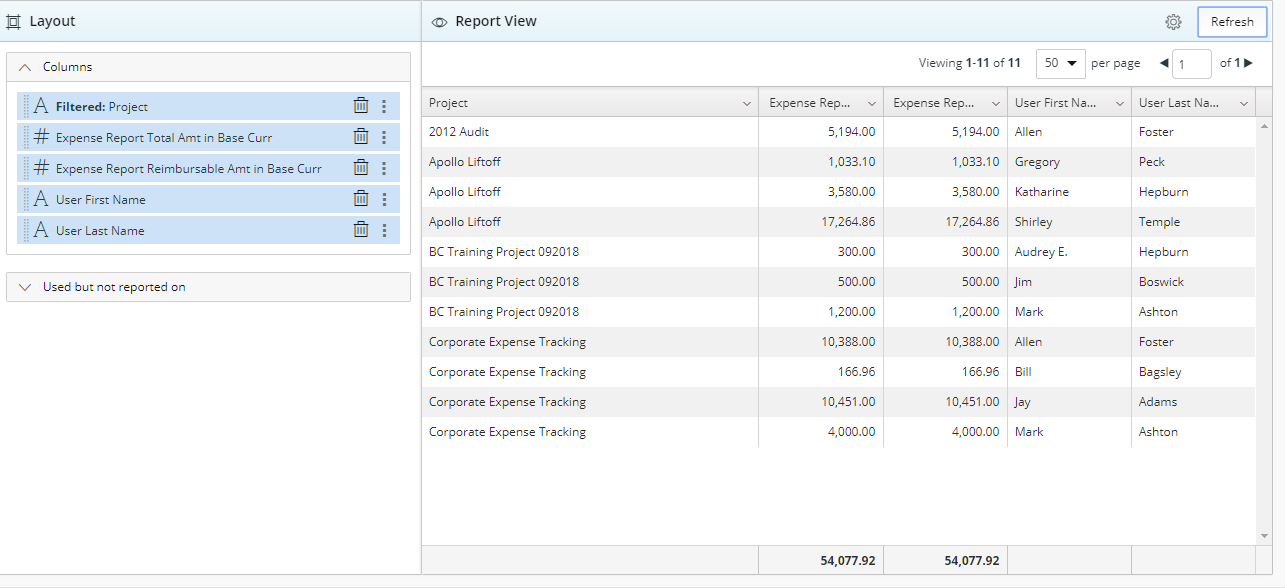
- For the purpose of this topic a sample report is being used to demonstrate each addiction of the Date Function Custom fields.
1. Date Difference
The Date Difference calculates the duration between two dates. It is commonly used to view the duration of a contract.
1.1.1. Creating a Date Difference Date Function
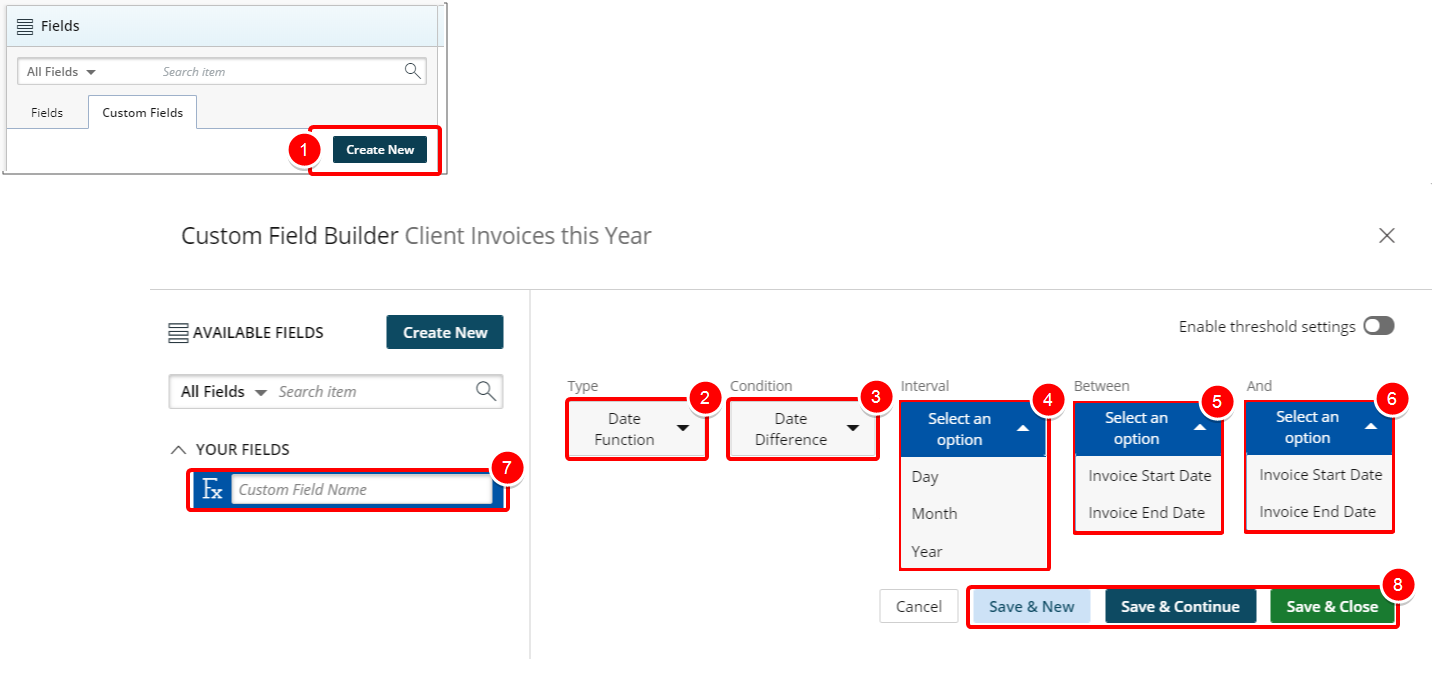
- Click Create New from the Custom Fields tab.
- In the Custom Field Builder dialog box click Type and select Date Function.
- Click Condition and select Date Difference from the available options.
- Click Interval and select from the following options: Day, Month,or Year.
- Click Between and select from the following options: Invoice Start Date or Invoice End Date.
- Click And and select from the following options: Invoice Start Date or Invoice End Date.
- Type the name of the Custom Field in the Custom Field Name box.
- Click one of the following:
- Cancel to return the previous page.
- Save & New to save the Custom Field and create a new one.
- Save & Continue to save the Custom Field and continue working on it. This is useful when working on a large formula or function.
- Save & Close to save the Custom Field and then close the Custom Field Builder. You will be redirected to the Report Editor screen where the newly created Custom Field(s) can be used in a report.
1.1.2. View Your Changes
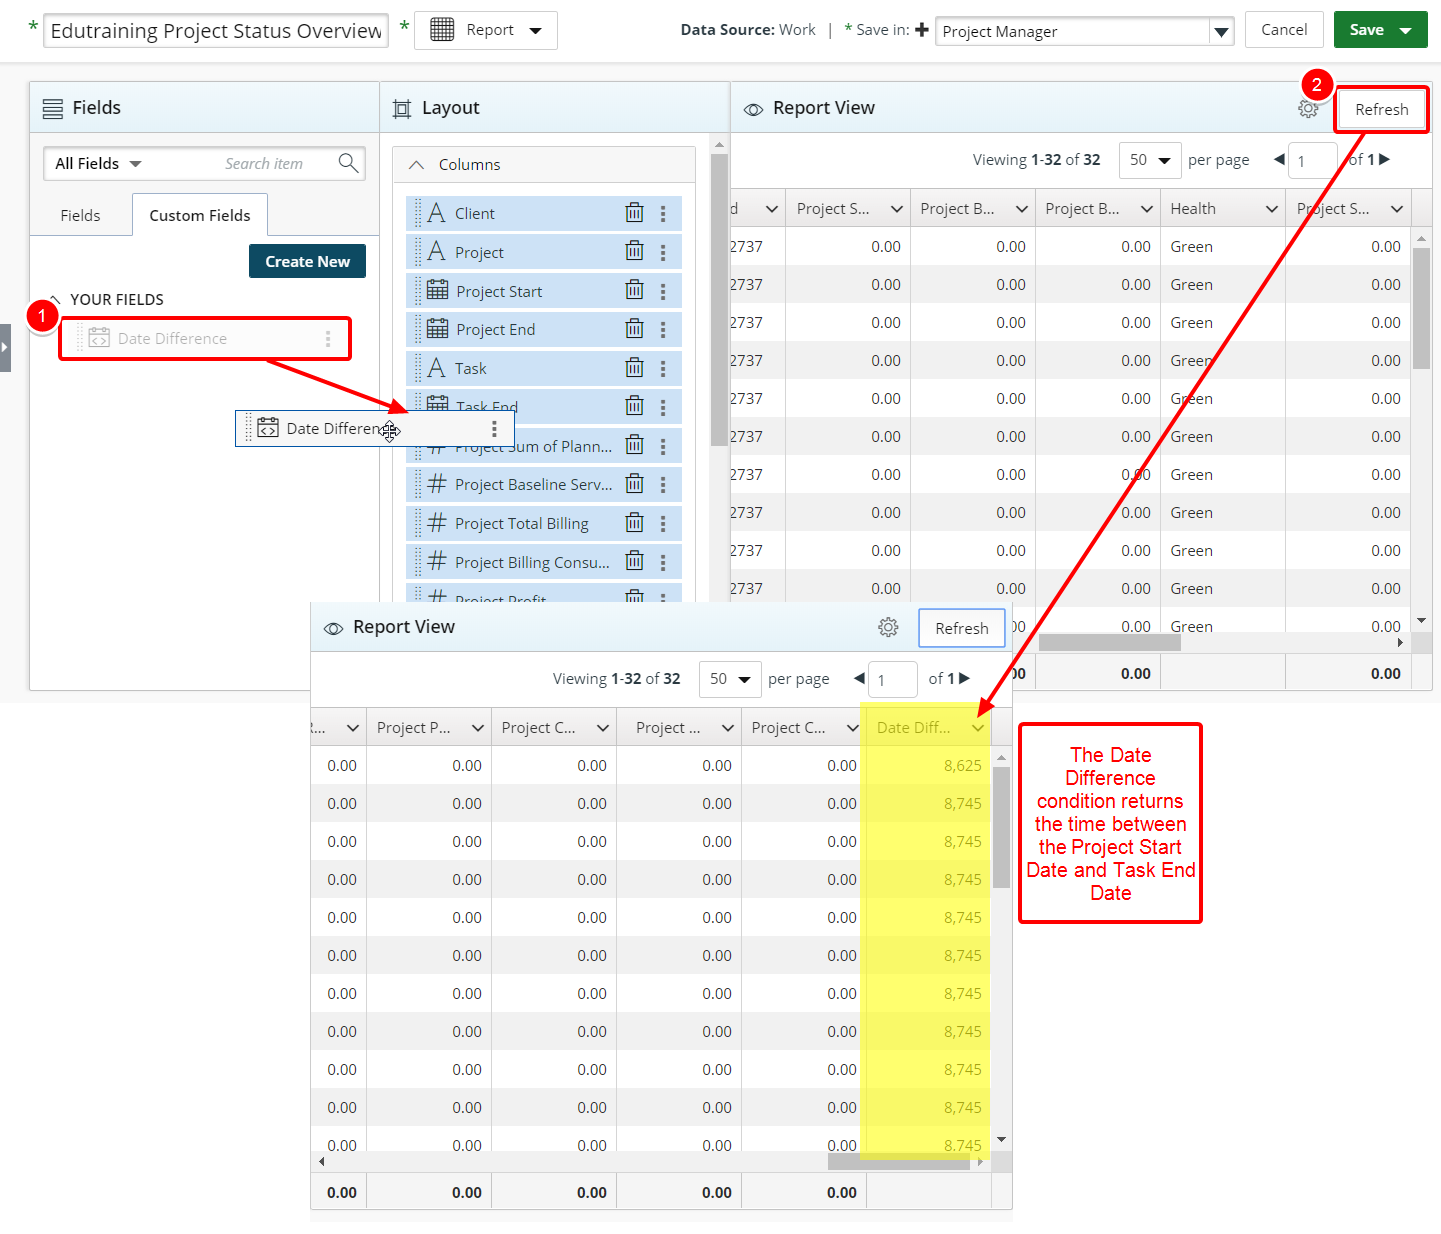
- From the Custom Fields tab drop the newly created Custom Field into the Layout section.
- Click Refresh to view your changes.
- View newly added Date Difference column in your report.
- Click Save.
2. Date Add / Sub
The Date Add / Sub function is used to add or extract a certain number of days, weeks, months, or years to an existing date field. This function is commonly used to add a grace period to a contract's end date. For example, to allow for the team to renew a contract, use this function to add three days to the end date.
2.1.1. Creating a Date Add / Sub Date Function
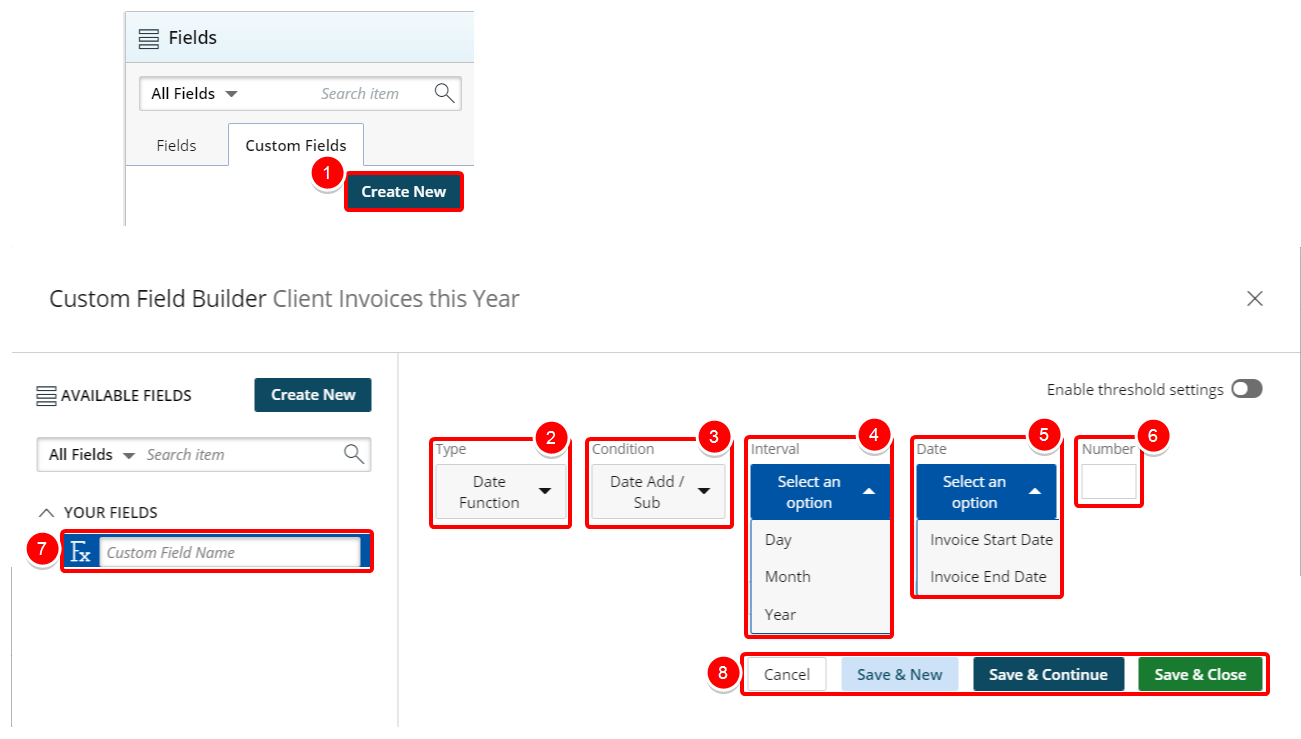
- Click Create New from the Custom Fields tab.
- In the Custom Field Builder dialog box click Type and select Date Function.
- Click Condition and select Date Add / Sub from the available options.
- Click Interval and select from the following options: Day, Month,or Year.
- Click Date and select from the following options: Invoice Start Date or Invoice End Date.
- In the Number box, type the number to add or extract from the selected start/end date.
- Type the name of the Custom Field in the Custom Field Name box.
- Click one of the following:
- Cancel to return the previous page.
- Save & New to save the Custom Field and create a new one.
- Save & Continue to save the Custom Field and continue working on it. This is useful when working on a large formula or function.
- Save & Close to save the Custom Field and then close the Custom Field Builder. You will be redirected to the Report Editor screen where the newly created Custom Field(s) can be used in a report.
2.1.2. View Your Changes
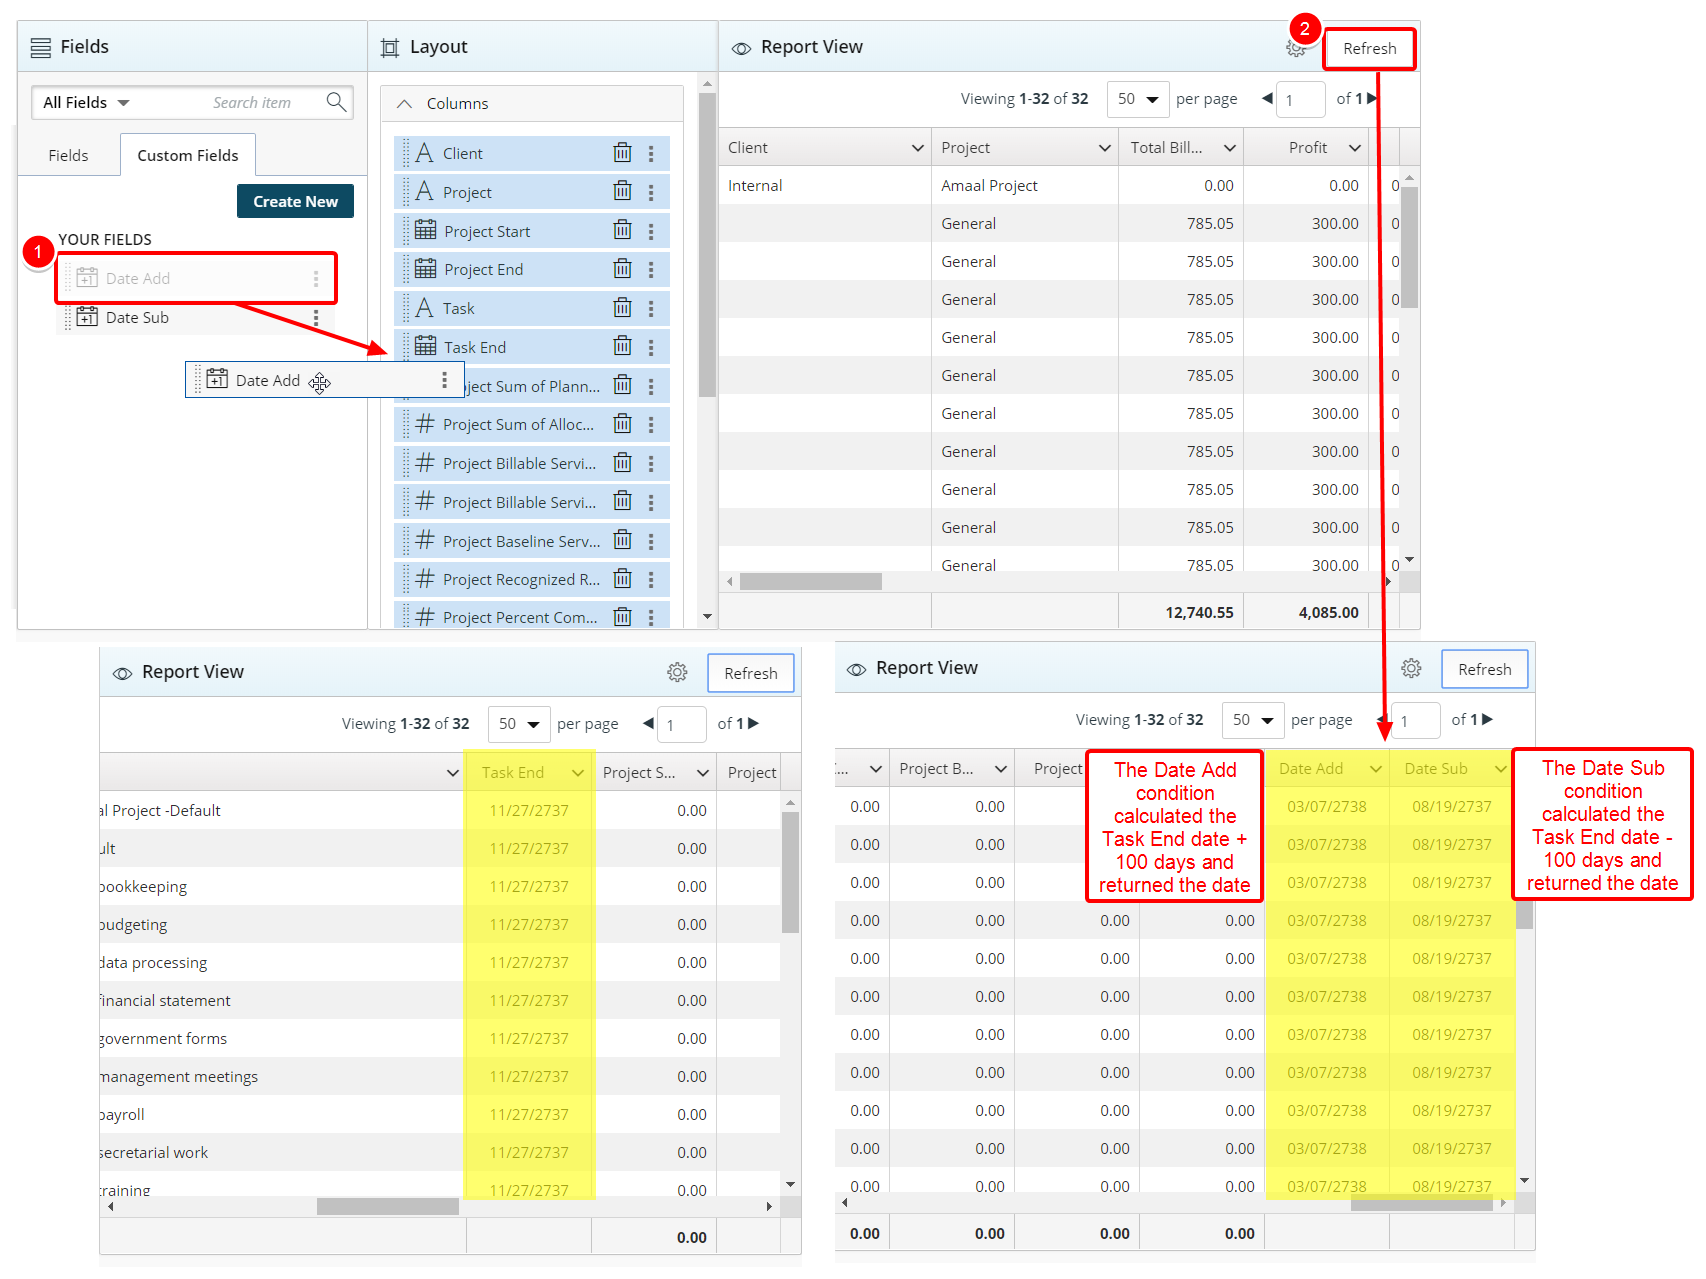
- From the Custom Fields tab drop the newly created Custom Field into the Layout section.
- Click Refresh to view your changes.
- View newly added Date Add / Sub column in your report.
- Click Save.
Menu