The following examples show you how QuickFlows can be applied to different business case scenarios. These examples are for illustrative purposes only and may not reflect your company’s unique configurations. There are several QuickFlow templates that you can use to address your company’s document capture, process, and delivery requirements.
Note: The Scan, Deliver to, and Job Properties steps of the QuickFlows wizard are the only steps that will be highlighted in these examples. See Creating a QuickFlow for more information about the Requirements, Naming, and Notifications steps in the wizard.
Scan to Email Example
The Administrator at Company A creates a Scan to Email QuickFlow so that employees can scan and send documents to a Human Resources email address.
Scan Properties
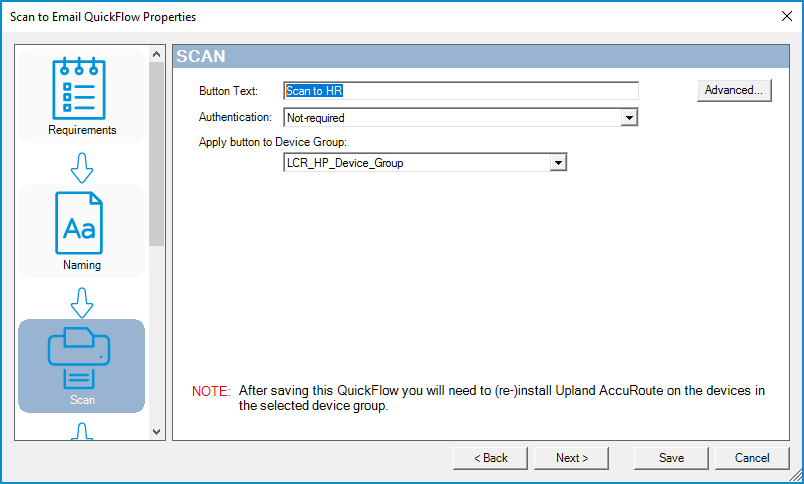
The Administrator specifies the following Scan Properties using the Scan step in the wizard.
-
The button text (label) that appears on the device is set to Scan to HR.
-
Authentication is not required. Employees do not have to type a password or use a security card to scan documents to the HR email address.
-
The Scan to HR Email button and details are applied to the selected device group.
See the Scan Properties below.
Deliver to Properties
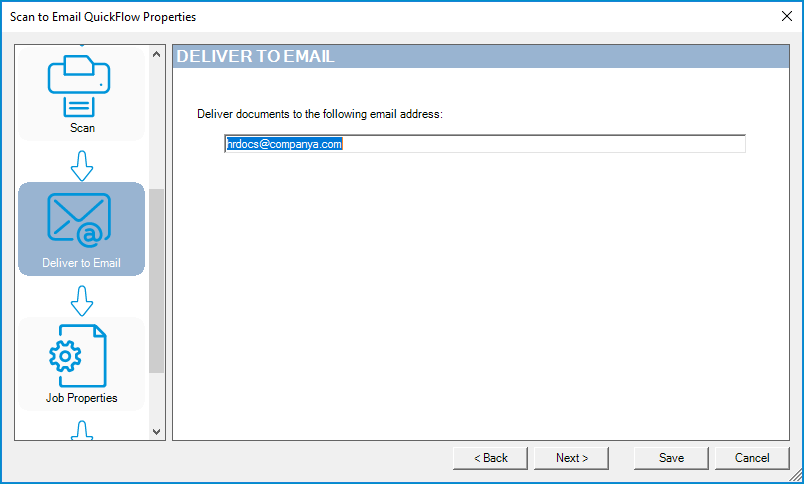
The Administrator specifies the following Deliver to Properties using the Deliver to step in the wizard.
-
The HR email address is set to hrdocs@companya.com.
Scanned documents are automatically sent to the HR email address when employees select the Scan to HR button on the device.
See the Deliver to Properties below.
Job Properties
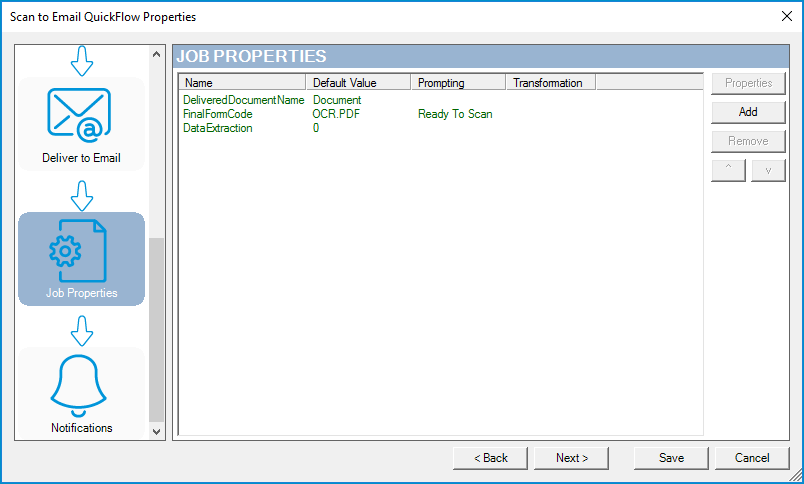
The Administrator uses the following default Job Properties in the Job Properties step in the wizard.
-
The DeliveredDocumentName property is set to Document. When the document is delivered to the HR email address, the email subject line and attachment shows Document as its name.
-
The FinalFormCode is set to OCR.PDF with a Ready to Scan prompt. When the document is delivered to the HR email address, it is delivered as a Text Searchable PDF.
-
The DataExtraction property is set to a zero value. It is not applicable in this example since barcodes are not a requirement for this workflow.
Scan to a Network Share Folder Example
The Administrator at Company B creates a Scan to Network Share Folder QuickFlow so that specific employees like HR Generalists can scan and send onboarding documents to a Human Resources network share folder.
Scan Properties
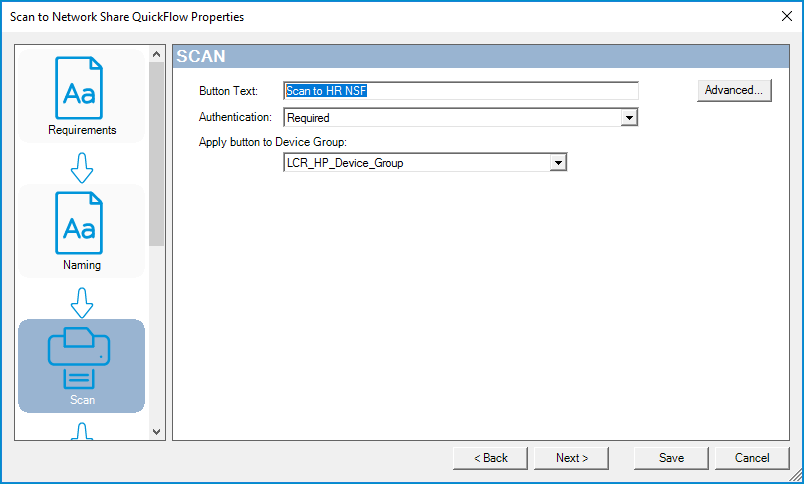
The Administrator specifies the following Scan Properties using the Scan step in the wizard.
-
The button text (label) that appears on the device is set to Scan to HR NSF (Network Share Folder).
-
Authentication is required. HR Generalists must use a security card to scan documents to the HR network share folder.
-
The Scan to HR NSF button and details are applied to the selected device group.
See the Scan Properties below.
Deliver to Properties
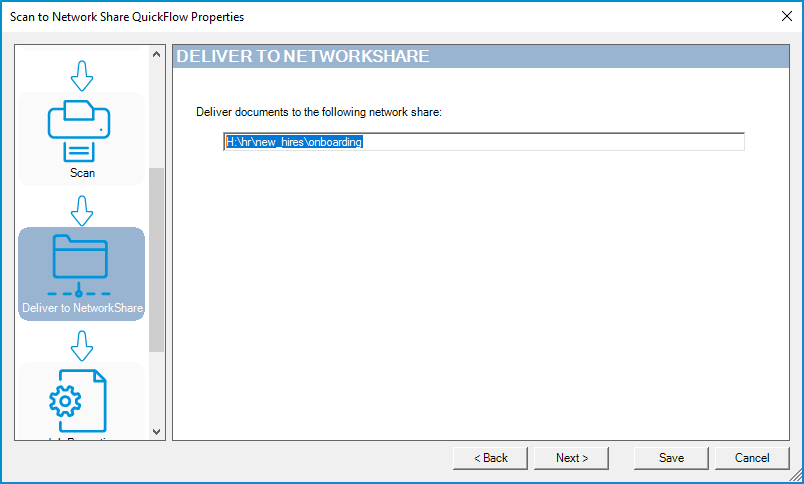
The Administrator specifies the following Deliver to Properties using the Deliver to step in the wizard.
-
The HR network share folder path is set to H:\hr\new_hires\onboarding.
Scanned documents are automatically sent to the onboarding network share folder when HR Generalists select the Scan to HR NSF button on the device.
Job Properties
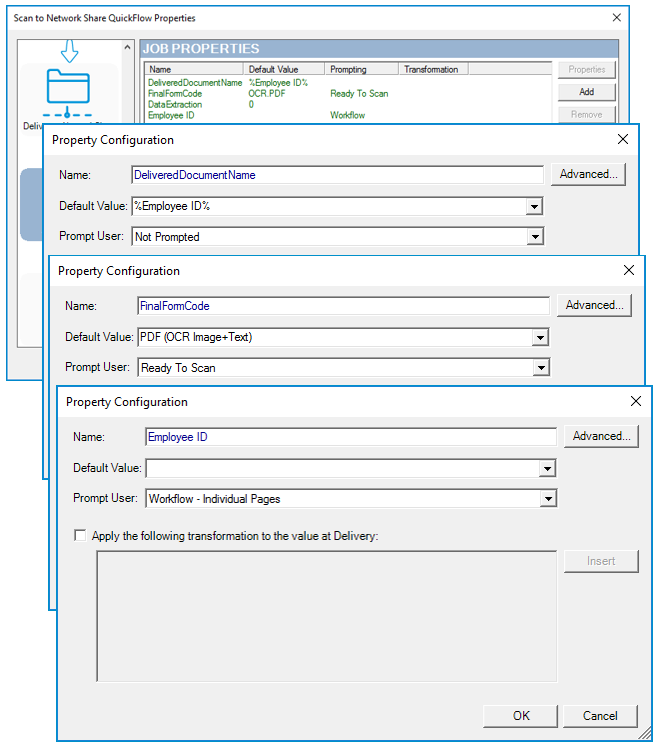
The Administrator adds and edits the following Job Properties using the Job Properties step in the wizard.
-
The Administrator adds a new Employee ID property.
-
The DeliveredDocumentName property is set to %Employee ID%. When the onboarding document is delivered to the HR network share folder, the Employee ID is used as the document name.
-
The FinalFormCode is set to OCR.PDF with a Ready to Scan prompt. The onboarding document is delivered to the HR network share folder as a Text Searchable PDF.
-
The DataExtraction property is set to a zero value. It is not applicable in this example since barcodes are not a requirement for this workflow.
-
The Employee ID is set to Workflow – Individual Pages. In this workflow, HR Generalists are prompted to type the Employee ID before each individual page is scanned to identify the employee’s onboarding documents.
See the Job Properties below.