About AccuRoute CloudFax Connector
Connectors are used to manage how messages flow in and out of the Upland AccuRoute Server. With the CloudFax connector, traditional fax boards, Dialogic Brooktrout SR140, and Telco lines are not required for this type of configuration. The server communicates with the AccuRoute CloudFax service to address your fax workflows requirements in the cloud.
AccuRoute CloudFax provides organizations with a high-capacity, secure online fax solution with strong encryption and SSL access, and supports the most stringent compliance regulations worldwide to ensure data security and privacy.
Adding the CloudFax connector
You can add the CloudFax connector by using Server Administrator > Connectors.
To add the CloudFax connector
-
In the Server Administrator, right-click Connectors. The Connectors shortcut menu appears.
-
Select New AccuRoute connector.
-
Select CloudFax. The Create New CloudFax Connector wizard appears.
-
Use the default server address or select Remote Server and specify the new address, if necessary.
-
Select Next.
-
Use the default connector name or type a new one in the Name box, if necessary.
-
Select Next.
-
Type your Fax service account credentials in the Username and Password boxes.
-
Select Next.
-
Select Finish. The CloudFax connector appears in the Details pane.
You can edit the connector's properties by using the CloudFax on the Server Properties dialog box.
-
In the Server Administrator, select Connectors. All connectors appear in the Details pane.
-
Select the CloudFax on the Server connector. The CloudFax on the Server Properties dialog box appears.
See the CloudFax on the Server Properties dialog box example below.

-
Use the General tab to edit the connector name, enable/disable the connector, and manage the connector profile.
-
Use the Connection tab to edit the username, password credentials, and more.
-
Use the Send tab to edit CSID, top line header variables, retry attempts and more.
-
Use the Servers tab to add more servers if necessary.
-
Use the Journal tab to track faxing history.
-
Select OK.
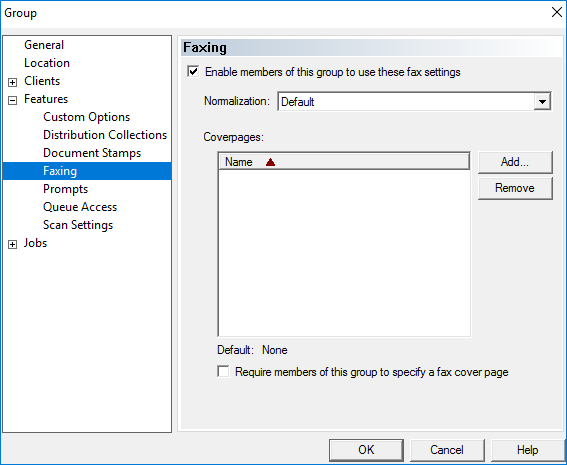
You can enable all or specific group members to use the fax service by using Configuration > Groups.
-
In the Server Administrator, expand Configuration.
-
Select Groups.
-
Right-click the appropriate group, for example, Default. The Group Properties dialog box appears.
See the Group Properties dialog box example below.
-
Expand Features in the left pane if necessary.
-
Select Faxing.
-
Select the Enable members of this group.... check box.
-
Select OK.
You can send a test fax from the Server Administrator by using the AccuRoute CloudFax connector.
To send a test fax
-
In the Server Administrator, right-click Messages. The Messages shortcut menu appears.
-
Select New > Test Message. The Test Message dialog box appears.
-
Use the default server or select the appropriate server from the drop-down list.
-
Specify your Administrator email address in the Sender Email box.
-
Specify or add your account fax number (outbound) in the Recipients box.
-
Specify a subject in the Subject box.
-
Specify your comments in the Comments box, for example, "This is a test fax."
-
Add an attachment.
-
Select Deliver. The test fax is delivered using the default CloudFax rule or any rules created for your fax workflow.
-
Sign into your AccuRoute CloudFax account and verify your test fax was delivered.
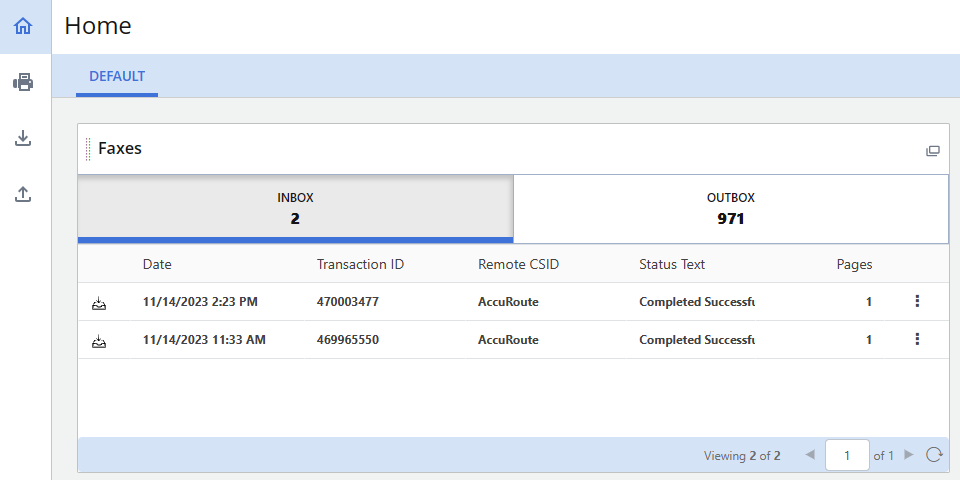
See the AccuRoute CloudFax Home page example below.