WebApps Device Address Book
New devices may require the latest address book to do its job. Administrators can update a device’s address book by simply transferring the address book from an existing device to another. Setup is needed in the Server Administrator. The transfer of the address book is done in
Note: Device users will not be able to access the address book on the device used to transfer the address book from if you are planning on keeping the device active.
Before you begin
Administrators must complete the following tasks.
-
Add Device Address Book Application.
-
Add the Search action.
-
-
Enable Enhanced Faxing and Address Book Support.
-
Transfer the Address Book.
Adding the Device Address Book application
You can add the Device Address Book application to a
To add the Device Address Book application
-
Start the Server Administrator.
-
Expand Configuration.
-
Select
-
Select the Default profile or a different profile, if necessary. The Profile Properties dialog box appears.
-
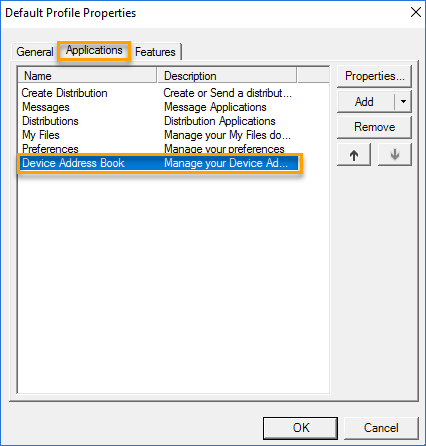
Select the Applications tab.
See the Profile Properties > Applications dialog box example below.
-
Select the Add button. The Applications shortcut menu appears.
-
Select Administration > Device Address Book.
-
Select OK on the Device Address Book Application Properties dialog box.
-
Select OK on the Profile Properties dialog box.
There are two actions associated with the administration of the device address book. The Update action is preconfigured for you. The Search action must be added if there are a lot of devices used at your company.
To add the Search action
-
Start the Server Administrator, if necessary.
-
Expand Configuration.
-
Select WebApps.
-
Select the Default profile or a different profile, if necessary. The Profile Properties dialog box appears.
-
Select the Applications tab.
-
Select Device Address Book on the Applications list.
-
Select the Properties button. The Device Address Book Application Properties dialog box appears.
-
Select the Actions tab.
-
Select the Add button.
-
Select Search.
-
Click OK on the Search Action Properties dialog box.
-
Click OK on the Device Address Book Application Properties dialog box.
-
Click OK on the Default Profile Properties dialog box.
You can enable enhanced faxing and address book support by using Devices in the Server Administrator.
To enable enhanced faxing and address book support
-
Start the Server Administrator, if necessary.
-
Select Devices.
-
Right-click Default Device Group or a different device group. The Properties shortcut menu appears.
-
Select Properties.
-
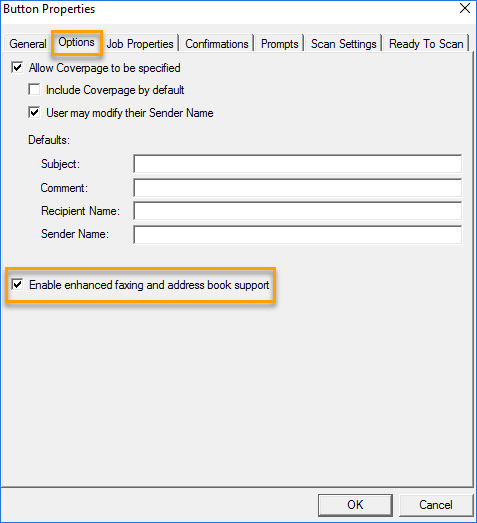
Select the Buttons tab.
-
Select Fax on the Device Home Screen list.
-
Select the Properties button.
-
Select the Options tab.
See the Fax Button Properties dialog box example below.
-
Select the Enable enhanced faxing and address book support check box.
-
Click OK on the Button Properties dialog box.
-
Click OK on the Device Group Properties dialog box.
You can transfer the address book from a device to another by using
To transfer the address book
1. Start
2. Select Device Address Book. Device serial numbers appear in a list.
3. Select Search to find the device serial number to transfer the address book from, if necessary.
See the Search dialog box example below.
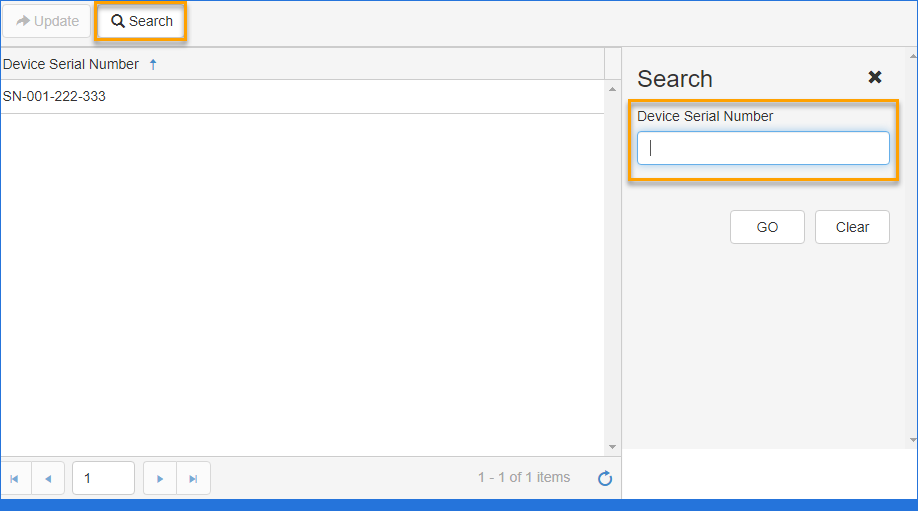
Tip: Use the Sort arrow in the column header to sort the device serial numbers in ascending or descending order.
-
Select the device serial number.
-
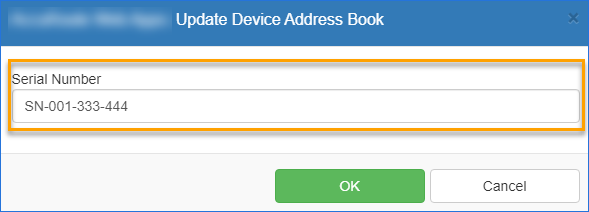
Select Update. The Update Device Address Book dialog box appears.
See the Update Device Address book dialog box example below.
-
Specify the new device serial number in the Serial Number box.
-
Click OK.