WebApps Administration Help Desk History Export
Administrators can export Help Desk History details to a CSV file for analysis and reporting purposes by using
Note: Use Configuration > Job Properties to look up system or user-defined job properties that you can add as Export columns.
Before you begin
Administrators must complete the following tasks.
Note:
Adding the Export action
Use the default Admin profile or select the appropriate profile to add the Export action.
Note:
The following instructions show how to add the Export action using the default Admin profile. These instructions are for illustrative purposes and may not reflect your unique workflow requirements.
To add the Export action
-
In the Server Administrator, go to Configuration >
-
Select Admin in the Profile details pane. The Admin Profile Properties dialog box appears.
-
Select the Applications tab.
-
Select the Administration application. The Administration Application Properties dialog box appears.
-
Select the Applications tab.
-
Select Help Desk. The Help Desk Application Properties dialog box appears.
-
Select the Applications tab.
-
Select History.
-
Select the Actions tab.
-
Select the Add button
-
Select Export. The Export Action Properties dialog box appears.
-
Continue with Adding the Export columns.
Adding the Export columns
The columns you want to export need to be added and defined after adding the Export action.
In the following example, an Administrator wants a group of Help Desk power users to export the following History details to a CSV file for monthly review.
-
Job ID
-
Sender
-
Destination
-
Sent
You can add any columns you want to use for exporting by using system or user-defined job properties. Determine which job properties you want for your export. You will need to know the correct syntax when adding the Export columns, for example, %{propertyname}%.
Note: Use Configuration > Job Properties to look up system or user-defined job properties that you can add as Export columns.
To add Export columns
-
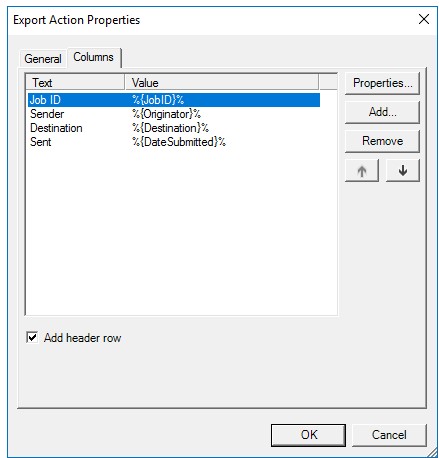
In Export Action Properties, select the Columns tab.
-
Select the Add header row check box to add the column headings to the CSV file if necessary.
-
Select the Add button. The Export Column Properties dialog box appears.
-
Select the Header > Text drop down list arrow for a list of the columns.
-
Scroll down to @Column and select @ColumnJobID.
Note: You can use the @Column options or type the column header text.
-
Type the %{JobID}% in the Content > Text box.
-
Select OK. The Job ID column appears in the Text/Value table.
-
Select the Add button.
-
Select @ColumnSender from the Header > Text drop down list.
-
Type %{Originator}% in the Content > Text box.
-
Select OK.
-
Select @ColumnDestination from the Header > Text drop down list.
-
Type %{Destination}% in the Content > Text box.
-
Select OK.
-
Select the Add button.
-
Select @ColumnDateSent from the Header > Text drop down list.
-
Type %{DateSubmitted}% in the Content > Text box.
See the Export Action Properties dialog box example below.
-
Select OK.
-
Ensure all columns and values appear in the Text/Value table.
-
Select OK on the Export Action Properties dialog box.
-
Select OK on the History Application Properties dialog box.
-
Select OK on the Help Desk Application Properties dialog box.
-
Select OK on the Administration Application Properties dialog box.
-
Select OK on the Admin Profile Properties dialog box.
Using WebApps Administration Help Desk History Export
Use the Export button on the Help Desk > History toolbar to export data details to a CSV file.
To export to a CSV file
-
Open
-
Select Administration.
-
Select Help Desk.
-
Select History.
-
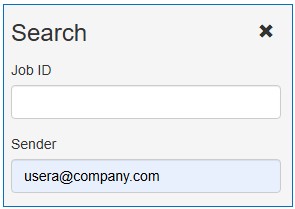
Search and filter the History details for the export if necessary.
Note: All details are exported if you do not filter the History folder. You can also select specific rows/details in the table you want to export. Both methods are acceptable, search or by mouse selection.
See the Search by Sender example below.
-
Select the Export button on the toolbar. The Export button automatically generates the CSV file.
-
Download the CSV file.
See the CSV Notepad example below.

Note: The CSV file shows the Job ID, Sender, Destination Email Address and Date/Time Sent column headings and details. Some of the data in this example has been intentionally obscured.
See also
Adding Route to Destination Column