Create a Summary Export
This topic covers the different steps for creating a summary export.
On this page:
Initial Setup
To create a new summary export click Create Summary Export. The initial setup page appears, where you can enter the basic setup details for the export.
Following are the details:
- Export Name: Name of the export. This doesn't have to be unique, it is recommended that you choose something memorable.
- Description: This is an optional field that can contain any additional details or information.
- Owner: Owner of the export. This defaults to your user, but if you're creating an export for someone else you can change it here.
- Time zone: The time zone to which the export data is to be converted.:
- Level of summary report: The level of the report for the summary export.
Click Save to create the export. The Export Overview page appears.
Note: Once you have created the export, the core table and export type cannot be changed.
Summary Export Overview
The export overview displays the three main parts that combine to form an export; Events and Data Source.
Note: Event fields are not visible for device & location exports, as this is predefined.
Your new export will initially be blank and will need to be configured before you can request or schedule a summary data export.
Event
An event is an action performed by the reader on a campaign. The next step is to select one or more events that the contact must have triggered in order to appear in your export. Click Add Event, in the Select Event Type box, select the events and click OKAY.
The events in summary exports are based on the Launch Results and Campaign Activity of Summary Reports.
Data Source
The data fields that appear in your final output file are selected from your core table and data tables, and you can tailor the fields you want to include for each export.
Choosing a data source means that you can restrict where the events data in your export comes from. You can have multiple data sources which can be, for example, as broad as whole workspace, or as specific as individual launches, depending on what you want your final output file to contain.
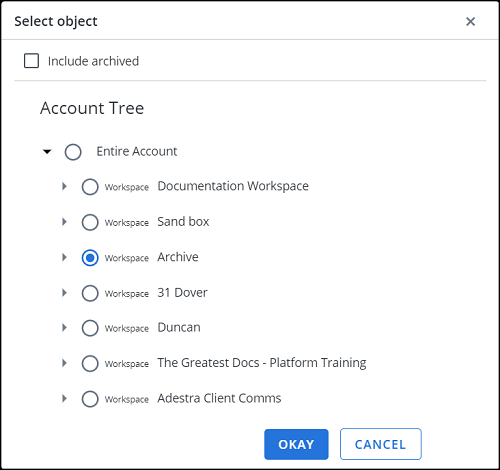
The final stage of structuring your export is to specify the data source. You can do this by clicking the ‘Add Source’ button, which will bring up the account tree.
The selection of object depends on the level of summary report during initial setup. If the level of summary report is Workspace level, you can only select the workspace level in this box.
To include archived projects and campaigns in your summary export, select Include archived.

The account tree displays the tiers of workspaces, projects and campaigns that you have access to. You are able to add multiple data sources to an export, across the different tiers, although they can only be added one at a time.
If no data source is selected, the entire account is selected by default.
Copy and Delete Export
In the Export Overview page, click the Copy Export button. This will allow you to copy this existing export, copying everything apart from the original export schedule.
To delete an Export, in the Export Overview page, click the Delete Export button.