Sending Shopify Customer Profiles to Adestra
On-demand: the Shopify integration is currently invitation only. If you are interested in connecting Shopify and Adestra, contact your customer success manager.
After connecting Shopify to Adestra, you will be able to send your customer profiles from Shopify to Adestra (automatically and on-demand) to use with your mailing lists.
On-demand profile sends
To send profiles from Shopify to Adestra on-demand:
-
Open the Adestra app in Shopify and select the Data Sync menu.
Tip: pin the Adestra app to make it easier to locate in Shopify.
-
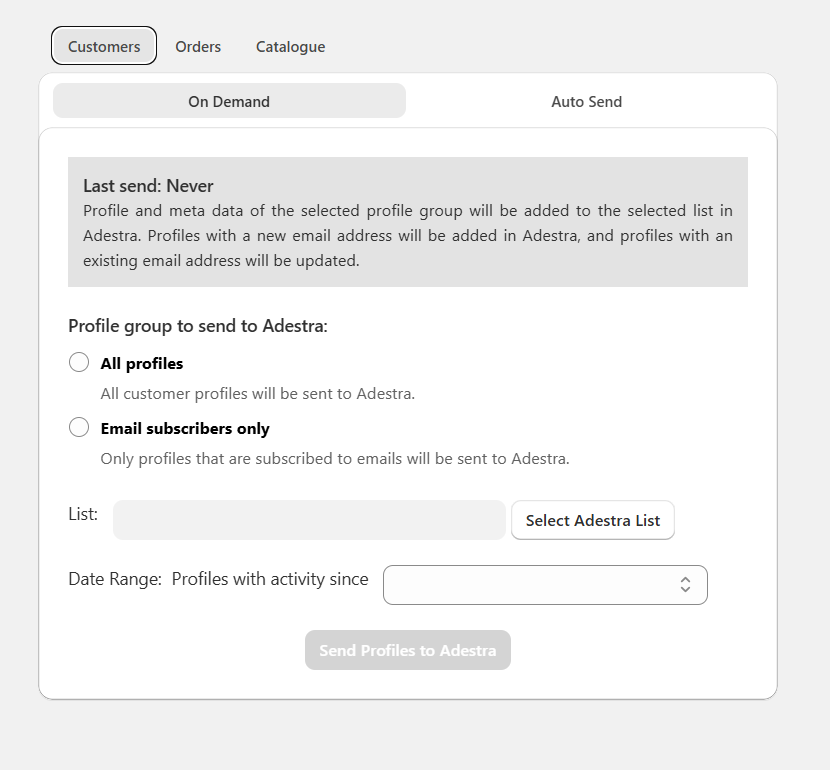
Select the Customers tab.
-
On the On Demand tab, use the radio buttons to select which profile group to send:
-
All profiles - all customer profiles in your Shopify store, regardless of their email subscription status.
-
Email subscribers only - profiles flagged as subscribed to emails in your Shopify store.
Tip: if unsure, select the 'Email subscribers only' option. Using 'All profiles' may result in mailings being sent to customers who have not signed up for emails.
-
-
Press the Select Adestra List button.
-
Either:
-
Create a new list by providing a name, or
-
Select a list from the available lists.
Note: if the list you are looking for is not available, it may be associated with a different core table to the one connected to your Shopify store.
-
-
Use the calendar dropdown to enter a date range to filter out older, inactive profiles, e.g. only include profiles with activity this year.
-
Press the Send Profiles to Adestra button.
When the send completes, your Shopify profiles will appear as contacts within your selected list in the Adestra lists menu and the timestamp of last send is updated.
Note: the last send time displayed in Shopify is set to match the timezone of your Shopify store.
Automated Shopify profile sends
To setup an automated send of profiles from Shopify to Adestra:
-
Open the Adestra app in Shopify and select the Data Sync menu.
Tip: pin the Adestra app to make it easier to locate in Shopify.
-
Select the Customers tab.
-
Select the Auto Send tab.
-
Use the radio buttons to select which profile group to send:
-
All profiles - all customer profiles in your Shopify store, regardless of their email subscription status.
-
Email subscribers only - profiles flagged as subscribed to emails in your Shopify store.
Tip: if unsure, select the 'Email subscribers only' option. Using 'All profiles' may result in mailings being sent to customers who have not signed up for emails.
-
-
Press the Select Adestra List button.
-
Either:
-
Create a new list by providing a name, or
-
Select a list from the available lists.
Note: if the list you are looking for is not available, it may be associated with a different core table to the one connected to your Shopify store.
-
-
Use the calendar dropdown to enter a date range to filter out older, inactive profiles, e.g. only include profiles with activity this year.
-
Ensure the Automatically send profiles checkbox is ticked.
-
Press the Save Settings button.
Automated sends are scheduled to occur daily. When the send completes, your Shopify profiles will appear as contacts within your selected list in the Adestra lists menu and the timestamp of last send is updated.
Note: the last send time displayed in Shopify is set to match the timezone of your Shopify store.
If you need to update your profiles in Adestra outside of the scheduled time, press the Send now button to manually update your profiles using the automated send settings.
Updating auto send settings
To make any changes to your auto send settings:
-
Open the Data Sync menu and select the Auto Send tab.
-
Untick the Automatically send profiles checkbox.
-
Make your changes, e.g. edit the date, change your core table, etc.
-
Tick the Automatically send profiles checkbox.
Tip: skip this step if you want to turn auto send off.
-
Press the Save Settings button.