The Salesforce application works in conjunction with the Export Manager allowing you to send event data into Salesforce against contacts, leads and campaigns.
On this page:
Pre-Export Information
You'll need to install this application in your Salesforce account, and will require configuration within Adestra. Refer to the Salesforce Installation and Configuration topic for help on how to do this.
There are two parts to setting up and using this app, the first is creating the export within Adestra, and then accessing the data within Salesforce.
In Adestra
You can access the Export Manager tab using the 'Data' tab in the header at the top of the screen.
Choose 'Export Manager' from the page tab bar and then click the 'Create Salesforce Export' link.
Create an export
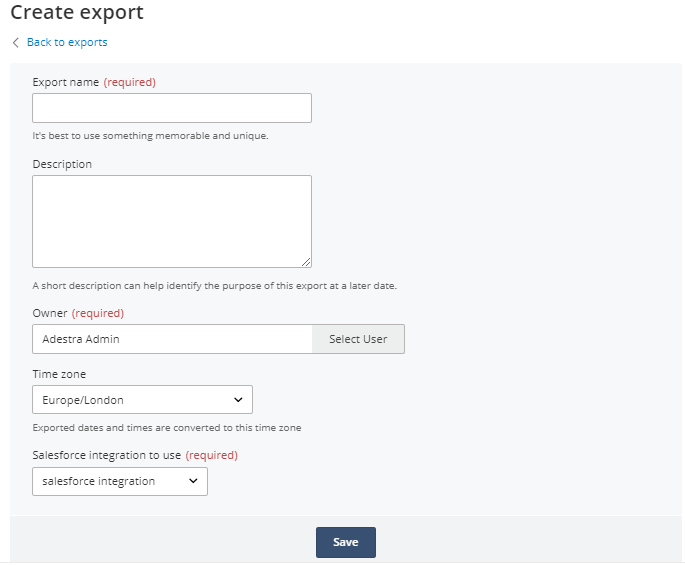
Note: If the Salesforce integration does not have both the Contact ID and the Lead ID mapped to a field in a core or data table, an error will occur on saving.
- Export Name: the name of the export. This doesn't have to be unique, but we recommend that you choose something memorable
- Description: this is an optional field that can contain any additional details or information you like
- Owner: the owner of the export. This defaults to your user, but if you're creating an export for someone else you can change it here
- Salesforce Integration: the Salesforce remote connection created for your integration
Click 'Save' to create the export, and you will be directed to the export overview.
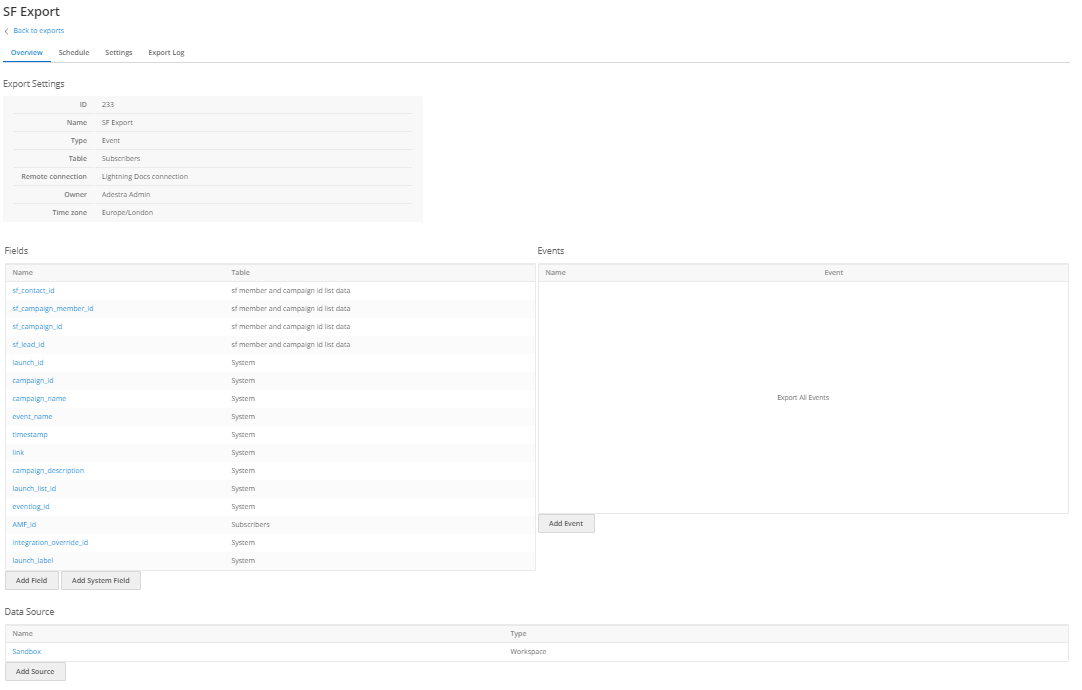
Note: Upon saving an export, the associated integration will not be editable.
Fields
The fields that will be exported are an automatic set of fields that cannot be changed.
Note: Fields will be populated in an export only if they are mapped as part of the installation.
Events
To select one or more events to export, click the ‘Add Event’ button to bring up the event selector. Please refer to the Export Manager documentation for more information on the different Export types.
Data Source
You will need to specify the data source using the ‘Add Source’ button, which will bring up the account tree. This will display the tiers of workspaces, projects and campaigns that you have access to. You are able to add multiple data sources, across the different tiers, however they can only be added one at a time. If no data source is selected, this will default to the entire account.
Schedule
The frequency settings in the ‘Schedule’ tab define how often your export will send.
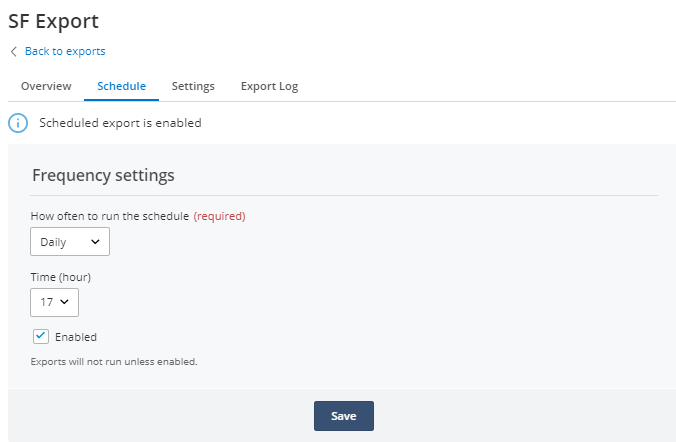
The default will be set to daily, but you can change this using the drop-down box to weekly or monthly. If you select to send weekly, you are given the option to specify which day of the week you wish the export to send. Similarly, if you select monthly, you are able to specify the day of the month.
The 'Enabled' option must be selected in order for the export schedule to run. By default this is unselected, and the yellow notification at the top of the screen will display ‘Scheduled export is disabled’. When you select to enable a schedule, the notification at top of the screen will display 'Scheduled export is enabled'.
You can stop a live schedule from running by deselecting this option, which leaves all of the schedule settings intact for future use.
Settings
Once an export has been created, you can edit basic details of the export using the 'Settings' tab.
Export Log
Once your export has been scheduled, the 'Export Log' tab will be available. This displays the history of your export, and will initially be empty until your schedule starts running.
In Salesforce
Once the export has been set up, you are able to view event data against contacts, leads and campaigns within Salesforce.
Leads and Contacts
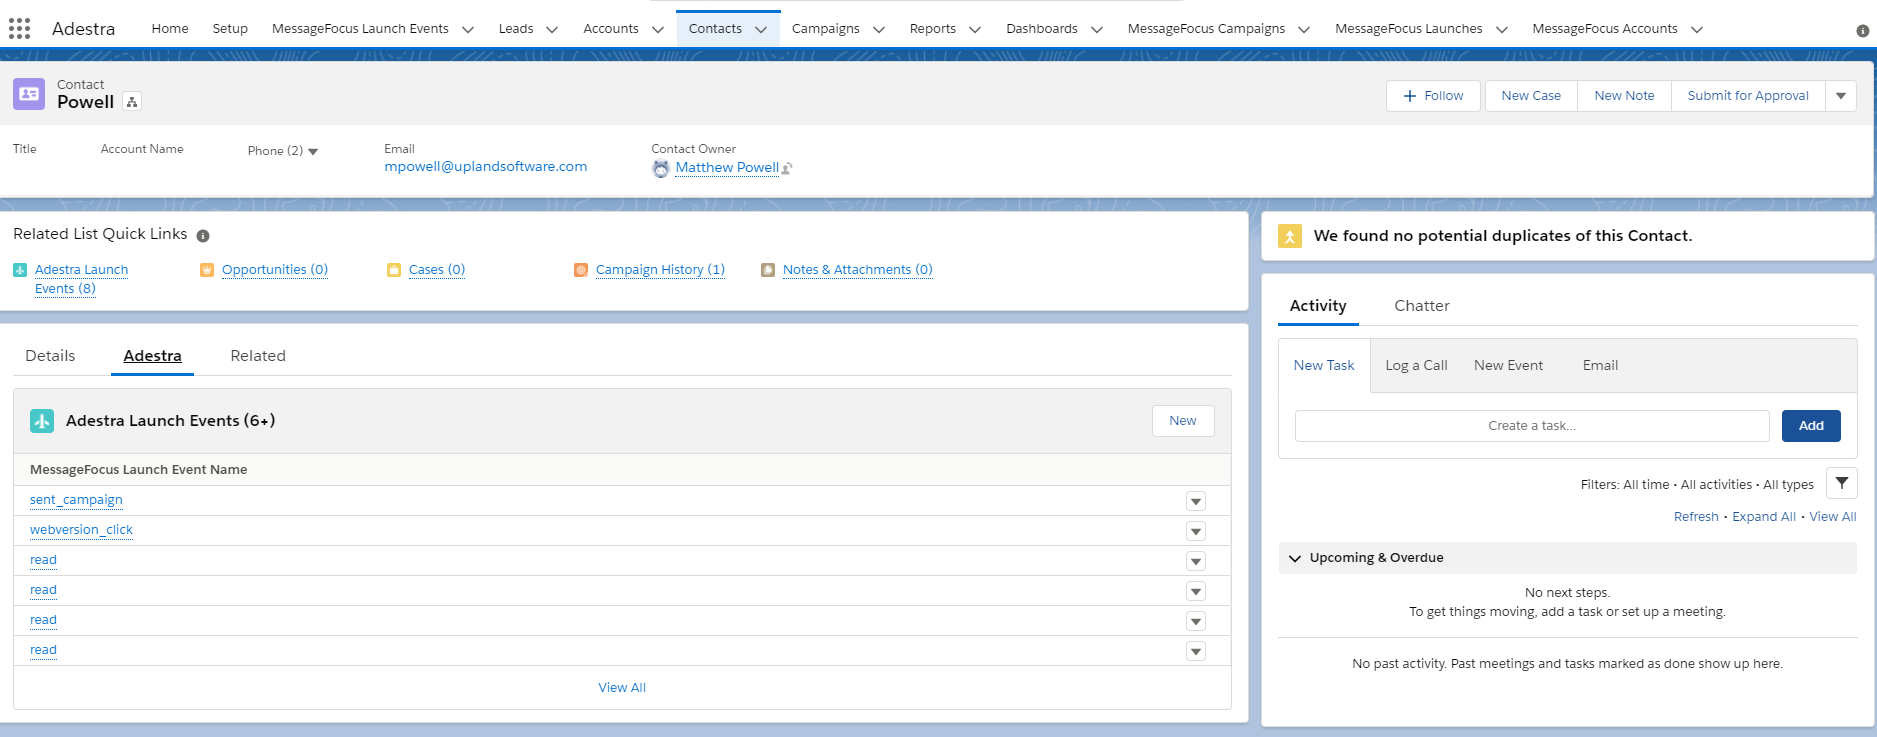
The set-up for Adestra exports for 'Leads' and 'Contacts' are the same. You will first need to navigate to either of these areas in Salesforce, and then select a lead or contact to view.
In the lower part of the page is the 'Adestra Launch Events' section. You can click on the event, campaign name, and launch name to see more details for each.
Campaigns
Click on the relevant campaign you wish to view. Although the export may be set up and scheduled to run, the 'Adestra Campaigns' section will only populated when Adestra receives event data.
Within this section, click on a campaign to see the launches associated with it.
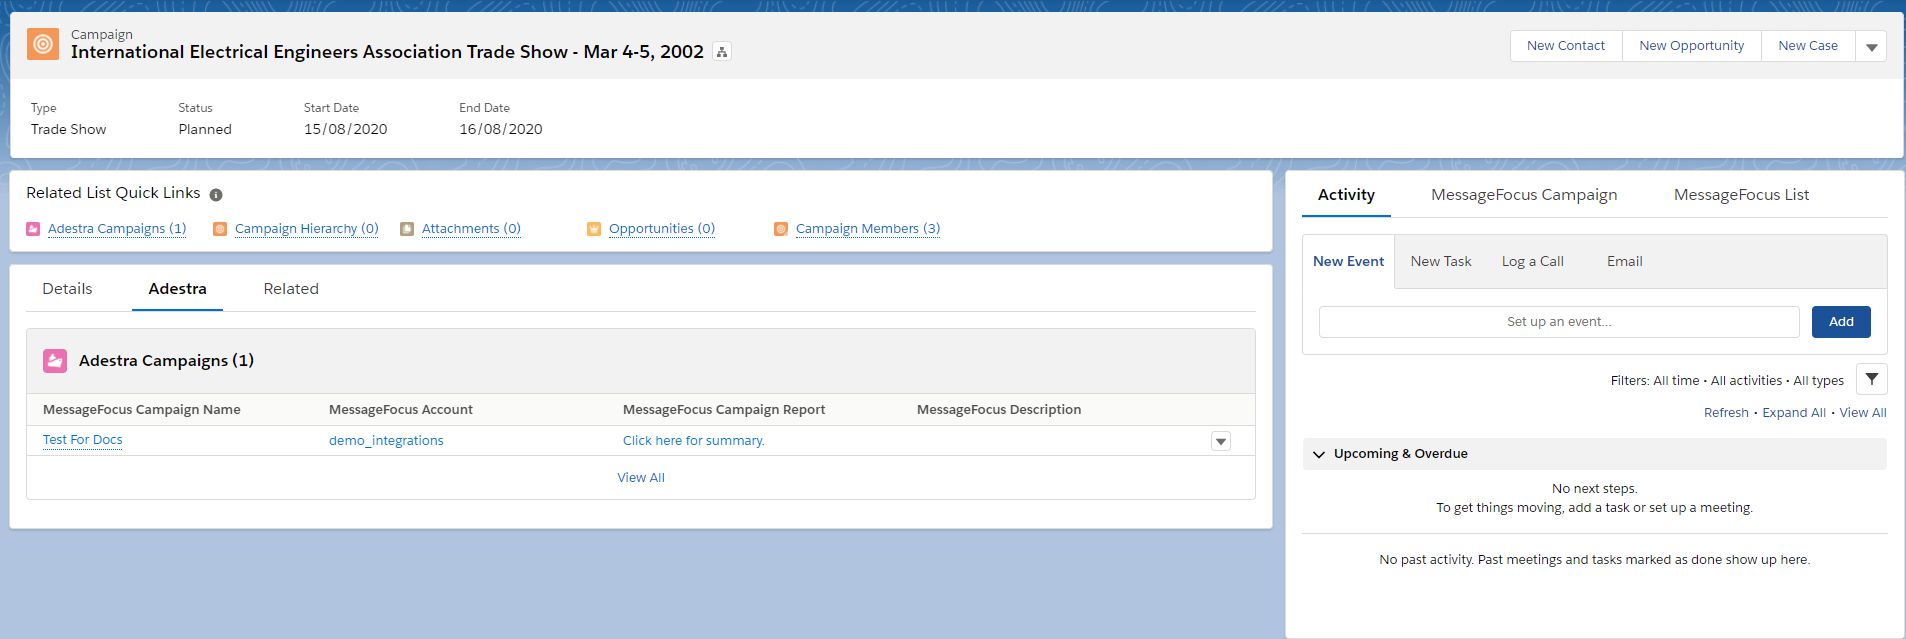
From here you will have a direct link to Adestra reporting using the 'Adestra Campaign Report' link.
In the lower part of the page, you can click on a launch name to see all events associated with that launch.