Sync your Salesforce Campaigns to Adestra
After mapping your Adestra Core Table and Fields, you will need to synchronize your campaigns to complete the Adestra-Salesforce integration and send Salesforce Contact and/or Lead profiles from a Salesforce campaign to Adestra.
In Salesforce Object Manager:
-
Search for and open the Campaign object.
-
Select Page Layouts in the nav menu.
-
Select Campaign Layout.
-
Under Campaign Layout, locate and open Mobile & Lightning Actions in the menu list.
-
Drag the “Sync Campaign to Adestra” object down to the Salesforce Mobile and Lightning Experience Actions section.
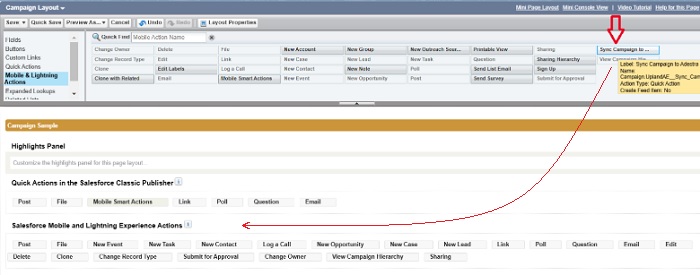
Tip: where you drop the object within the list of objects will determine where it appears on screen, i.e. putting it at the start of the list will make it the first button, putting it at the end of the list of objects will make it the last button.
-
Locate and open Related Lists in the menu list.
-
Drag the “Messages” object into the Related Lists section, underneath the Campaign Hierarchy object.
-
Press the Save button.
To verify the settings and sync a campaign:
-
Open the Salesforce app launcher and select the Adestra app.
-
Open a Salesforce campaign to be synced.
-
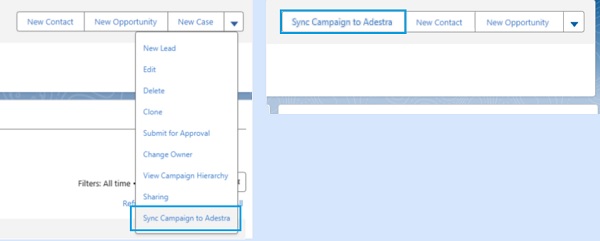
Press the Sync Campaign to Adestra button.
The Sync Campaign to Adestra button should be available alongside your other action buttons.
Note: the exact location of the button depends on where you placed the object during configuration. You may need to expand the actions using the down arrow button to see the Sync Campaign to Adestra button.
The Messages object should be present in your Related tab.
-
In the Sync Campaign to Adestra dialog window do the following:
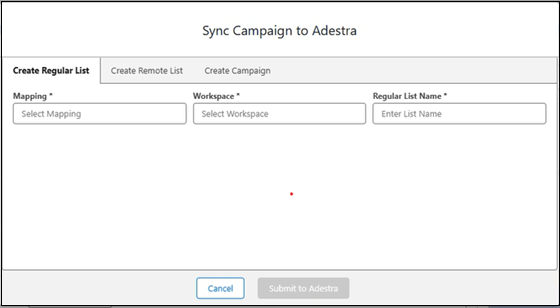
Create Regular List
-
Mapping – the created mapping is fetched from the Adestra settings.
Note:your Salesforce profile must have access to at least one mapping.If no mappings are available, the dialog shows an error.
Note: access to mappings is determined by the profile permissions configured within the system. You can only view and use mappings that have been assigned to your profile.
-
Workspace - select a workspace associated with your core Adestra table from the list.
-
Regular List Name - enter a list name for the contacts that will be synced.
Create Remote List
This works similarly to the create list functionality. Remote lists are auto-sync lists in Adestra. At a scheduled time, the system automatically calls the middleware, which retrieves campaign data and sends it back to Adestra.
Note:scheduling of this list will be set to daily 00:00 Europe/London time. If this needs to be updated, it can be changed in Adestra.
Create Campaign
-
Campaign Name – Select the Campaign Name.
Note: This will default to your Salesforce campaign name.
-
Regular List Name - Enter a list name for the contacts that will be synced.
-
Mapping – Select the mapping from the list.
-
Workspace - Select a workspace associated with your core Adestra table from the list.
Note: The window displays a list of available projects when a workspace is selected. Select the project you wish to create your campaign.
-
-
Press the Submit to Adestra button to sync your campaign.
After synchronizing your campaigns, add the optional dashboard to your home page.