Configuring your Adestra-Shopify Mappings
After installing the Adestra-Shopify app, you will need to:
-
Map your Shopify fields to your Adestra fields.
Tip: prepare a core table in your Adestra workspace that mirrors your Shopify store fields before configuring the app.
Connect Shopify to an Adestra workspace and core table
-
On the Adestra app landing page, press the Get Started button.
-
Enter the token provided by your customer success manager.
Tip: keep the token safe as it will be needed for authentication should you wish to change any settings in the future.
-
Press the Next button.
-
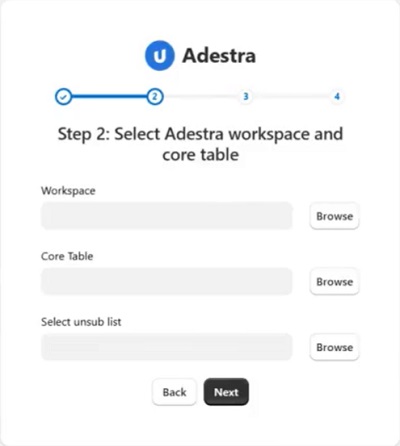
Use the Browse buttons to select:
-
The Adestra workspace,
-
The Adestra core table, and
-
The Adestra unsub list that you want to connect to your Shopify store.
Tip: when choosing an unsub list, anybody who unsubscribes via Shopify will be added to the selected unsub list in Adestra.
-
-
Press the Next button to go to the mapping options.
Map your Shopify fields
You can either map your fields manually or use the Guess Mappings button to search Adestra for matching fields.
Using Guess Mappings
Enter your Shopify fields and auto-search Adestra for matching fields.
Note: the email field is mandatory and pre-mapped.
-
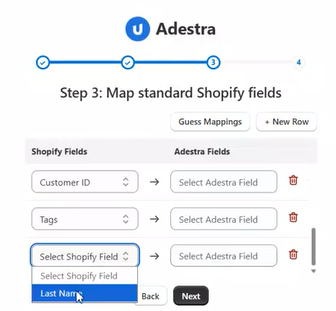
On the mapping page, select the standard Shopify fields you wish to map to Adestra.
-
Press the Guess Mappings button to find matching fields in your chosen Adestra table.
-
On the results page, check the box at the end of a row to select those rows that are correctly guessed.
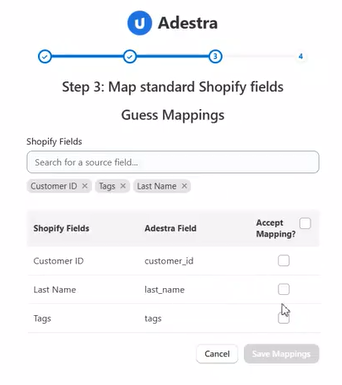
Tip: if all rows are correct, check the box in the table header row to select all rows simultaneously.
-
Press the Save Mappings button to return to the main mapping page.
-
If there are rows that could not be guessed, you will need to map your fields manually. When all fields are mapped, press the Next button.
Tip: mapping is performed against your chosen core table. To select fields in a data table, you will need to enter the field manually.
-
If you have custom Shopify fields you wish to map, you can also use the Guess Mappings button to auto-search Adestra for fields that match your custom fields.
-
When you are finished mapping any optional custom fields, press the Submit button to complete the connection.
-
Should you need to update any settings, press the Settings button in the left panel to return to the configuration options.
Manually Mapping your Shopify fields
To manually map your standard Shopify fields:
-
Press the + New Row button.
-
Select an Adestra field from the dropdown menu.
-
Select the matching field in Shopify from the dropdown menu.
-
Repeat for each row of fields to map.
Tip: the Adestra field dropdowns default to your chosen core table. To select fields in a data table, enter the field manually in the format TableID.FieldName, e.g. 1234.my_field.
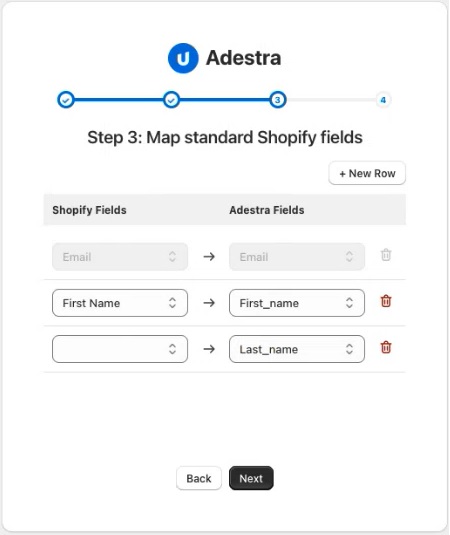
Note: the email field is mandatory and pre-mapped.
-
Press the Next button.
(Optional) To map your custom Shopify fields:
-
Press the + New Row button.
-
Select the custom Shopify field from the dropdown menu.
-
Select a matching Adestra field from the dropdown menu.
-
Repeat for each row of fields to map.
-
Press the Submit button to complete the connection.
-
Should you need to update any settings, press the Settings button in the left panel to return to the configuration options.