Setting Relationships between Contacts
Learning Objectives
After completing this unit, you'll be able to:
- Set the reporting relationships between contacts
- Show the informal power between contacts (influence)
- Show negative relationships between contacts (conflict)
- Move contacts to where you want them in the layout
- Remove contacts from the map
Lynn is an account executive working for Retail POS. She's pursuing an opportunity with MyHealth. She knows she can offer them outstanding value by helping them to scale and upgrade their pharmacy point-of-sales (POS) technology.
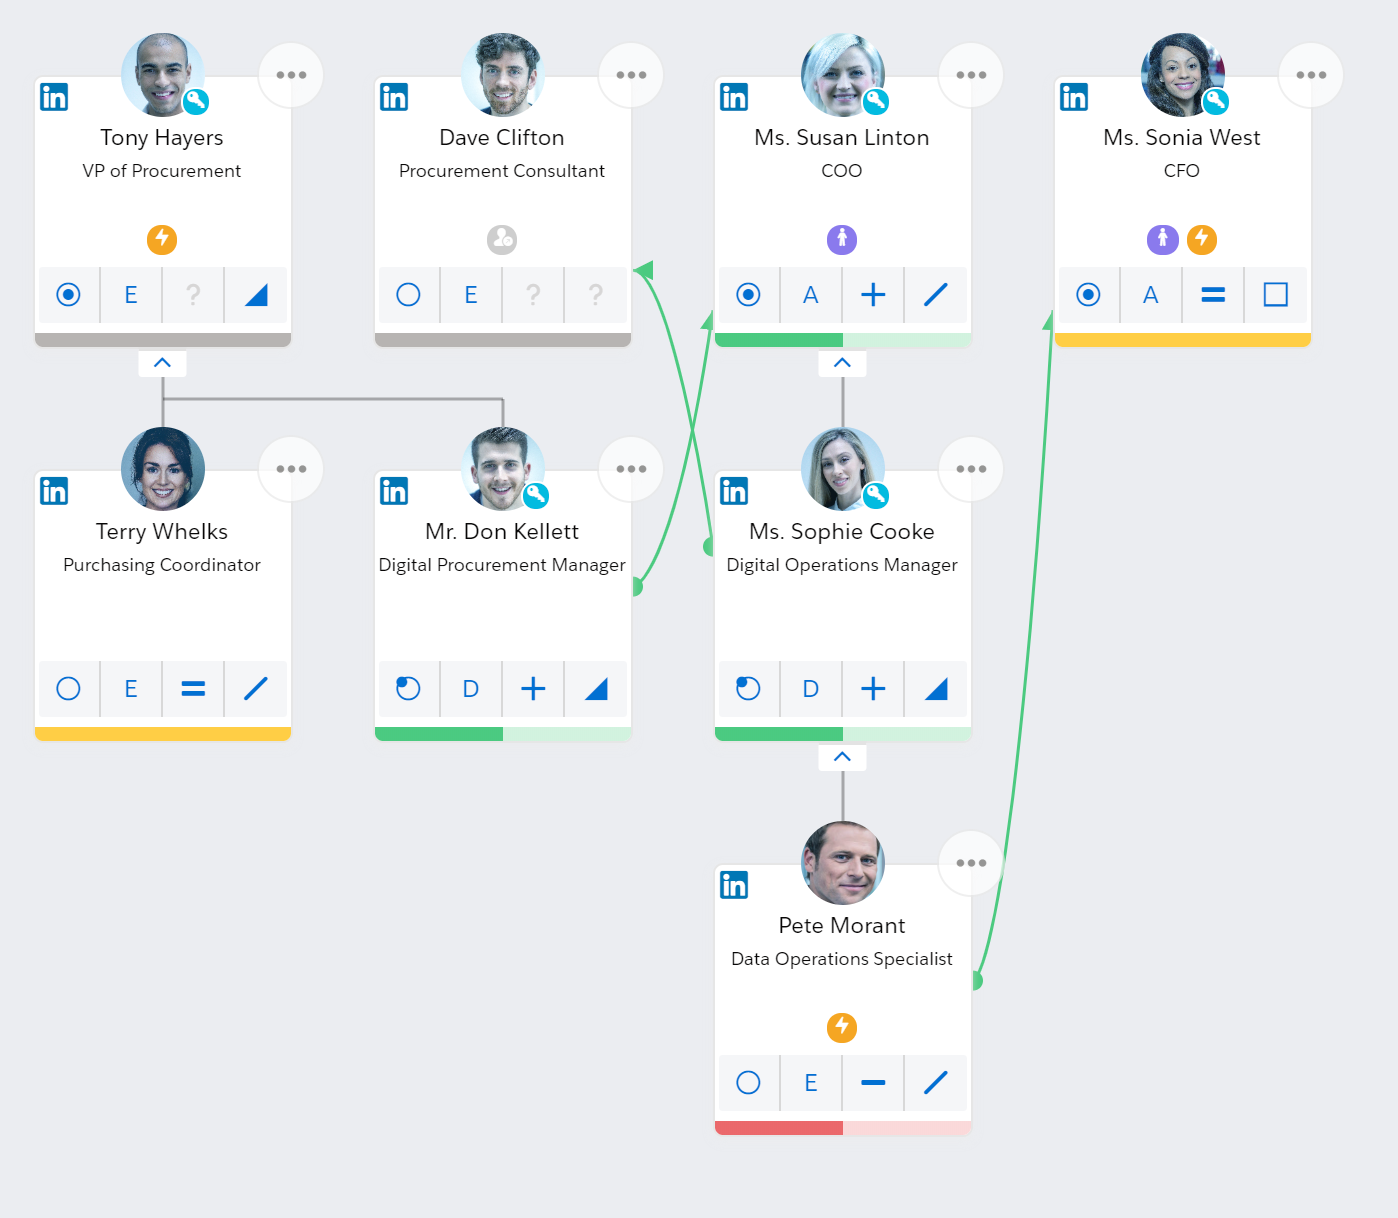
Lynn and her colleagues on the revenue team have connected with most of the contacts important to this particular buying decision, and they've added a number of them to the relationship map:
- Susan Linton, the COO
- Sonia West, the CFO
- Tony Hayers, the vice president of procurement
- Sophie Cooke, the digital operations manager
- Don Kellett, the digital procurement manager
- Terry Whelks, the purchasing coordinator
- Dave Clifton, a consultant from an external agency
- Pete Morant, a digital operations specialist
Set a Reporting Relationship
When you add contacts to a relationship map, they're automatically arranged into the reporting structure specified in Salesforce. This can save a lot of time.
Each contact is connected to their manager by a gray line, if their manager is also on the map.
In the case of Lynn's map, everyone has automatically fit into the reporting structure apart from Terry Whelks. Terry's manager is not set at the moment, so she's not connected to anyone.
However, Lynn knows that Terry's manager is Tony Hayers, so she knows where Terry belongs in the reporting structure.
Lynn simply drags
(This also sets

Show Influence
MyHealth's COO, Susan Linton, pays close attention to the opinions of Don Kellett, the digital procurement manager. He's one of this initiative's decision makers.
Since Susan is an approver for this deal, Lynn knows it's important to represent the "informal power" that Don may exert on Susan's thinking about the buying decision. Don may well have more power than the other decision maker, Sophie Cooke.
So Lynn decides to add an influence line from
Lynn selects

Influence flows in nontraditional directions. Lynn and her team know that influence often flows from the lower ranks in an organization. They'll pay close attention to this kind of influence, and try to leverage it.
For example, Lynn knows that Sonia West, the CFO, worked with Pete Morant, the new data operations specialist, at a previous company, and she has very high regard for his technical expertise. She'll seek out Pete's advice in her capacity as approver of the use of budget.
Lynn adds an influence line from Pete to Sonia.
In addition, Jane Anderson, one of Lynn's colleagues on her revenue team, has discovered that the external consultant Dave Clifton will be working closely with Sophie Cooke, the digital operations manager. Jane opens the relationship map and adds an influence line from Dave to Sophie to indicate that he'll have a direct impact on Sophie's thinking.
There are now three influence lines on the map.

Show Conflicts
Lynn heard that there's some personal friction between Terry Whelks, the purchasing coordinator, and Pete Morant, the data operations specialist.
The friction might impair the way they work together and share information, so this is something that everyone on Lynn's team needs to be aware of and strategize for. For example, they may need to double-check that Pete has shared with Terry all the information he received in conversations with Retail POS, and vice versa.
Lynn decides to add a conflict line between Pete and Terry.
She selects Pete's Add Conflict option. Then she selects Terry's card to add a red conflict line between them.

(She could also have selected Terry's Add Conflict option. Unlike influence relationships, a conflict is mutual and so does not have a direction.)
Move Contacts to Where You Want Them in the Layout
You can move contacts left and right along the row they belong to on your map. Or, to put it another way, you can change the horizontal order of the contacts who report to a particular manager.
Lynn prefers to keep contacts who work closely together in close proximity on the map.
So she wants to place Susan Linton beside vice president of procurement Tony Hayers.
Lynn uses Susan's Move Left option to move her across.

Remove a Contact from the Map
Suppose that Lynn finds out that
To do this, she simply selects
(Removing

Try It Yourself
You've seen how to represent relationships on the map and how to move contacts to where you want them.
In the previous unit, we suggested that you could start adding contacts to a relationship map. Why not return to that map now and start representing relationships and positioning contacts? You can:
- Set a reporting relationship
- Set an influence relationship
- Set a conflict relationship
- Move contacts to where you want them on the map
- Remove a contact from the map
