The sections that follow explain how to set up a new Stage in Salesforce.
Creating a New Stage in Salesforce
- In Setup, open the Opportunity object.
- Click Stage in the Opportunity Standard Fields section.
- Scroll down to the Opportunity Stages Picklist Values.
- Click New.
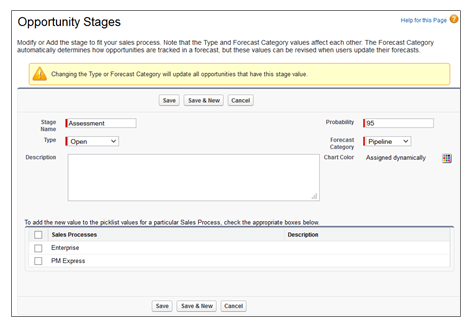
- The Opportunity Stages page is displayed. Fill in the required values.
- Click Save.
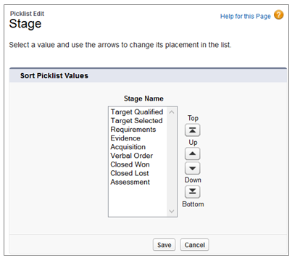
- In the Opportunity Field Stage page, the new stage appears at the end of the list under Opportunity Stages Picklist Values.
- Click Reorder and use the arrow buttons to rearrange the stages.
- Click Save when you are finished.
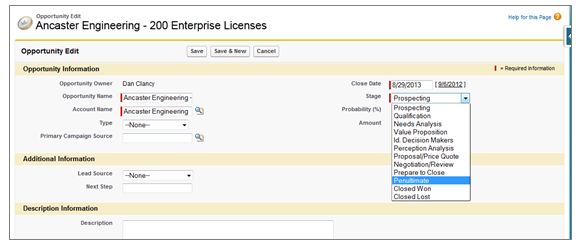
- To verify that the new stage appears in the correct position in the list of stages, go to an opportunity and click Edit. The correct sequence of stages should be displayed in the Stage drop-down list.
Creating a Corresponding Altify Stage
When a new stage in Salesforce has been created, you can use the Altify Sales Process Diagnostics tab to create a corresponding stage in Altify. For more information, see Synch Stages.
This newly created Altify Stage can be added to existing and new sales processes.
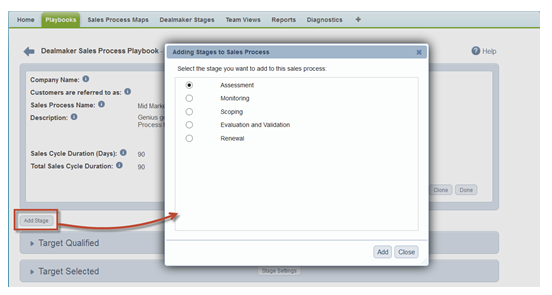
To add it to an existing sales process:
- Open the sales process you wish to update.
- Click the Add Stage button.
- The dialog shows any Altify stages not already present in your sales process. Select the stage.
- Click Add.
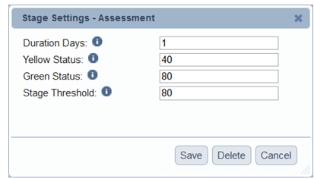
- The Stage Settings dialog is presented. Fill in the required values.
- Click Save.