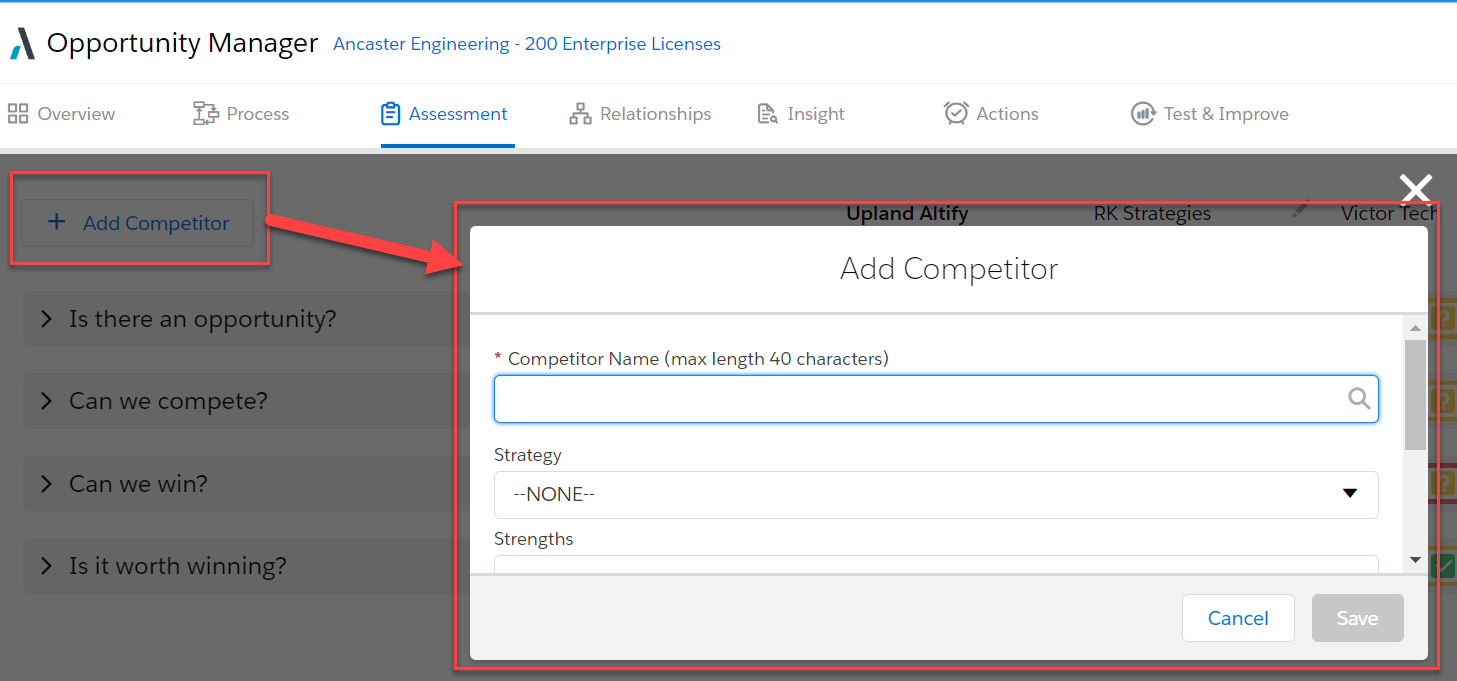
On the Assessment page in Opportunity Manager, users can add competitors to the opportunity assessment process - as shown below:

By default, users can only add competitors to their assessment from a picklist manually compiled by an administrator.
However, by creating an Apex Class you can configure a dynamic list of options from which the user can select their assessment competitors. For example, if you maintain Account records for your competitors (Type = 'Competitor') and you want your users to be able to add these as competitors on the Assessment page.
- Create the Apex class:
- In Setup, go to Apex Classes.
-
Click the New button to create the class. Below is sample code for a class called 'BakeryProviderList', which generates a competitor list composed of hardcoded strings and Account names containing 'Bakery'.
Copyglobal class BakeryProviderList implements ALTF.CompetitorListProvider {
public List<String> getCompetitorNames(String opportunityId) {
List<String> hardCoded = new List<String>();
hardCoded.add('Test Comp One');
hardCoded.add('Test Comp Two');
hardCoded.add('Test Comp Three');
List<Account> accounts = [Select Name from Account where Name LIKE '%Bak%'];
if((accounts != null) && (accounts .size() > 0)) {
for(Account acc: accounts) {
String accName = acc.Name;
hardCoded.add(accName);
}
}
hardCoded.add(opportunityId);
return hardCoded;
}
}The Apex class must implement ALTF.CompetitorListProvider interface.
The getCompetitorNames() method returns a list of competitors. The precise implementation is determined by your organization.
- When you are finished, click Save.
- Specify the Apex class name in the relevant custom setting:
- In Setup, go to Custom Settings.
- Click Manage beside Altify Opportunity Manager Settings.
- Click Edit.
- In the Competitor Class List Provider field, specify the name of the Apex class that returns the list of competitors. In this example, it's BakeryProviderList.
- Test the new class:
- Open the Assessment tab in an Altify opportunity plan.
- Add a competitor.
-
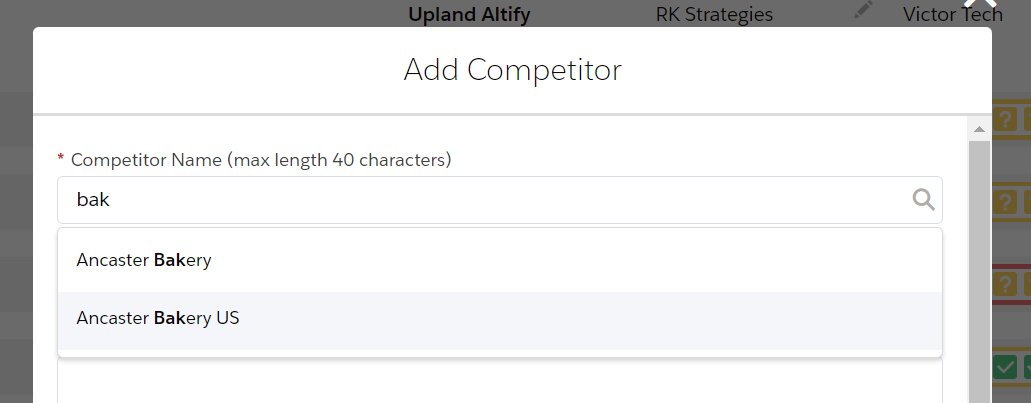
The type-ahead functionality should reflect the custom list generated by your Apex class.
The following example is based on the sample Apex Class provided above (whereby typing 'Bak' displays accounts with a relevant name).

Ensure access to Apex Class
To ensure your users have access to the Apex Class you have created, you need to update the Altify Permission Set.
-
In Setup, go to Permission Sets.
-
Click Altify Permission Set.
-
In the Altify Permission Set, select Apex Class Access in the Apps section.
-
Click Edit in the Apex Class Access section.
-
Add the class you created to the list of Enabled Apex Classes.
-
Click Save.