Adding an Insight
The insight map has five rows: Goals, Pressures, Initiatives, Obstacles, and Solutions.
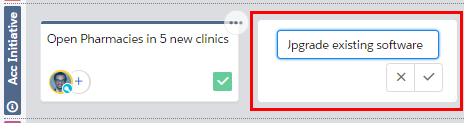
You can quickly add an insight by clicking your preferred location in the relevant row and typing its name. In the example below, a new initiative is added to the right of an existing initiative. (You can place a new insight on any side of an existing insight - right or left, above or below):
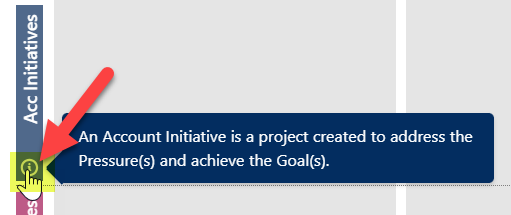
Hover your cursor over the information icon (highlighted below) in the row header for a reminder of the kind of insights that belong in the row.
A fully-developed insight card looks like this:
-
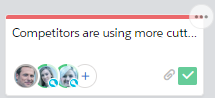
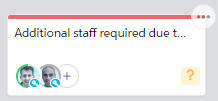
The card shows the contacts who have been specified as its owners (the people who are responsible for or are impacted by the business issue). You can hover over an image to see a summary of the relevant contact.
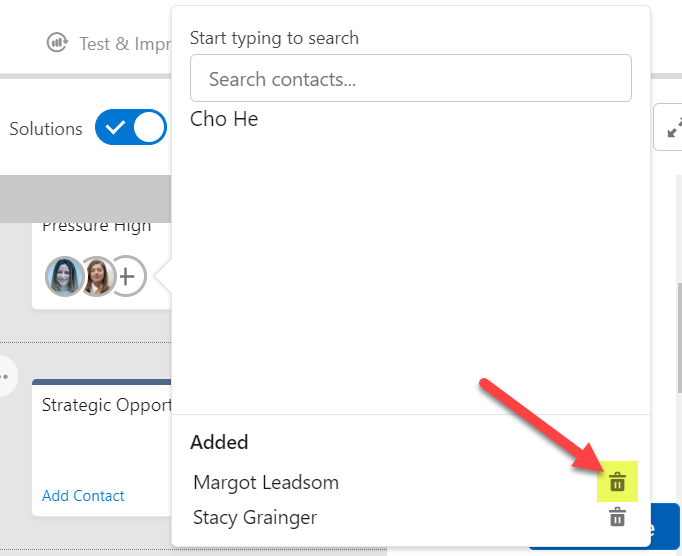
Click the Add Contact link to add an insight's owner, and the + icon to add more contacts. A drop-down menu displays all the key players from the associated relationship map (however, other contacts can also be added as an insight owner). This menu also allows you to remove an owner (as shown in the example below).
-
The paperclip icon indicates that files are attached to the card. For example, you can attach sales resources that support the story you're developing about the customer's business, and files containing your research about the customer.
Files can be attached on the insight's details panel.
- A green tick icon indicates that the details of this card have been confirmed by key players in the customer's business as being correct and complete. Hover your cursor over the icon to see who confirmed the insight and when.
When the icon is yellow (as shown in the example below), the details of the insight are not yet confirmed by the customer. Click this icon to mark the insight as confirmed.
For help with adding solution insights, see Adding a Solution Insight.