Install AutoClassifier Engine Components
Use the following steps to install AutoClassifier.
- Double-click BA Insight AutoClassifier<version>.msi to run the installer.
- Read and accept the End User License Agreement and click Next to continue.
- Continue to the Components to be installed dialog.
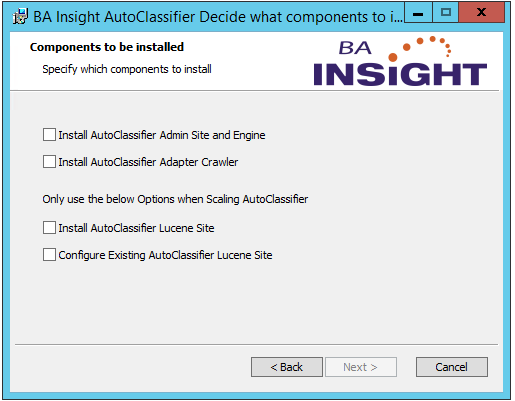
- Install AutoClassifier Admin Site and Engine: Select this option.
- This is the base AutoClassifier Admin Site and Engine.
- This includes a single Lucene site.
- This can be installed on a single server or multiple servers behind load balancing.
- If AutoClassifier is being installed on a single server, a separate Lucene Site is not required, as the needed functionality is embedded in the engine.
- Install AutoClassifier Adapter Crawler (optional): Select this option only if you are using AutoClassifier Adapters to crawl and tag content.
- Example AutoClassifier can crawl and tag Elastic in-place.
- This option can be installed with or without the Engine.
- Install AutoClassifier Lucene site (optional): Select this option only if you are installing in a scaled environment.
- When selected, this Lucene site overrides the default site included in the option "Install AutoClassifier Admin Site and Engine."
- If the AutoClassifier Admin Site is to be installed on multiple servers for load balancing, install exactly one Lucene Site.
- The Lucene Site cannot be scaled.
- It is used for development purposes only.
- If AutoClassifier is being installed on a single server, a separate Lucene Site is not required, as the needed functionality is embedded in the engine.
- If you set up a custom binding to your AutoClassifier Engine Site, you have to update it in the Lucene Site web.config as well.
- You set the new value in the AutoClassifierServiceUrl setting.
- For example: <value>http://company.contoso.com:8080 </value>
- Configure Existing AutoClassifier Lucene Site: When scaling AutoClassifier the installer can point to an existing Lucene Site
- Click Next and the Specify running account dialog appears.
This account will run the installed Application Pools and Windows Services.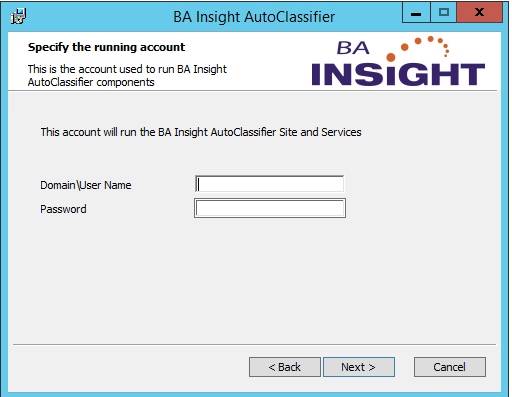
- Click Next to continue.
- Accept the default configuration ports or enter your own values. Note these values in the Installation Prerequisite checklist.
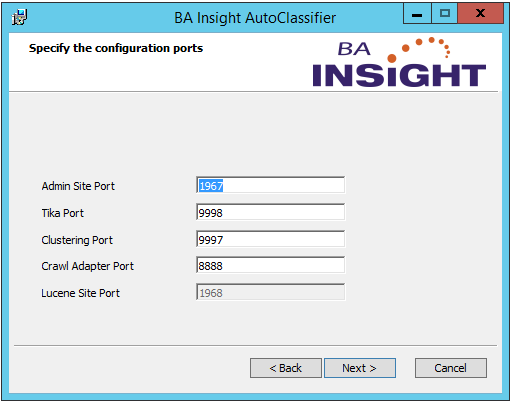
- Click Next to continue.
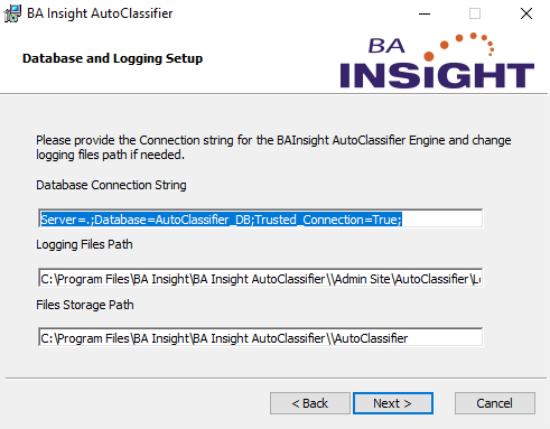
- Database and Logging Setup
- Database Connection String
- Configure the AutoClassifier database connection string, including:
- Server
- Database
- Trusted Connection
- Configure the AutoClassifier database connection string, including:
- Logging Files Path
- The path to the directory that will store AutoClassifier's logging files.
- Accept the provided default path or set to a different path as desired.
- File Storage Path
- The path to the directory that will store AutoClassifier's recorder and lucene index files.
- Accept the provided default path or set to a different path as desired.
- Database Connection String
- Click Next to continue.
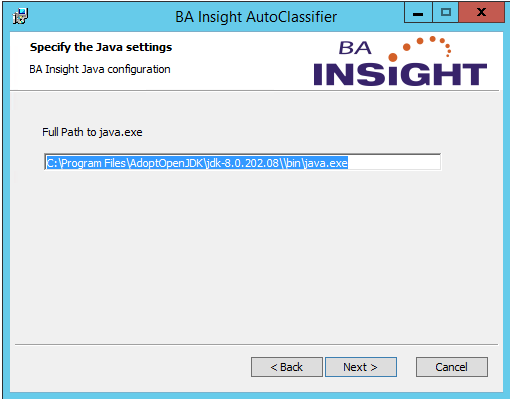
- Java Settings: Specify the full path to your java.exe file
- Full Path to java.exe:
- Specify the full path to your java run time environment (JRE) executable (.exe) file.
- For example: C:\Program Files\AdoptOpenJDK\jdk-8.0.202.08\jre\bin\java.exe
- Default value:
- JAVA_HOME environment variable (if configured)
- JAVA_HOME environment variable (if configured)
- Full Path to java.exe:
- Click the buttons Next>Install>Finish sequentially, to complete your installation.