How to Set Up and Configure the Website Connector
All BA Insight connectors can be downloaded from Right Answers under Knowledge > BA Insight > Product Downloads > Connectors.
This connector is installed with the same generic steps as any BA Insight connector. Be sure to check the "Unblock" box in .zip file properties dialogue box.
Satisfy the Prerequisites for your connector before installing.
Configuration specifics are detailed below.
Choosing the Right Security Model for the Connector
- Select "Connections" from the top navigation menu to open the Connections page.
- Select New>Web service connection.
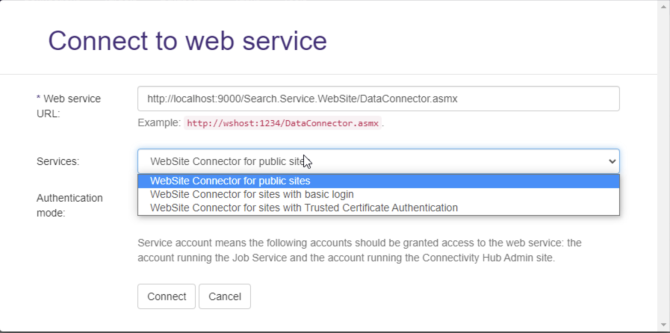
- The Connect to web service dialog appears.
- Enter your Website connector URL into the Web service URL field.
- You can retrieve your website service URL from IIS.
- You can retrieve your website service URL from IIS.
- After you enter your Web service URL, click the Connect button.
- The Services field appears. See the graphic below.
- WebSite Connector for public sites: Select this option to use no authentication.
- WebSite Connector for sites with basic login: Select this option to use basic authentication.
- WebSite Connector for sites with Trusted Certificate Authentication: Select this option to authenticate using an Azure AD Application.
- WebSite Connector for sites with OAuthentication: Select this option to authenticate using oAuth access or ID tokens
- Select your Authentication mode.
- Note that your Service account should be used, unless you require special considerations,
- This account DOES NOT REQUIRE you enter a Login or Password.
- The following accounts must be granted access to the web service:
- The account used to run the Job service.
- The account running the ConnectivityHub Admin site.
- Click the Connect button at the bottom of the dialogue box.
- Note that Web service URL field in the Connection Info tab is now populated to reflect your authentication mode:
- Before proceeding, enter a name for your connection in the Title field.
Connection Configuration Specifics
General Settings
- Select the General Settings tab.
- Note that the fields you see are based on the Authentication mode you selected earlier.
- The General Settings tab shown below reflects the service "WebSite Connector for public sites."
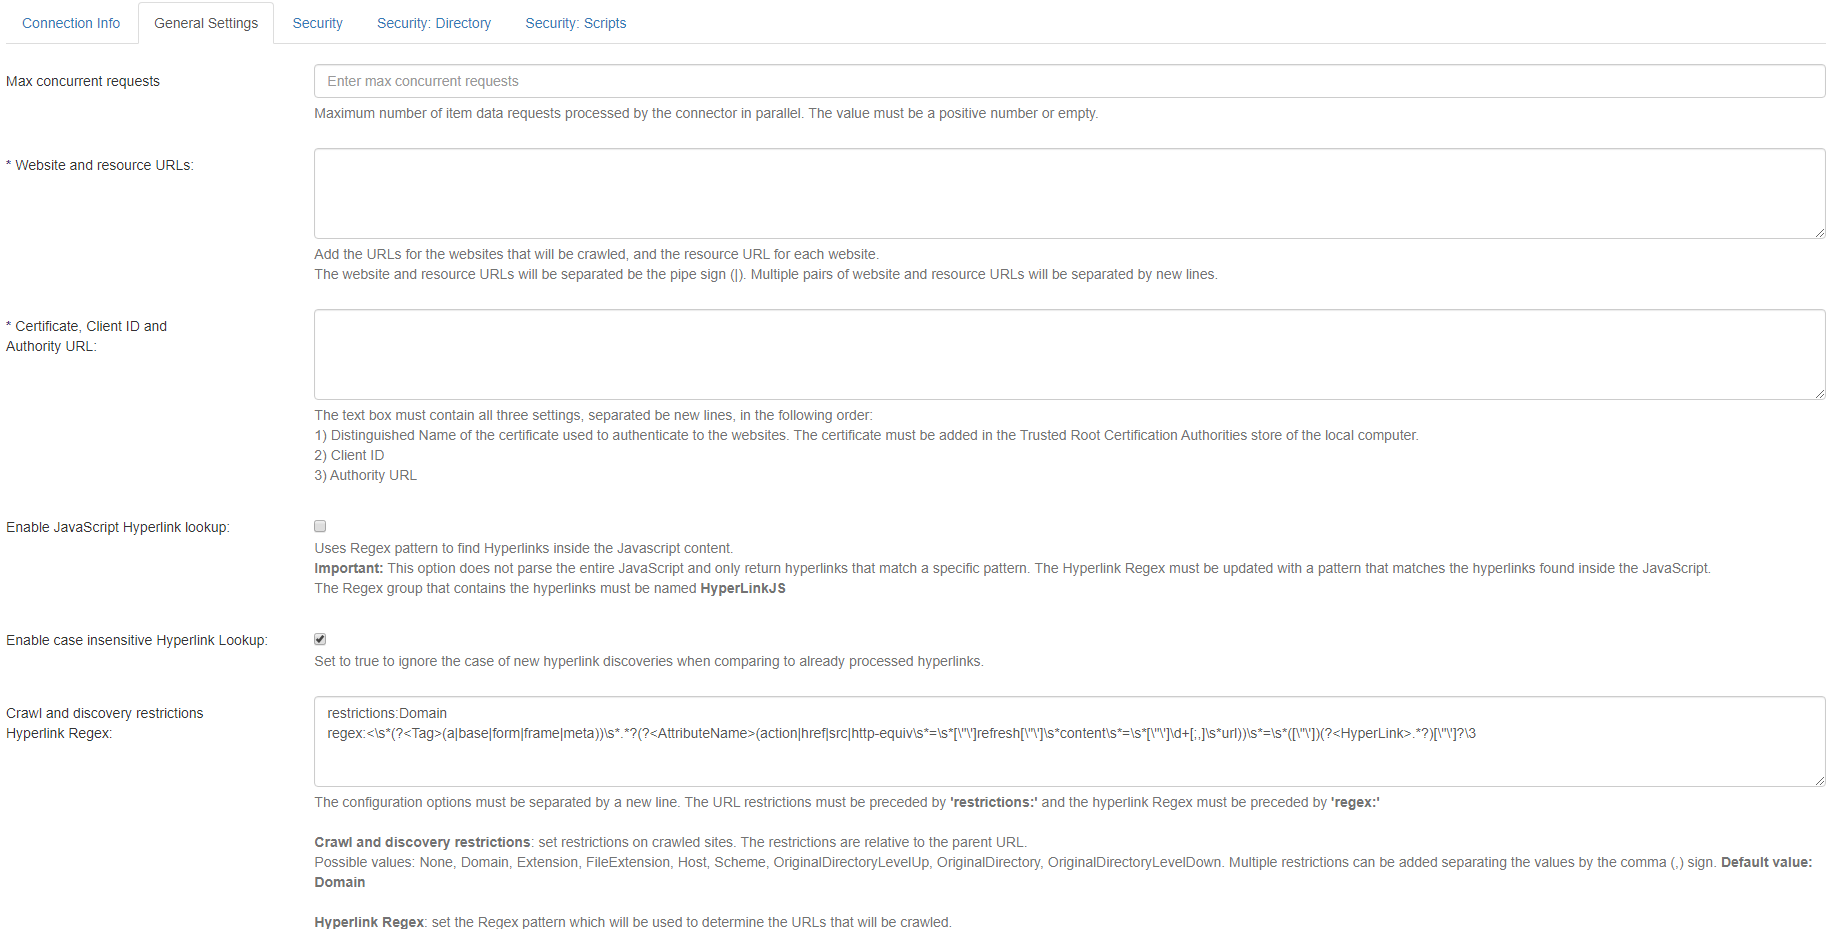
- Site
- The site URL to be crawled.
- URL must be in absolute form including scheme and domain.
- Use only user filters
- Ignore content filters from Robots.txt
- Allow sub domains crawl
- Enable to crawl pages from site sub domains
Settings
Website connector supports additional settings during crawl to specify non-standard behavior of the operation:
Copy{
"crawlDelay": 100,
"crawlTimeout": 300000,
"proxy": "123.123.123.123",
"retryCount": 3,
"headers": {
"X-API-Key": "abcdef12345" },
"filters": {
"allow": [
"/" ],
"disallow": [
"*?utm_source" ]
},
"supportFileExtensions": [
"pdf","doc","docx","rtf","txt","xls","xlsx","ppt","pptx" ],
"ParallelCrawlsPerSite": 2,
"supportFileExtensions": [
"pdf",
"doc",
"xls" ]
}- crawlDelay
- Add delay before any call to target site in ms.
- Default: No delays
- crawlTimeout
- Single page crawl timeout in ms.
- Default value is 5 minutes or 300000 ms.
- proxy
- Use additional proxy server to crawl pages.
- Default: Disabled
- retryCount
- How many times the page will be retrieved in case of failure.
- Default value is 3.
- headers
- Additional headers can be specified with this option in "key":"value" form.
- filters
- User-defined filters in standard Allow/Disallow Robots.txt format
- Examples
- parallelCrawlsPerSite
- Number of concurrent crawl operations per site.
- Default value: 1
- Site
Basic Authentication Websites
These credentials are used to authenticate with the web pages your web connector crawls.
- Username
- Username for site basic authentication
- Password
- Password for site basic authentication
- Site
- The site URL to be crawled.
- URL must be in absolute form including scheme and domain.
- Use only user filters
- Ignore content filters from Robots.txt
- Allow subdomains crawl
- Enable to crawl pages from site sub domains
-
Settings
-
Website connector supports additional settings during crawl to specify non-standard behavior of the operation.
Copy{
"crawlDelay": 100,
"crawlTimeout": 300000,
"proxy": "123.123.123.123",
"retryCount": 3,
"headers": {
"X-API-Key": "abcdef12345" },
"filters": {
"allow": [
"/" ],
"disallow": [
"*?utm_source" ]
},
"supportFileExtensions": [
"pdf","doc","docx","rtf","txt","xls","xlsx","ppt","pptx" ],
"ParallelCrawlsPerSite": 2
} - crawlDelay
- Add delay before any call to target site in milliseconds
- Default: no delays
- crawlTimeout
- Single page crawl timeout in ms.
- Default value: 5 minutes or 300000 ms
- proxy
- Use additional proxy server to crawl pages.
- Default value: off
- retryCount
- How many times page will be retrieved in case of failure
- Default value: 3
- headers
- Additional headers can be specified with this option in "key":"value" form.
- filters
- User-defined filters in standard Allow/Disallow Robots.txt format
- Examples
- supportFileExtensions
- supported file extensions for extracting files from html source by URL
- parallelCrawlsPerSite
- Number of concurrent crawl operations per site.
- Default value is 1.
-
Trusted Certificate Authentication
- Certificate, Client ID, and Tenant ID: All 3 of these settings must be added on new lines in the following order:
-
-
Certificate: Distinguished Name of the certificate used to authenticate to the websites.
IMPORTANT!
The user account running the Website Connector application pool, must have READ access to the Trusted Root Certificate store on the local computer.
This user account cannot be "Network Service".
- Client ID: Application ID of the client service.
- Tenant ID: The tenant ID.
https://docs.microsoft.com/en-us/azure/active-directory/develop/quickstart-register-app
-
- Site:
- The site URL to be crawled.
- URL must be in absolute form including scheme and domain.
- Use only user filters
- Ignore content filters from Robots.txt
- Allow sub domains crawl
- Enable to crawl pages from site sub domains
-
Settings
-
Website connector supports additional settings during crawl to specify non-standard behavior of the operation.
Copy{
"crawlDelay": 100,
"crawlTimeout": 300000,
"proxy": "123.123.123.123",
"retryCount": 3,
"headers": {
"X-API-Key": "abcdef12345" },
"filters": {
"allow": [
"/" ],
"disallow": [
"*?utm_source" ]
},
"parallelCrawlsPerSite": 2
} - crawlDelay
- Used to add a delay (in milliseconds) before any call is made to the target site.
- Default setting: no delays
- crawlTimeout
- Single page crawl timeout (in milliseconds).
- Default value: 5 minutes or 300000 ms.
- proxy
- Use additional proxy server to crawl pages.
- Default: disabled
- retryCount
- How many times the page will be retrieved in case of failure.
- Default value: 3
- headers
- Additional headers can be specified with this option in "key":"value" form.
- filters
- User-defined filters in standard Allow/Disallow Robots.txt format
- Examples
- parallelCrawlsPerSite
- Number of concurrent crawl operations per site.
- Default value: 1
-
oAuth Authentication
Obtain a valid oAuth token for crawling
When using the oAuth mode for the connector, you must first obtain a valid oAuth token by following the steps below:
- Browse to the URL of the site where the connector is installed.
- http://<connectorUrl>/oauth.aspx where http://<connectorUrl>
- Typically: http://localhost:2406
- Specify the oAuth client ID and endpoint url for the authentication endpoint to be used
- Click Authorize
-
After clicking Authorize, you will be redirected to the authentication server to authenticate as if you were logging on to the website you wish to crawl.
-
After successfully authenticating, you will be redirected back to the connector website so that it can capture the access and refresh tokens required for successful crawling
Configure the Connection
Once the tokens obtained, you are now ready to configure the connection.
The same general configuration options as above apply to the oAuth authentication module.
However, this module has 2 additional settings to specify:
- ClientID: You must specify here the same client ID as you specified when you obtained the oAuth token
- Settings:
- The JSON contains the same settings as above
- You must add a oAuthInitializationPage field to the settings JSON.
The value must be the url of the page which will initialize the website with the access or ID token provided by the connector.
The initialization page must save the ID and/or refresh token in the appropriate place in the browser (local storage, cookie, etc.) in order for the authentication to complete and for any requests to be considered valid by the server hosting the application.
The syntax for this URL is as follows:- http://<url of the website to crawl>/<custom page used to authenticate based on the token received>?access={AccessToken}&idToken={IdToken}
- Example: http://localhost:3000/oAuthInitialization?access={AccessToken}&idToken={IdToken}
- http://<url of the website to crawl>/<custom page used to authenticate based on the token received>?access={AccessToken}&idToken={IdToken}
-
See Okta configuration example: oAuth Setup Example
Content Configuration Specifics
The connector does not extract the meta tags from the HTML pages crawled.
-
Instead, please configure Connectivity Hub to extract the tags.
-
Please refer to the ConnectivityHub documentation on how to extract metadata from indexed documents.