How to Setup and Configure the iManage Connector
All BA Insight connectors can be downloaded from Right Answers under Knowledge > BA Insight > Product Downloads > Connectors.
This connector is installed with the same generic steps as any BA Insight connector.
Satisfy the Prerequisites for your connector before installing.
Configuration specifics are detailed below.
Note: This connector supports one installation per tenancy.
Before You Start
You must satisfy the Prerequisites before continuing, including acquiring your:
- Client ID
- Client Secret
- redirect URL
See the Prerequisites topic for this information.
Upgrading the iManage Connector
When upgrading to the BA Insight iManage Connector v2.0.0.0-19672 (or later) from an older version (earlier than 19672) you must perform the following:
- Reset the index
- Run a full crawl
How to Authorize the Connector
The iManage connector must be authorized with appropriate permissions to your iManage content.
Use the following steps to grant the iManage connector access to your iManage tenancy:
- On the server where the iManage connector is installed, navigate to: http://localhost: number>/OAuth.aspx
- <port number>: This is the port number that you selected during the connector installation.
- Default port is 2292.
- Default port is 2292.
- <port number>: This is the port number that you selected during the connector installation.
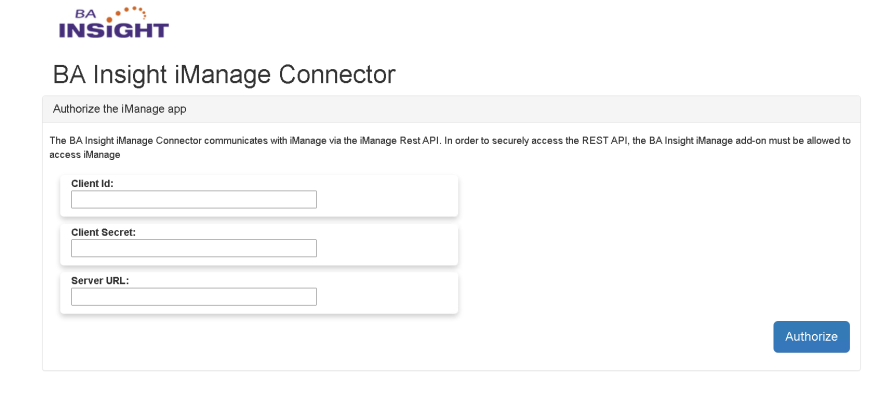
- Configure your iManage connector
- The iManage connector is pre-configured to work with the US Region and comes with the BA Insight application ID for the OAuth authorization process.
- If you wish to use it, leave the text boxes empty.
- If you want to use the connector in a different region or register your own application, follow the instructions below:
- Create a new application. For this you have to contact your iManage administrator
- On the server where the iManage connector is installed:
- Navigate to: http://localhost: number>/OAuth.aspx
- Enter your Client Id and Client Secret
- If you are indexing an iManage tenancy from a different data center, change the Server URL path.
- For more information see the iManage Cloud Speedtest.
- The iManage connector is pre-configured to work with the US Region and comes with the BA Insight application ID for the OAuth authorization process.
- Click Authorize to start the authorization process.
-
Log into iManage using an account that has READ access to all content that you want to crawl.
Note: This connector has the same permissions in iManage as the user account that is used to log in here.
* If multiple instances of the connector are deployed, you must use different user accounts for each connector instance.
- Click Allow.
- If the authorization is successful, the following message is displayed:
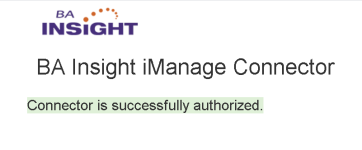
- If the authorization is unsuccessful, ensure you are using the correct user or service account and that account contains the correct permissions.
Connection Configuration
- Add the iManage Instance URL:
_1039x157.png)
Content Filters
Filter
You can filter (refine) crawled items by specifying the item properties in JSON format in the field found under the Content Filters tab.
- Optional setting
- Used for content filtering
- To refine crawled items, specify properties in a JSON format in the Content Filters tab
- Supports multiple values separated by comma (see
custom1in the example below) - "exclude_emails": true improves performance significantly
- For date fields, only ISO format is supported:
yyyy-MM-ddTHH\:mm\:ss.fffffffzzz
Examples:
2008-09-22T13:57:31.2311892-04:00
2008-09-22T14:01:54.9571247Z
2008-09-22T14:01:54
2008-09-22
Example
{
    "exclude_emails": true,
    "email_only": false,
    "class": "",
    "subclass": "",
    "container_id": "",
    "author": "",
    "document_number": "",
    "type": "",
    "edit_date_from": "",
    "edit_date_to": "",
    "create_date_from": "",
    "create_date_to": "",
    "custom1": "value1, value2, value3",
    "custom2": "",
    "custom3": "",
    "custom4": "",
    "custom5": "",
    "custom6": "",
    "custom7": "",
    "custom8": "",
    "custom9": "",
    "custom10": "",
    "custom11": "",
    "custom12": "",
    "custom13": "",
    "custom14": "",
    "custom15": "",
    "custom16": "",
    "custom17": "",
    "custom18": "",
    "custom19": "",
    "custom20": "",
    "custom29": "",
    "custom30": ""}