How to Upgrade SmartHub
Use the following instructions to upgrade BA Insight SmartHub.
WARNING! When you upgrade SmartHub, your local SmartHub files are overwritten.
You must save or backup your local files to avoid losing any critical data or customizations.
Note: If you upgrade your Elasticsearch backend to version 7 (v7.5.1), you must use SmartHub v5.x.
If you use Elasticsearch version 6.x, use SmartHub v4.x.
Note:Your Elasticsearch and Kibana (for the SmartHub Analytics component) versions must match.
For example, if you use Elasticsearch v7.6, you must also use Kibana v7.6.
Note: The Custom Settings file was also upgraded and it should follow the following format:
SH.ModuleName= SH.ModuleName|| {};
SH.ModuleName.CustomSettings = {};
SH.ModuleName.PathsToExclude = [];
The Plugins module has been changed to follow the same pattern:
SH.Plugins = SH.Plugins || {};
SH.Plugins.CustomSettings = {};
Note:The following components have their configuration overwritten when you upgrade SmartHub.
Make sure to back up their configuration and manually re-add them after SmartHub is updated.
-
Learn-To-Rank Scheduled Task
-
Any tool under the /Tools folder (Example: Analytics Exporter, TaxonomyPreloader, etc)
Before You Start
- The upgrade process overwrites local files, including files that contain any customizations you may have created.
- Move your customized files to an outside directory and then copy them back into your active SmartHub directory, when your SmartHub directory contains the new, v6.0 SmartHub files.
- Create a backup of your entire SmartHub installation directory to ensure you can restore your settings and do not loose any important customization information.
Note!!: If you have made customizations to any native, out-of-the-box files, such as web.config, those customizations are overwritten during the SmartHub upgrade process. - Create a backup of your entire Analytics installation directoryfor the same reason as above.
- Backup any modified native files, such as web.config BEFORE PROCEEDING.
Download New Version of SmartHub
-
Download and unzip the latest release of SmartHub (a single .zip file) from the Right Answers Portal if you have not already done so.
-
Navigate to Right Answers > Knowledge > BA Insight > Product Downloads > SmartHub.
-
Save the file to the server to host SmartHub.
-
Right-click the downloaded .zip file and check the "Unblock" check box.
-
Click OK.
-
Extract the contents of the .zip file.
-
Files to Upgrade
If you are upgrading from SmartHub v5.5 or earlier, follow the steps below.
If you are upgrading from a previous SmartHub v6.x version, skip this sub-topic.
-
The upgrade procedure requires you update all SmartHub pages
-
This topic does not deal with upgrades to your custom SmartHub site pages.
-
Contact BA Insight support for help in upgrading your custom site pages.
-
-
The topics below describe how to upgrade the default out-of-the box HTML pages.
-
Use the graphics and steps below to upgrade each of the HTML pages:
-
Landing.html
-
Index.html
-
Results.html
-
SmartAutomations.html
-
Upgrade Procedure
Read and satisfy all of the bullets in the topic "Before You Start," above.
Use the following procedure to upgrade your instance of SmartHub:
- Open IIS Manager and click Application Pools from the left navigation pane.
- Select your SmartHub Application Pool, which was setup and named when you first installed SmartHub, and then click Stop from the Actions menu on the right side pane.
-
Copy the extracted files into your current SmartHub installation directory, such as "C:\Program Files\BA Insight\SmartHub\SmartHub-5.6". Note: This overwrites the existing files.
Note: If you change the name of your SmartHub installation directory when upgrading, SmartHub will not load.
You must instruct IIS to use the new directory path (on the right side, under "Edit Site > Basic Settings..."). See the graphic below.
For this reason, you may decide to name your SmartHub installation directory generically, with no version in its title.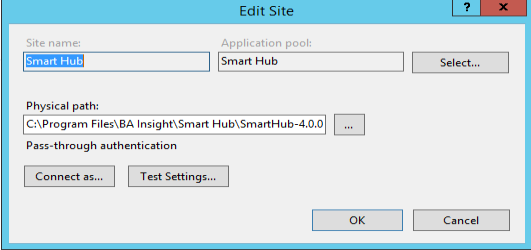
- Any customizations made to your old, SmartHub web.config file must be merged into your new SmartHub v5.x web.config file.
These changes are typically bindings settings. See How to Set Access and User Authentication.
Recall, you backed up modified files before starting your upgrade. -
Copy any customized files back into your SmartHub installation directory, such as customized HTML or settings files for pages such as:
-
Landing
-
Index
-
Results
-
SmartAutomations
-
-
Open IIS Manager and click Application Pools.
-
Select your SmartHub Application Pool, which was set up and named when you first installed SmartHub, and then click Start from the Actions menu.
-
If your HTML pages use any of the unsupported components you must update them. See the sections below.
-
To test if the upgrade was successful, open a new browser window, enter your SmartHub URL and run a test query.
-
At this point you will see either:
-
Your SmartHub site landing page
or
-
A blank page
-
-
Open a console window in your web browser for additional details.
-
The console will state that some Coveo Content Container components are unsupported and require upgrade.
-
To do this, use the topic below.
-
For more information, see How to Add the Content Containers Module.
-
- For help with any installation errors, contact BA Insight support.
- Proceed to the next section.
If using an Elasticsearch backend, before your upgrade from SmartHub version 4 to 5 is complete, see Additional Steps: Update Elastic Backend Settings.
Landing.html Page Diagram
Index.html Page Diagram
Results.html Page Diagram
Results.html Page Diagram - with Content-by-Search enabled
SmartAutomations.html Page Diagram
Upgrade Details
The following table displays the SmartHub HTML page structure: v5.x vs. v6.0
SmartHub v5.x uses a component ("Old Component" in the table below) to declare various SmartHub modules
These components are not supported by SmartHub v6.0
These components are defined as <div classes>.
For example, <div class="CoveoSearchbox">
Settings (parameters) for each component are defined, nested, within each <div>
SmartHub v6.0 uses a component ("New Component" in the table below) to declare various SmartHub modules
These components are defined as <div classes>. For example, <div class="sh-search-section">
Settings (parameters) for each component are defined in the settings (.js) file for each of your SmartHub site's HTML page
Example:
HTML page: Results.html
Page Settings: ResultsPageSettings.js (custom settings file: ResultsCustomSettings.js)
SmartHub Page v5.x Component v6.0 Component
Landing.html
Index.html
Results.html
SmartAutomations.html
CoveoResultList sh-result-list
CoveoContentBySearch sh-content-by-search
CoveoSearchBox sh-search
CoveoSort sh-sort
CoveoQuerySummary
sh-query-summary
CoveoPager sh-pager
CoveoResultsPerPage sh-results-per-page
CoveoErrorReport sh-error-report
CoveoSmartPreviews
No new component.
Controlled by the page custom settings .js file
raw
result
coveo-result-frame
sh-cbs-item
CoveoResultLink
sh-result-link
CoveoActionBar
cbs-action-bar
CoveoFieldValue sh-field-value
Upgrade Procedure
Read and satisfy all of the bullets in the topic "Before You Start," above.
Use the following procedure to upgrade your instance of SmartHub:
Open IIS Manager and click Application Pools from the left navigation pane.
Select your SmartHub Application Pool, which was set up and named when you first installed SmartHub, and then click Stop from the Actions menu on the right side pane.
Copy the extracted files into your current SmartHub installation directory (which you backed-up earlier), such as "C:\Program Files\BA Insight\SmartHub\SmartHub-5.0.1.0". Note: This overwrites the existing files.
If you change the name of your SmartHub installation directory when upgrading, SmartHub will not load.
You must instruct IIS to use the new directory path (under "Edit Site>Basic Settings..."). See the graphic below.
For this reason, you may decide to name your SmartHub installation directory generically, with no version in its title.
Any customizations made to your old, SmartHub web.config file must be merged into your new SmartHub web.config file.
These changes are typically bindings settings. See How to Set Access and User Authentication.
Copy any customized files back into your SmartHub installation directory, such as customized HTML or settings files for pages such as:
Landing
Index
Results
SmartAutomations
Open IIS Manager and click Application Pools.
Select your SmartHub Application Pool, which was set up and named when you first installed SmartHub, and then click Start from the Actions menu.
If your HTML Pages use any of the unsupported components you must update them. See the sections below.
To test if the upgrade was successful, open a new browser window, enter your SmartHub URL and run a test query.
At this point you will see either:
Your SmartHub site landing page
or
A blank page
Open a console window in your web browser for additional details.
The console will state that some Coveo Content Container components are unsupported and require upgrade.
To do this, use the topic below.
For more information, see How to Add the Content Containers Module.
For help with any installation errors, contact BA Insight support.
How to Upgrade Your Page Settings (to use ContentContainers)
Identify Unsupported Content
Some Coveo components are no longer supported and require upgrade.
For example, using the console screenshot of the file Index.html above, it is clear that <div> CoveoContentBySearch is no longer supported.
The code must be removed from the HTML page it is on (a custom Index.html page in this case), moved to a custom settings file, and referenced from the HTML page (the custom Index.html page, in this case).
This is shown, further below.
ContentContainer within the HTML page
All Available ContentContainer Settings (Found in DefaultModuleSettings.js)
ContentContainer Setting Descriptions and Examples
The content container settings in the table here: How to Add the Content Containers Module control the content container of a SmartHub site's HTML page (such as Index.html).
Example: SmartHub Site Index.html (Personalized Card Recommendations)
The cards shown in the screenshot below are controlled by the code in the screenshot below - "SmartHub v5.2 Index.html code."
SmartHub v5.2 Index.html code
Content Container Format: version 5.x vs. version 6.0
The imageRefer back to bottom part of the wireframe above...
The image below:
Corresponds with the lower part of the Index.html Page Diagram, above.
Compares the SmartHub v5.x and v6.0 HTML page formats
Index.html page is used in this example.
SmartHub v5.x vs. v6.0
SmartHub v5.x uses the deprecated CoveoContentBySearch, shown on the right side.
The settings for each container on this page are embedded in the page, as shown.
For example, the InterestsContainer and its settings are highlighted in the screenshot.
SmartHub v6.0 uses the supported classes and divs, in this case, the content-by-search-selection, shown on the left side.
The settings for each container on this page are contained in the custom settings .js file for the page, shown below.
For example, the InterestsContainer and its settings are highlighted in the screenshot.
How Many Content Containers Do I Need?
The following graphic shows:
SmartHub v5.2 Index HTML file on the right
SmartHub v6.0 custom settings .js file on the left
As the graphic shows your custom settings file for the SmartHub HTML page (Index.html, in this case), MUST have an entry for each content container.
In this example, the content containers represent Recommendation categories from the Index.html page.
Settings which Remain from v5.x
The <div> that names the container
The value of the data-preference property
SmartHub v6.0: Index.html
Settings which have Changed from v5.x
All content container settings, with the exception of the two listed above, have been moved
Settings are no longer stored in the HTML page file
Settings are stored in:
The page's custom settings .js file.
A provided, customizable HTML template
Ex: gridResultItemTemplate.html
In the screenshot "SmartHub v5.x Index.html (left) and SmartHub v6.0 gridResultItemTemplate.html (right)" below, you see the SmartHub v5.x Index HTML settings now live in the new SmartHub v6 template file.
For complete content container settings see the table here: How to Add the Content Containers Module
SmartHub v6.0: IndexCustomSettings.js
SmartHub v5.x Index.html (left) and SmartHub v6.0 gridResultItemTemplate.html (right)
SmartHub v6.0 Upgrade Examples: Replace Old Code with New
In the examples that follow, the following actions are performed:
The v5.x code in the HTML page is removed and replaced with the equivalent SmartHub v6.0 <div> entry.
For example, in the screenshot below, CoveoSearchBox from SmartHub v5.x is replaced with sh-search
Next, the <div> class settings (Search Box settings, in the screenshot below) are removed from the HTML file and inserted into the page's custom settings (.js) file.
In the example below, the page Results.html contains the new <div> code sh-search-section.
Settings for the page Results.html are shown at right (ResultsCustomSettings.js).
The new code - sh-search-section - is referenced in the custom settings file, shown on the right.
Note: You may wish to copy all the existing settings for a given <div> entry from your HTML file into a blank page in your editor first, and then, lastly, copy them back into your custom settings file.
Info: All available settings for all SmartHub modules are stored in the file DefaultModuleSettings.js at <SmartHub-root>\modules\SmartHubResourceLoader
Migrating the Main Results
Example
HTML markup for a ResultList component:
1
2
3
4
5
6
7
8
9
10
11
12
13
14
15
16
17
18
19
20
21
22
23
24
25
26
27
28
29
30
31
32
33
34
35
36
37
38
39
40
41
42
43
44
45
46
47
48
49
50
51
52
53
54
55
56
57
58
59
60
61
62
63
64
65
66
67
<div class="CoveoResultList" data-caption="List" data-layout="bailist" data-fields-to-include="@clickUri,@Title,@excerpt,@title,@JobTitle,@Department,@AboutMe,@escbasecrawurl,@WorkEmail">
<script type='text/underscore' class='result-template' data-condition="isUserProfile != 'true'">
<div class="coveo-result-frame core-result">
<div class="CoveoOpenPreviewAction"></div>
<div class="core-result-info-wrapper">
<div class="core-result-info">
<div class="core-info" >
<a class="CoveoResultLink" rel='noreferrer' data-always-open-in-new-window="true"></a>
</div>
<div class="core-info" >
<div class="CoveoFieldValue result-summary" data-field="@excerpt" data-caption="Excerpt" data-html-value='true'></div>
</div>
<div class="core-info widgets-placeholder" ></div>
</div>
<div class="CoveoActionBar core-action-bar" >
<a class='CoveoResultLink prettyURL sh-float-left' rel='noreferrer' target="_blank">
<span title="<%= (raw.filetype||'document') + " from " + (raw.contentsource || raw.clickUri || 'Source') %>"><%= (SH.utils.getSourceSystemImage(raw.clickUri, raw.ContentSource) || raw.ContentSource) %></span>
<span title="<%= raw.clickUri %>"><%= SH.utils.prettifyURL(raw.clickUri) %></span>
</a>
<div class="open-preview-button hidden sh-float-right">
<i class="sh-icon-button far fa-eye"></i>
<span>Preview</span>
</div>
</div>
</div>
</div>
</script>
<script type='text/underscore' class='result-template' data-condition="isUserProfile == 'true'">
<div class="coveo-result-frame core-result">
<div class="CoveoPreview sh-float-left" data-small="true" data-shape="round"></div>
<div class="core-result-info-wrapper sh-float-left">
<div class="core-result-info">
<div class="core-info" >
<a class="CoveoResultLink" rel='noreferrer' data-always-open-in-new-window="true"></a>
</div>
<div class="core-info" >
<div class="CoveoFieldValue" data-field="@AboutMe" data-caption="AboutMe" data-html-value='true'></div>
</div>
</div>
<div class="core-action-bar" >
<span class="prettyURL sh-float-left">
<span>
<span class="CoveoFieldValue" data-field="@Department" data-caption="Department" data-html-value='true'></span>
</span>
<span> › </span>
<span class="CoveoFieldValue" data-field="@JobTitle" data-caption="JobTitle" data-html-value='true'></span>
</span>
<div class="sh-float-right action-bar-button">
<a class='CoveoResultLink' rel='noreferrer' data-href-template='sip:${WorkEmail}'>
<i class="sh-icon-button far fa-comments"></i>
<span>Skype</span>
</a>
</div>
<div class="sh-float-right action-bar-button">
<a class='CoveoResultLink' rel='noreferrer' data-href-template='mailto:${WorkEmail}'>
<i class="sh-icon-button far fa-envelope"></i>
<span>Mail</span>
</a>
</div>
</div>
</div>
</div>
</script>
</div>
Steps to migrate to ContentContainers:
Create an HTML template for each script used in the ResultList component.
In the new HTML templates replace:
"raw" with "result"
"coveo-result-frame" with "sh-result-item"
"CoveoResultLink" with "sh-result-link"
"CoveoActionBar " with "sh-action-bar"
"CoveoFieldValue" with "sh-field-value"
Via your custom settings file (default is <SmartHub_install_dir>\modules\SmartHubResourceLoader\CustomSettingsTemplate.js) add a new container to the section SH.ContentContainers.CustomSettings.
Point to your templates in the ItemTemplatePicker option.
In the HTML page replace the full ResultList with a new <div> element that has the class or id used in step 3 in the ParentContainerSelector option.
HTML Templates Sample
For the script that has data-condition="isUserProfile != 'true'".
The template will be saved as an HTML file name "myItemTemplate".
The name of the template and the location it is saved to is your choice.
1
2
3
4
5
6
7
8
9
10
11
12
13
14
15
16
17
18
19
20
21
22
23
24
25
26
27
28
29
30
31
32
33
34
35
36
<!-- <div class="coveo-result-frame core-result"> becomes next line instead -->
<div class="sh-result-item core-result">
<div class="core-result-info-wrapper">
<div class="core-result-info">
<div class="core-info" >
<!-- <a class="CoveoResultLink" rel='noreferrer' data-always-open-in-new-window="true"></a> becomes next line instead -->
<a class="sh-result-link analytics-track-openItem" href="<%= result.clickUri %>" title="<%= result.title %>"><%= result.title %>
</div>
<div class="core-info" >
<!-- <div class="CoveoFieldValue result-summary" data-field="@excerpt" data-caption="Excerpt" data-html-value='true'></div> becomes next line instead -->
<div class="sh-field-value">
<div><%= result.excerpt %></div>
</div>
</div>
<div class="core-info widgets-placeholder" ></div>
</div>
<!-- <div class="CoveoActionBar core-action-bar" > becomes next line instead -->
<div class="sh-action-bar core-action-bar" >
<!-- <a class='CoveoResultLink prettyURL sh-float-left' rel='noreferrer' target="_blank"> becomes next line instead -->
<a class='sh-result-link prettyURL sh-float-left' target="_blank" href="<%= result.clickUri %>">
<span title="<%= (result.filetype||'document') + " from " + (result.contentsource || result.clickUri || 'Source') %>"><%= (SH.utils.getSourceSystemImage(result.clickUri, result.ContentSource) || result.ContentSource) %></span>
<span title="<%= result.clickUri %>"><%= SH.utils.prettifyURL(result.clickUri) %></span>
</a>
<div class="open-preview-button hidden sh-float-right">
<i class="sh-icon-button far fa-eye"></i>
<span>Preview</span>
</div>
</div>
</div>
</div>
For the script that has data-condition="isUserProfile == 'true'", see the following:
The template will be saved as an HTML file name "myPeopleTemplate".
The name and save location is your choice.
1
2
3
4
5
6
7
8
9
10
11
12
13
14
15
16
17
18
19
20
21
22
23
24
25
26
27
28
29
30
31
32
33
34
35
36
37
38
39
40
41
42
43
44
45
46
47
48
49
50
51
52
53
54
!-- <div class="coveo-result-frame core-result"> becomes next line instead -->
<div class="CoveoPreview sh-float-left" data-small="true" data-shape="round"><img src="<%= result.blobUrl %>"></div>
<div class="core-result-info-wrapper sh-float-left">
<div class="core-result-info">
<div class="core-info" >
!-- <a class="CoveoResultLink" rel='noreferrer' data-always-open-in-new-window="true"></a> becomes next line instead -->
<a class="sh-result-link analytics-track-openItem" href="<%= result.clickUri %>" title="<%= result.title %>"><%= result.title %></a>
</div>
<div class="core-info" >
!-- <div class="CoveoFieldValue" data-field="@AboutMe" data-caption="AboutMe" data-html-value='true'></div> becomes next line instead -->
<div class="sh-field-value"><%= result.AboutMe %></div>
</div>
</div>
<div class="core-action-bar" >
<span class="prettyURL sh-float-left">
<span>
!-- <span class="CoveoFieldValue" data-field="@Department" data-caption="Department" data-html-value='true'></span> becomes next line instead -->
<span class="sh-field-value"><%= result.Department %></span>
</span>
<span> › </span>
<!-- <span class="CoveoFieldValue" data-field="@JobTitle" data-caption="JobTitle" data-html-value='true'></span> becomes next line instead -->
<span class="sh-field-value"><%= result.JobTitle%></span>
</span>
<div class="sh-float-right action-bar-button">
!-- <a class='CoveoResultLink' rel='noreferrer' data-href-template='sip:${WorkEmail}'> becomes next line instead -->
<a class='sh-result-link' data-href-template='im:<sip:${"<%= result.WorkEmail %>"}' href='im:<sip:<%= result.WorkEmail %>>'>
<i class="sh-icon-button far fa-comments"></i>
<span>Skype</span>
</a>
</div>
<div class="sh-float-right action-bar-button">
<!-- <a class='CoveoResultLink' rel='noreferrer' data-href-template='mailto:${WorkEmail}'> becomes next line instead -->
<a class='sh-result-link' data-href-template='mailto:${"<%= result.WorkEmail %>"}' href='mailto:<%= result.WorkEmail %>'>
<i class="sh-icon-button far fa-envelope"></i>
<span>Mail</span>
</a>
</div>
</div>
</div>
</div>
SH.ContentContainers.CustomSettings Sample
1
2
3
4
5
6
7
8
9
10
11
12
13
14
15
16
17
18
19
20
21
22
23
24
25
26
27
ContentContainers: {
SampleContentContainerWithDefaultValues: {
ParentContainerSelector: '.sh-main-results-container',
Title: '',
ControlTemplatePath: SH.RootLevelURL + "/modules/ContentContainers/templates/controlResultTemplate.html",
ItemTemplatePicker: function (result) {
if (result.isUserProfile == 'true') /* These are the same conditions used in on the scripts inside the ResultList component */
return SH.RootLevelURL + "/myFolder/myPeopleTemplate.html";
return SH.RootLevelURL + "/myFolder/myItemTemplate.html";,
QueryText: '',
QueryTemplate: '{searchboxquery} FederatorBackends:"*"',
SourceId: 'b29924a9-ec32-4c10-8892-a544b69ee121',
RowsPerPage: 5,
EnablePagination: false,
EnableCountTotal: false,
EnableSmartPreviews: true,
EnableContentIntelligence: true,
EnableResultFeedback: true,
EnableRatings: false,
ShowSort: false,
SortProperties: 'Rank,Date',
SortDirection: 'Descending,Ascending',
IsMainResults: true,
FieldsToInclude: 'clickUri,title,Rank,ContentSource,FileExtension,excerpt,SDFUrl,LastModifiedTime,DisplayAuthor,isUserProfile,WorkEmailclickUri,Title,JobTitle,Department,AboutMe,escbasecrawurl,WorkEmail,UserName',
TriggerNewQueryOn: 'deferredQuerySuccess'
}
}
Migrating From a Content-By-Search Component
Example
HTML markup for a ContentBySearch Component:
1
2
3
4
5
6
7
8
9
10
11
12
13
14
15
16
17
18
<div class="CoveoContentBySearch " data-query-text='* FederatorBackends:"*"' data-source-id="b29924a9-ec32-4c10-8892-a544b69ee121" data-results-per-page='5' data-hide-until-first-query="false">
<div class="CoveoResultList" data-layout="bailist" data-infinite-scroll-container-selector='#InterestsCBS' data-fields-to-include='@Title,@ContentSource,@date,@clickUri,@DisplayAuthor,@filetype'>
<script type='text/underscore' class='result-template'>
<div class="coveo-result-frame core-result">
<div class="core-result-info-wrapper">
<div class="core-result-info">
<div class="core-info" >
<a class="CoveoResultLink" data-always-open-in-new-window="true"></a>
</div>
<div class="core-info" >
<div class="CoveoFieldValue result-summary" data-field="@excerpt" data-caption="Excerpt" data-html-value='true'></div>
</div>
</div>
</div>
</div>
</script>
</div>
</div>
Steps to migrate to ContentContainers:
Create an HTML template for each script used in the ResultList component.
In the new HTML templates replace:
"raw" with "result"
"coveo-result-frame" with "sh-cbs-item"
"CoveoResultLink" with "sh-result-link"
"CoveoActionBar " with "cbs-action-bar"
"CoveoFieldValue" with "sh-field-value"
Via your custom settings file add a new container to the section SH.ContentContainers.CustomSettings.
Point to your templates in the ItemTemplatePicker option.
In the HTML page replace the full Content-By-Search with a new <div> element that has the class or id used in step 3 in the ParentContainerSelector option.
HTML Templates Sample
1
2
3
4
5
6
7
8
9
10
11
12
13
14
15
16
17
18
19
20
<!-- <div class="coveo-result-frame core-result"> becomes next line instead -->
<div class="sh-cbs-item">
<div class="core-result-info-wrapper">
<div class="core-result-info">
<div class="core-info" >
<!-- <a class="CoveoResultLink" data-always-open-in-new-window="true"></a> becomes next line instead -->
<a class="sh-result-link" title="<%= result.title %>" href="<%= result.clickUri %>"> <%= result.title %> </a>
</div>
<div class="core-info" >
<!-- <div class="CoveoFieldValue result-summary" data-field="@excerpt" data-caption="Excerpt" data-html-value='true'></div> becomes next line instead -->
<div class="sh-field-value result-summary"><%= result.excerpt%></div>
</div>
</div>
</div>
</div>
SH.ContentContainers.CustomSettings Sample
1
2
3
4
5
6
7
8
9
10
11
12
13
14
15
ContentContainers: {
SampleContentContainerWithDefaultValues: {
ParentContainerSelector: '.sh-cbs-container',
Title: 'MyCBS',
ControlTemplatePath: SH.RootLevelURL + "/modules/ContentContainers/templates/cbsControlTemplate.html",
ItemTemplatePicker: function (result) {return SH.RootLevelURL + "/myFolder/myTemplate.html";,
QueryText: '',
QueryTemplate: '{searchboxquery} FederatorBackends:"*"',
SourceId: 'b29924a9-ec32-4c10-8892-a544b69ee121',
RowsPerPage: 5,
IsMainResults: false,
FieldsToInclude: 'clickUri,title,Rank,ContentSource,FileExtension,excerpt,SDFUrl,LastModifiedTime,DisplayAuthor,isUserProfile,WorkEmailclickUri,Title,JobTitle,Department,AboutMe,escbasecrawurl,WorkEmail,UserName',
TriggerNewQueryOn: 'load'
}
}
How to Migrate to SearchBox
Steps to migrate the SearchBox:
Find the "coveo-search-section" containing the "CoveoSearchbox" in your page's html
HTML SearchBox example from SmartHub 5.x version
1
2
3
<div class="coveo-search-section sh-header-top sh-column-middle">
<div class="CoveoSearchbox" data-placeholder="Search..." data-add-scoped-search="true" data-show-keep-refiners="true"></div>
</div>
Replace the "coveo-search-section" class with the new SearchBox class, for example "sh-search-section"
HTML SearchBox example from SmartHub 6.x version
1
2
3
<div class="sh-search-section sh-header-top sh-column-middle">
<div class="CoveoSearchbox" data-placeholder="Search..." data-add-scoped-search="true" data-show-keep-refiners="true"></div>
</div>
Open the page's settings (.js) file and update the SearchBoxSettings with your existing settings for Scoped Search and KeepRefiners.
Your existing settings can be seen in the HTML for CoveoSearchBox
1
2
3
4
5
6
7
8
9
10
11
12
13
14
15
".sh-search-section":{
Enabled: true,
SearchBoxTemplatePath: SH.RootLevelURL + "/modules/SearchBox/templates/searchboxTemplate.html",
ScopedSearchTemplatePath: SH.RootLevelURL + "/modules/SearchBox/templates/scopedSearchTemplate.html",
KeepRefinersTemplatePath: SH.RootLevelURL + "/modules/SearchBox/templates/keepRefinersTemplate.html",
ShowScopedSearch:true,
ShowKeepRefiners:true,
RemoveResultsOnClear:true,
ShowSelectedScope:false,
EnableDuplicateSearch:true,
ModuleDetails: {
SearchBoxPlaceholder: "Search...".toLocaleString(),
KeepRefinersLabel: "Keep Refiners".toLocaleString()
}
}
Remove the CoveoSearchbox element from the HTML
HTML SearchBox example from SmartHub 6.x version
1
2
<div class="sh-search-section sh-header-top sh-column-middle">
</div>
Migrate User Profile Providers and User Picture Providers
User Profile Providers and User Picture Providers are no longer backward compatible with 5.x. You need to reconfigure them.
If you don't remember the settings that you need to use then check the current configuration in 5.x.
Go to SmartHub Admin → User Profile Settings .
Remove current providers
Click Configure to add new providers
Note: SharePoint Online Provider has been replaced by Microsoft O365 Provider.
Encrypt SmartHub Files
Follow the instructions here: