How to Use the Taxonomy Editor
Taxonomies Available for Auto-tagging
The taxonomies that are available for auto-tagging purposes are listed below the Taxonomies List on the Manage Taxonomies page.
-
Each of these taxonomies are located in the SharePoint term store.
-
For this reason, each entry corresponds to a term set in the SharePoint Managed Metadata Service (MMS).
-
Use the test bench to see whether a taxonomy node is matched by any of the documents in the index.
-
Documents are determined to be a match when one or more of the documents is a match for the rule.
-
Each taxonomy node is delimited by a rule with one , or more terms, which must be matched in order for the taxonomy node/term to return a match.
To see test results, do not select all of the fields, or none of the fields in the Select column pop-up window.
How to Change the Taxonomy Editor View
- Click the name of the taxonomy that you want to edit. The Taxonomy Editor, or Test Bench, interface is displayed.
- Click
 (to the right of the Properties tab) and the Options pop-up window appears:
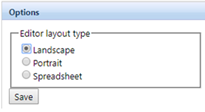
- Click the radio button that corresponds to the layout that you want to use:
- Landscape:
- Default selection.
- This selection re-sizes the interface for wide-screen monitors.
- Portrait:
- This selection is re-sizes the screen for traditional and laptop monitors.
- Spreadsheet:
- This selection is recommended when you choose to edit taxonomy rules as a group and there is no need to see your matched documents.
- To expand this taxonomy, click the plus button (+)
Note: When you select the spreadsheet view, you can use the drop-down operations that are available in the taxonomy pane to modify your taxonomy.
- Landscape:
How to Use Term Store Operations
Term Store operations affect the selected taxonomy and you can see these changes in the test bench.
-
For example, if you add a taxonomy, or a taxonomy node in the Term Store, the change is also made in the Taxonomy Management page.
-
The same operations made in the Taxonomy Management page appear in the Term Store.
To make taxonomy changes in the Term Store, follow these steps:
- Go to the Central Administration. Click Manage Service Applications.
- The SERVICE APPLICATIONS page is displayed.
- Make sure that the Managed Metadata Service (MMS) is started.
- Make sure that the Managed Metadata Service (MMS) is started.
- Managed Metadata Service: Click and the Site Settings - Term store page appears:
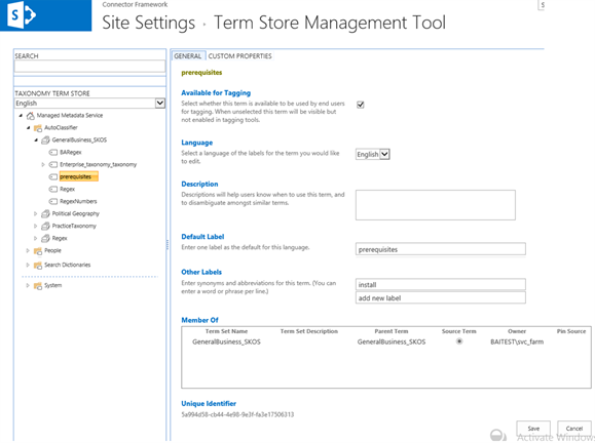
- Select the taxonomy and taxonomy node that you want to see or edit such as GeneralBuiness_SKOS > Prerequisites.
- Right-click and select:
Create Term: Add a new term to the Term Store and to your taxonomy.
Copy Term Set: Duplicate the selected term set and taxonomy.
Reuse Terms: Select a term and this operation to replicate the selected term (and any children of this term) in the selected location.
Pin Term with Children: Add the selected term with any children.
Move Term Set: Add the term set to the new location.
Delete Term Set: Remove the selected term set.
- (As required) Use the appropriate tabs and panes on the right-hand side of the page:
Available for tagging: By default all terms are available for tagging. Deselect this checkbox and your documents are not tagged with this tag.
Language: Select the language for your tags using the drop-down arrow.
Description: Enter information about this tag here.
Default Label: This is the node name.
Other Labels: Add additional labels and these labels appear in the test bench.
Note: The labels that you add here are immediately added to the selected node in the Test Bench.Member Of: See the taxonomies where this label is a member.
Unique Identifier: This is the unique number that is assigned to the selected label.