Index Your Own Database Using the SQL Connector
Use the SQL Connector, which is installed as part of the Connectivity Hub to access your third-party SQL databases.
Tip: As you add your information, click  to see the tabs that require field entry information.
Add Your SQL Database Connection
Use the following steps to add a SQL connection.
- From the Connections page, select New > SQL connection.

- The Connection Info page appears.

- Title: Enter the name of your connection. This must be a unique name.
- Data Provider: By default, "SqlServer" is entered.
Specify the General Settings for Your Database Connection
- From the Connections page, select <your SQL Connection>>
 >Edit. Click the General Settings tab.
 - Connection Mode:
- Default: Basic
- "Advanced" mode is described at the end of this section.
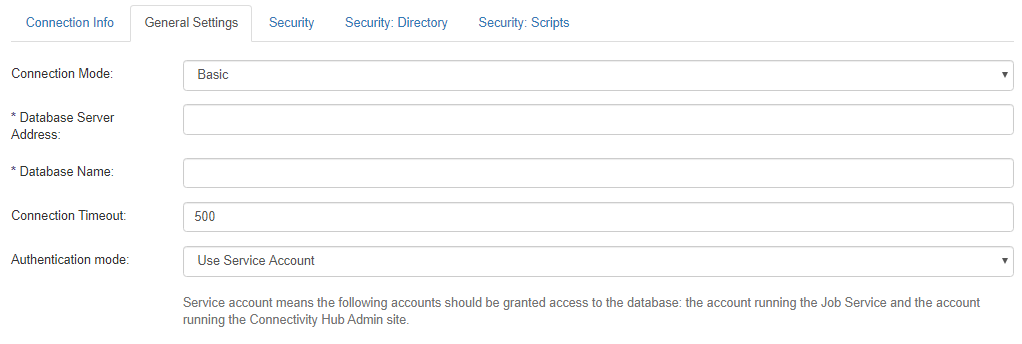
- Database Server Address: Enter your database server address.
- Database Name: Enter your database name.
- Connection Timeout: Default setting is 500 (seconds). Set as desired.
- Authentication mode: The account used to run the Job service and the Connectivity Hub Admin website.
Specify one of the following:- Use Service Account:
- Default entry.
- No additional information required.
- Specify User Account:
- Enter the account credentials for a single user.
- Use Service Account:
Advanced Mode
- Connection Mode: Use the drop-down list box to select Advanced.

- In Advanced mode, Connection String is required.
Standard formats for connection strings:- SQL:
Server=SERVERORIP;Database=DBNAME;User ID=USERID;Password=PASSWORD;
- Oracle:
Server=SERVERORIP;PORT=1521;SID=samples;User Id=USERID;Password=PASSWORD;
- See The Connection Strings Reference for samples of connection strings for various databases.
- SQL:
- All other fields are listed above in Basic Mode.
Next Steps
Test your connection. See How to Test Your Connector Configuration.