Indexing Using Quick Mode
For information about your specific connector, see your connector's documentation.
The following topics describe how to index using Quick mode (BA Insight application wizard).
About Indexing with Connectivity Hub
Use the instructions below to define a new Content Source to index,
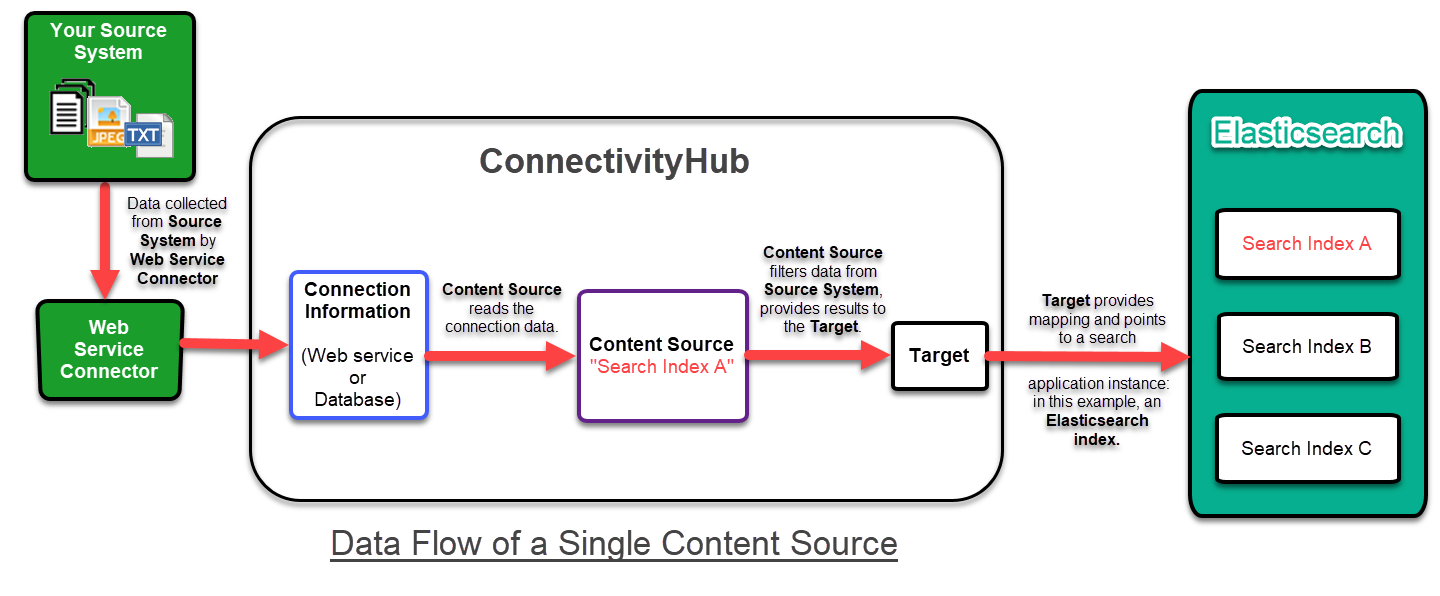
When you define a new Content Source, you configure the following components shown in the diagram below:
- Connector (a Web Service connector in the example, and steps below)
- Connection
- Content Source
- Target
Before you continue, read the basic facts about indexing with Connectivity Hub below, and view the diagram.
- When you define a new Content Source, you specify the Source System repository that your Connector crawls to extract data, such as Documentum or SharePoint Online.
- In Connectivity Hub, there is one index created per content source for both Elasticsearch and Azure Cognitive Search.
- Lastly, you perform the following 2 actions:
- Link the content from a Source System repository to the BA Insight Connector that you define.
- Provide basic indexing information.
- Link the content from a Source System repository to the BA Insight Connector that you define.

How to Index Using Quick Mode
The following steps guide you through setting up your new Content Source using a web service connection.
You must enter the information for your specific BA Insight Connector.
Note that the steps below use the File Share connector as an example, but the configuration fields shown on you screen are specific to the Connector you are setting up.
- Choose a (Web Service) connection: Choose from existing connections already configured or create and configure a new one.

- If you selected a pre-existing connection, skip to step 5 to configure your Target, otherwise move to step 3, below, to setup your Connector.
- Connect to a web service:
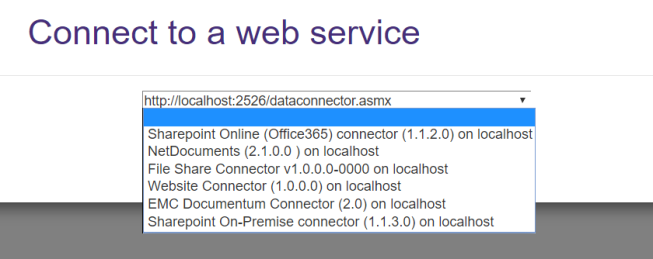
- When choosing to create a new connection, you are prompted to connect to a new web service connector (enter its URL) or choose from existing web service connectors.
- A sample of connectors is shown in the screenshot below.

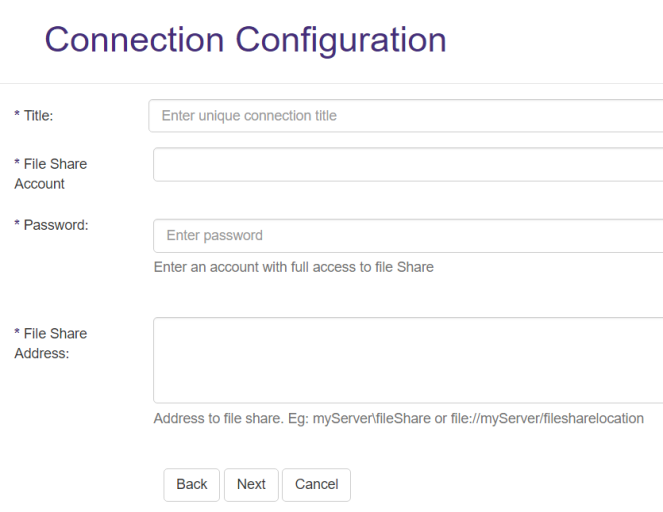
- Connection Configuration: You insert the required values (only those which are required and have no default values are shown).
The screenshot you see below represents the configuration of the File Share connector, and is shown as an example.
Note that the basic configuration fields are the same for all connectors.
Some connectors require connector-specific information, such as the File Share Address in the example below.
The fields you see will be specific to the connector you selected in the previous step.
For information about your connector's specific settings, see your connector's documentation.
- Target Configuration:
Choose from existing targets or load and configure a new one.- If you select an existing Target, click the Next button, and skip to step 8 to create a new Content Source.
- If you create a new Target, proceed to step 6, below.

- If a new target option is selected, you are directed to the Load Target screen.

- After selecting the Target, you are directed to the Target Settings screen to complete setting up your target.
- Only parameters which are required and have no default value are shown.
- Only parameters which are required and have no default value are shown.
- Configure your Target (Elastic, SOLR, Microsoft Search, etc.) as described in How to Configure Your Target.
- Content (Source) Configuration:
- Create a new Content Source.
- The Content Source is related to the Connection and Target previously configured.
- Name the Content Source appropriately.

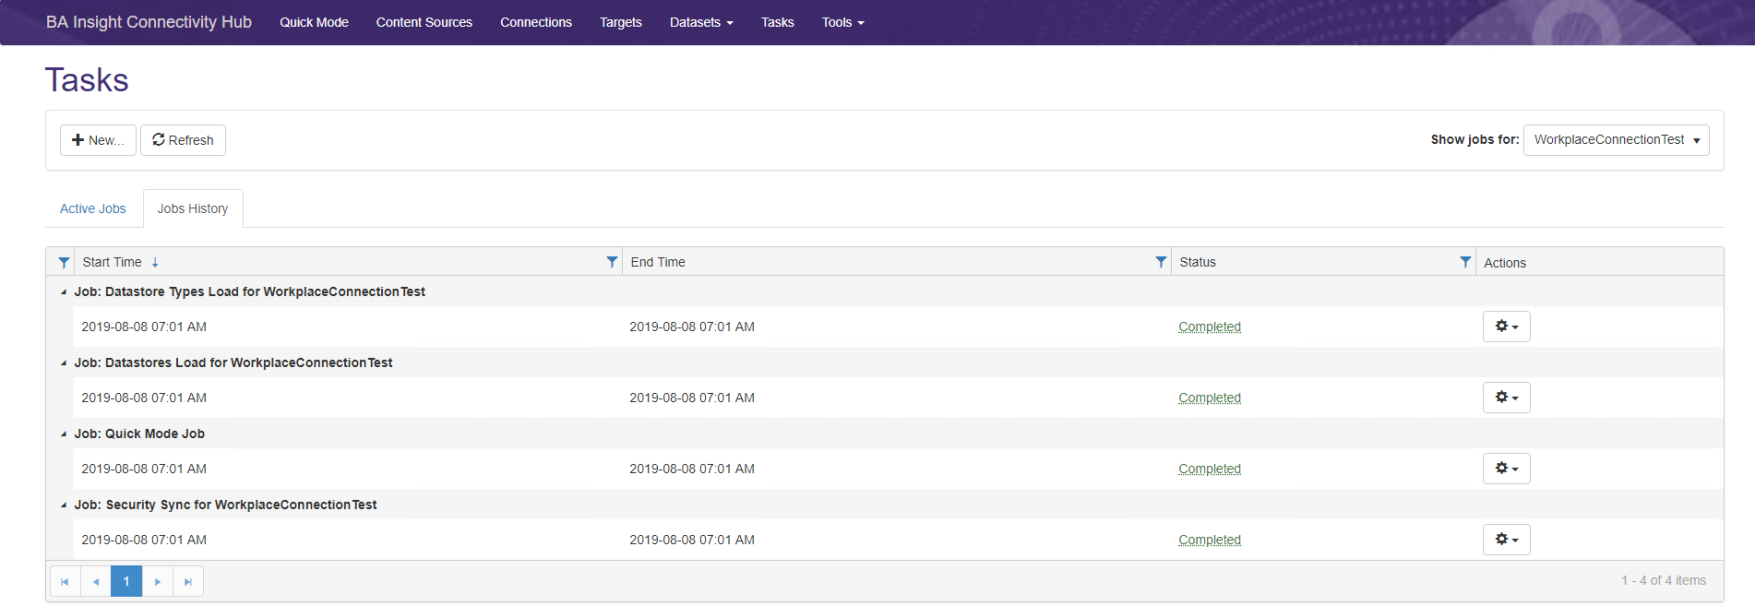
- When configuration is done, a Quick mode job starts that runs all the Connection Jobs that are supported by the connector:
- Security Sync
- Datastore Load
- DatastoreTypes Load

- Content is ready to be crawled after the job completes.
- An example history of Jobs is shown below.
- For more information about Job, see Run Required Jobs.
