How to Configure Your AWS-Hosted Elasticsearch Target
The following topics describe how to create an AWS-hosted Elasticsearch Target in Connectivity Hub.
For more information about Targets, see What is a Target?
Elasticsearch Support
ConnectivityHub v3.x supports Elasticsearch v7.x and v8.
Add the Target and Configure the Search Schema
Before you can add your target, you must install BA Insight Connectivity Hub.
- You can add multiple targets, one for each BA Insight Connector content source.
- More than one target can point to the same index.
To add the Elasticsearch Integration target, follow these steps:
- Go to the Connectivity Hub Target page.
- Click the New Target button.
- The Load Target dialogue appears.
Select the following target from the drop-down menu: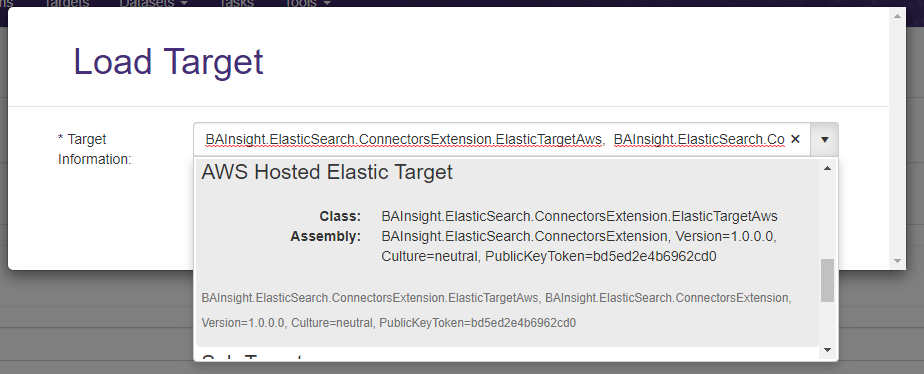
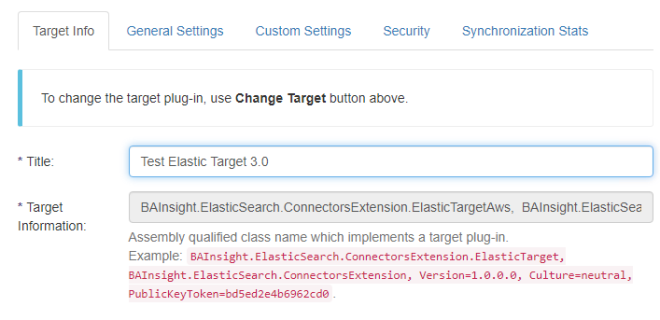
- Select the Target Info tab.
Enter the following information:- Title (required): Specify a name.
- Target Information (required): This field is pre-populated: BAInsight.ElasticSearch.ConnectorsExtension.ElasticTarget.
-
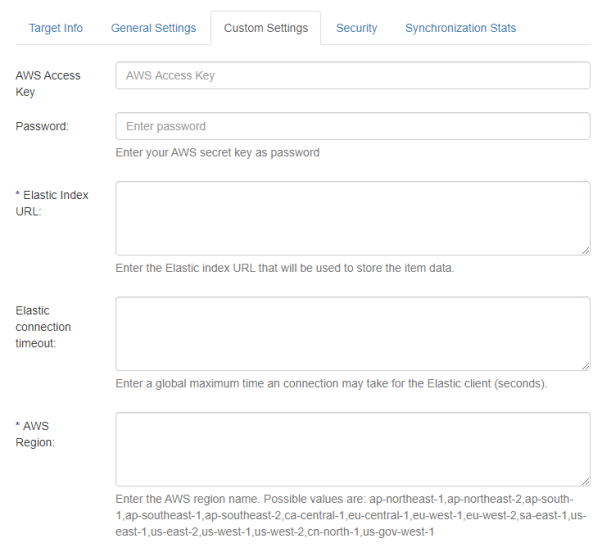
Select the Custom Settings tab.
- AWS Access Key:
- Password:
-
Elastic index URL (required): Enter your URL in the format:
http(s)://[server_name]:[port_number].
Connectivity Hub attempts to connect to the index using this address [index_name].
If the index does not exist, Connectivity Hub creates it.The Elastic Schema will be created automatically.
-
AWS Region
-
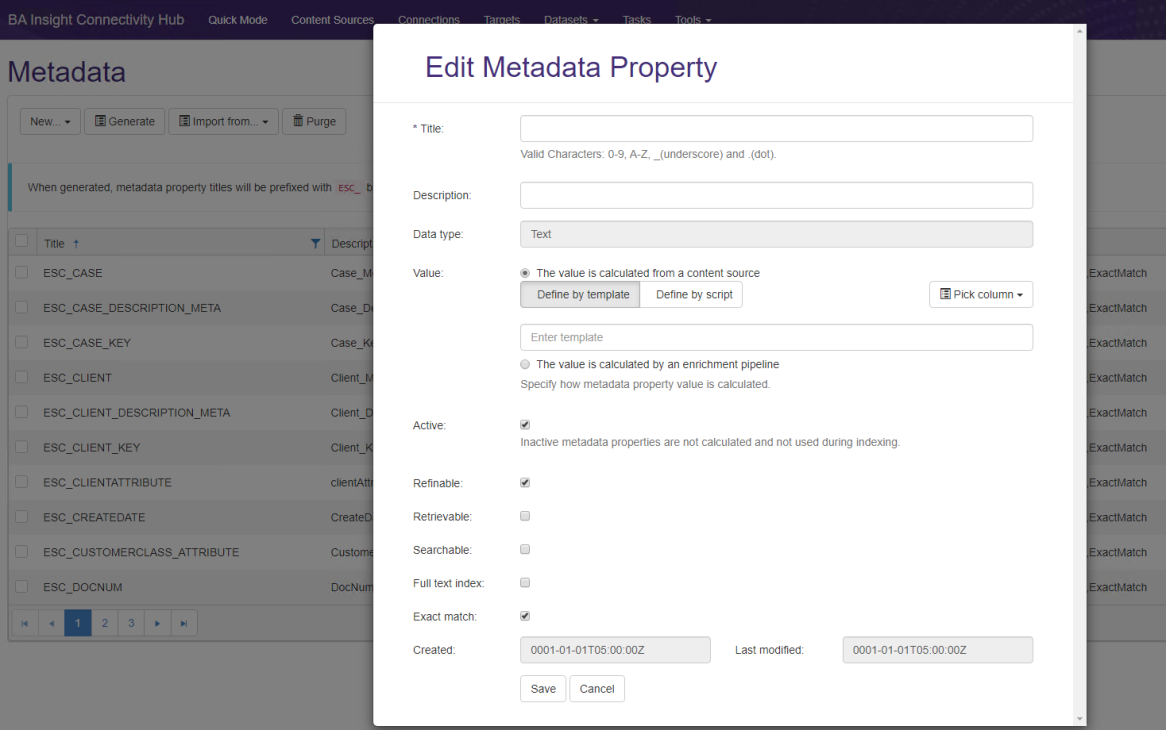
To define the fields you want to see in your index use the Metadata page and set the Active, Refinable, Searchable, Exact match settings for your metadata.
The fields are automatically created in your index, based on these settings.
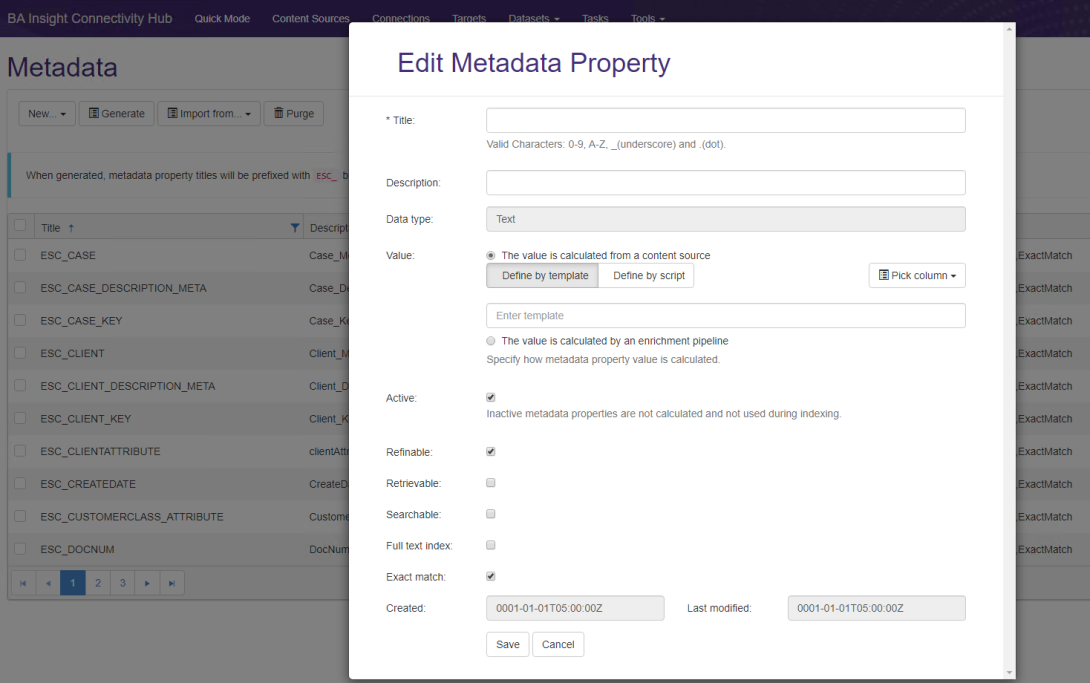
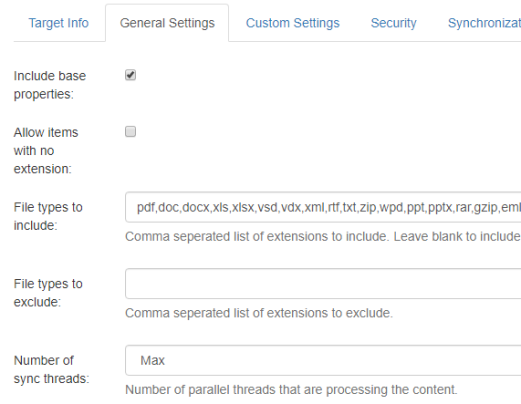
- Click Include base properties to make the system metadata emitted by Connectivity Hub accessible to the Elasticsearch target.
- Click Save.
- Click Connect.
How to Push Data to an Existing Elastic Index
You can push documents to an existing Elastic index under an existing Elastic type.
Executing a Target Content Reset job, DELETES the existing Elastic index!
This option causes the loss of data in your existing index. Use this job with caution!
KNN support
To use KNN with Connectivity Hub, you must manually create an index with the index.knn setting and add one or more fields of the knn_vector data type.
-
Schema must be provided with the index.
-
How to set up such a schema is described here: https://docs.aws.amazon.com/elasticsearch-service/latest/developerguide/knn.html
-
Connectivity Hub is not aware of the knn_vector data type.
-
Elastic AWS target will push values into a knn_vector data type using arrays of double metadata type.
-
Use AutoClassifier CEWS to generate the vectors and then push these values into knn_vector data type using AWS Elastic target.
How to Prevent Specific Properties from Being Mapped or Indexed
Use the metadata page and mark the properties as Inactive:
How to Group All Non-refinable/Non-searchable Properties
You can group all non-refinable/non-searchableproperties from Connectivity Hub in a bulk property in Elastic by setting the Active and Full text index property on your metadata:

After indexing, all values are found under the escbase_fulltextcontent property.
How to Run a Full Target Update Job
After you add a Target, you must run an Full Target Update job.
To update the target after you have run a Full Target Update job, run a Incremental Target Update job.
To run a "Full Target Update" job, follow these steps:
- Go to the Connectivity Hub Tasks page.
- Click New and the Edit Job page appears.
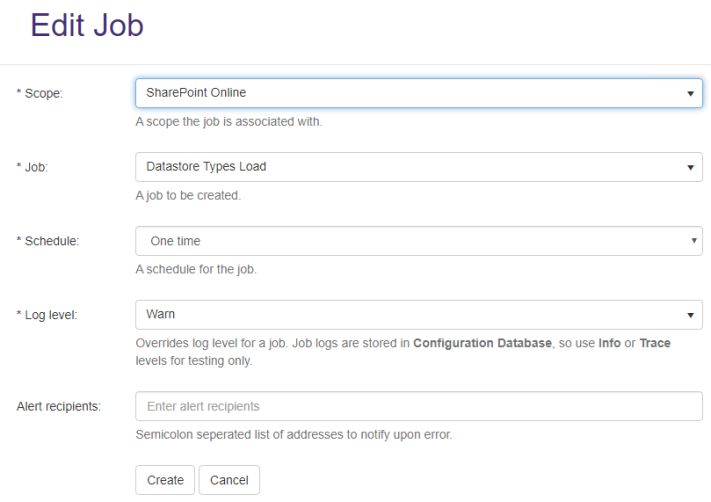
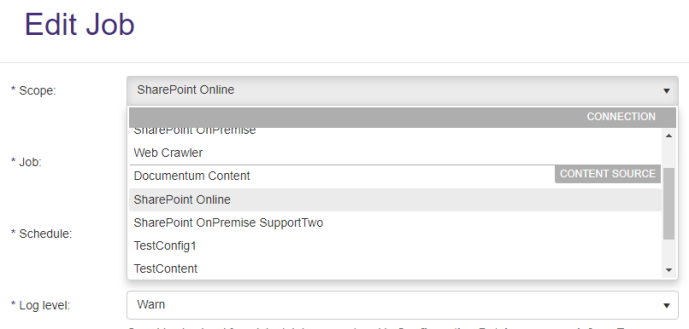
- In the Scope drop-down list select the Amazon Elasticsearch content source (not shown in graphic) to run your job against.
-
Select Target Full Update from the Job drop-down list.

- Complete the remaining fields.
-
Click Create.