How to Configure Your Azure Cognitive Search Target
The following topics describe how to create an Azure Cognitive Search Target in Connectivity Hub.
For more information about Targets, see What is a Target?
Prerequisites
Before you can add your target, you must install the BA Insight Connectivity Hub.
- Before you proceed to add and configure your Azure Cognitive Search Target:
- Create an index in your Azure Search Service instance.
Index-to-Content Source
In Connectivity Hub, there is one index created per content source for both Elasticsearch and Azure Cognitive Search.
Vector fields indexing (optional)
This section is only applicable if vector fields are required in order to leverage Microsoft Azure AI Vector Search capabilities. If you plan to use vector fields in your index, you must satisfy the following prerequisites and note any limitations.
Prerequisites
-
The Azure index that will contain vector fields must be manually created before indexing, using the 2023-10-01-Preview API version.
Currently, the Azure portal is facing some when creating vector fields in an index. Therefore, you should use the workaround described in the Create a Microsoft Azure index section to create an index and vector field. -
Vector fields must be created and configured in Microsoft Azure before you try to populate them with Connectivity Hub.
-
To create and configure vector search configurations and vector fields, you can follow the steps in the Microsoft documentation for Add a vector search configuration.
-
-
If you want to return a vector field as metadata on the results page, you need to specify that the vector field is retrievable when creating it in Microsoft Azure.
-
The AutoClassifier Engine must be installed and configured.
Limitations
-
Upgrading an existing Microsoft Azure index to support vector fields is currently not supported. Vector fields will only work with newly created indexes.
Create a Microsoft Azure index
In order to create a Microsoft Azure index with the 2023-10-01-Preview API version, use the following steps:
-
Install an API management platform (Postman, Insomnia, etc.).
-
Create a PUT request. For example:
PUT https://[servicename].search.windows.net/indexes/[index name]?api-version=[api-version]

Content-Type: application/json
api-key: [admin key] -
Provide the body of the request. The code snippet below describes creating an index with the id field (required), a vector field, and the vector search configuration.
Note the following:- The dimensions attribute of vector field has a minimum of 2 and a maximum of 2048 floating point values each.
- The size of embeddings generated by the Open AI's text-embedding-ada-002 model is 1536, the LLM used in our sample is 1536.
{
    "fields": [
        {
            "name": "id",
            "type": "Edm.String",
            "searchable": true,
            "filterable": true,
            "retrievable": true,
            "sortable": true,
            "facetable": true,
            "key": true,
            "indexAnalyzer": null,
            "searchAnalyzer": null,
            "analyzer": "standard.lucene",
            "normalizer": null,
            "dimensions": null,
            "vectorSearchProfile": null,
            "synonymMaps": []
        },
        {
            "name": "vector_field",
            "type": "Collection(Edm.Single)",
            "searchable": true,
            "filterable": false,
            "retrievable": true,
            "sortable": false,
            "facetable": false,
            "key": false,
            "indexAnalyzer": null,
            "searchAnalyzer": null,
            "analyzer": null,
            "normalizer": null,
            "dimensions": 1536,
            "vectorSearchProfile": "vector-profile-hnsw1",
            "synonymMaps": []
        }
        ],
            "scoringProfiles": [],
            "corsOptions": null,
            "suggesters": [],
            "analyzers": [],
            "normalizers": [],
            "tokenizers": [],
            "tokenFilters": [],
            "charFilters": [],
            "encryptionKey": null,
            "similarity": {
                "@odata.type": "#Microsoft.Azure.Search.BM25Similarity",
                "k1": null,
                "b": null
            },
            "semantic": null,
            "vectorSearch": {
            "algorithms": [
            {
                "name": "my-hnsw-config-1",
                "kind": "hnsw",
                "hnswParameters": {
                "m": 4,
                "efConstruction": 400,
                "efSearch": 500,
                "metric": "cosine"
            }
        }
    ],
        "profiles": [
            {
                "name": "vector-profile-hnsw1",
                "algorithm": "my-hnsw-config-1"
            }
        ]
    }
} -
Execute the request.
-
Validate that the index and the vector fields were created in the Microsoft Azure portal.
Add the Microsoft Azure Search integration target
You can add as many targets to connectivity as you like. A target is associated with a specific Microsoft Azure Search service. More than one target can point to the same Azure search service. To addd the Microsoft Azure Search itnegration target, do the following:
-
In Connectivity Hub, navigate to the Target page and select New Target.
-
On the Load target page, select your target from the drop-down menu.
-
Select the Target Info tab and specify a name for your target in the Title field.
-
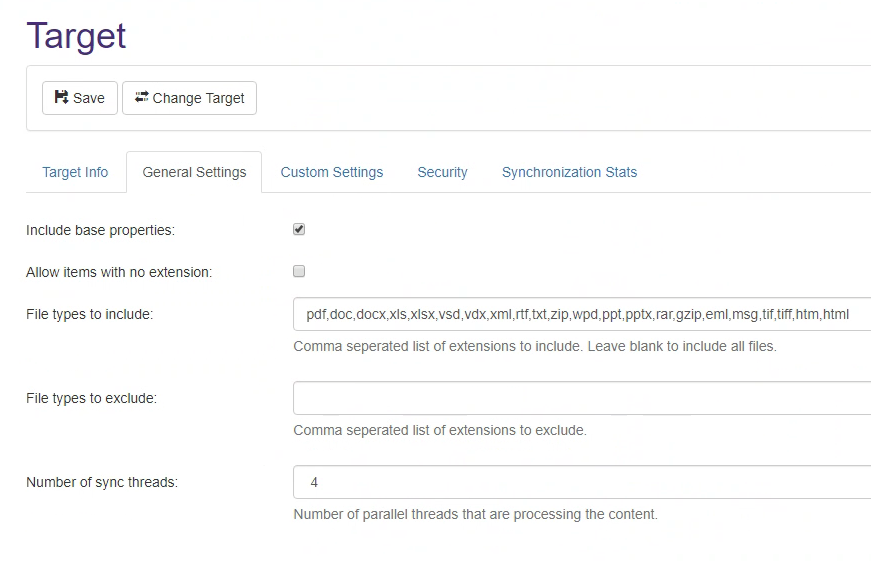
Select the General Settings tab. The fields shown in the graphic below are completed by default.
-
Note that the Include base properties checkbox is checked. This option sends the esc_base properties to the index. These properties are mandatory to ensure security trimming and integration with Smart previews. BA Insight recommends that you do not disable these properties.
-
If you pause a job, change the number of sync threads, and resume your job, the job will leverage the additional threads.

-
-
Select the Custom Settings tab and specify the following fields:
-
Search Service Name (required): Enter the name of your Microsoft Azure Search service.
-
Password (required): Enter the admin key (with full permissions) for you Microsoft Azure Search service.
-
DNS Suffix: Enter the custom DNS suffix to be used when connecting to the Microsoft Azure Search service.
-
This is required if you are connecting to a custom cloud, such as a government cloud.
-
Do not specify this suffix for the public Microsoft Azure Cloud.
-
-
-
Click Save.
Schema Mapping
To plan your Azure Cognitive Search schema, consider the fields you wish to include in your search.
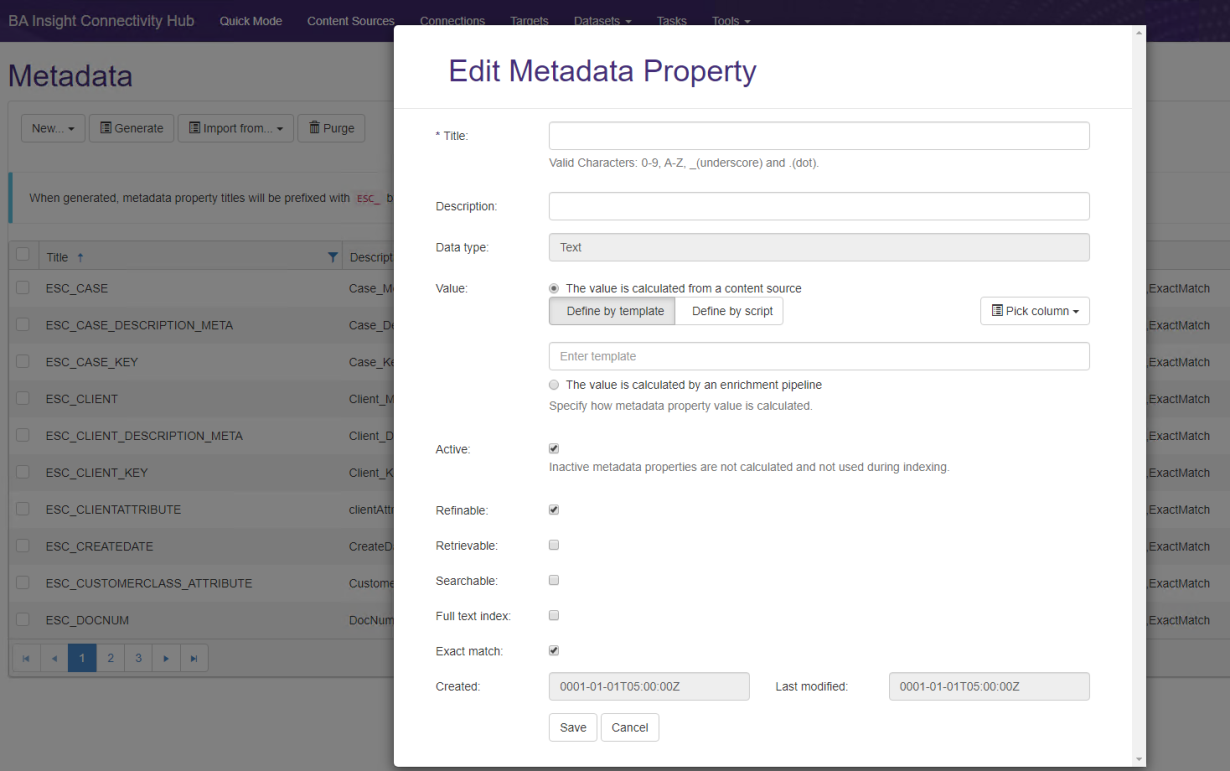
- To configure the fields you want to see in your index, navigate to the Metadata page for your Content Source. An example is shown below.
- Set the Active, Refinable, Searchable, and Exact match settings for your metadata.
- The fields are automatically created in your index, based on these settings.

- Retrievable:
- Select this for any field you wish to return with the search results.
- Generally, these are fields that are used as part of your displayed result.
- Refinable:
- Select this for any field which might be explicitly searched or used by a refiner.
- For example, a title search: "title = 'Mary had a little lamb'".
- Searchable:
- Select this for any field which should be searched for the keywords used in your query.
Complex Fields
Table data types from Connectivity Hub will be treated as Collection of Complex fields in Azure Cognitive Search schema.
Azure target cannot create these complex fields, so they require manual input:

You need to add the table field and all its sub-fields in you Azure index and then repeat the full crawl.

Populate vector fields through Connectivity Hub (optional)
To populate vector fields into the Azure index when running Connectivity Hub tasks, do the following:
-
Create a Microsoft Azure index with your desired schema for vector fields.
-
In Connectivity Hub, navigate to the Content Sources page.
-
Create a content source with the same name as the Azure index that uses the Microsoft Azure target.
-
Configure AutoClassifier to generate vector embeddings via scripting.
-
Configure the enrichment pipeline integration on the content source.
-
Create vector metadata in Connectivity Hub.
-
Delete the automatically created metadata that corresponds to the Output properties that were configured on the Microsoft Azure content source in step 5.
Output properties have the following format:ESC_<OutputPropertyName>. You will have to manually delete the automatically created meta data properties each time you generate them. -
Run the target sync task.
Configure AutoClassifier to generate vector embeddings via scripting
Refer to How to Generate Vector Embeddings via Scripting in the AutoClassifier documentation.
Configure the enrichment pipeline integration on the content source
-
In Connectivity Hub, navigate to the Content Sources page.
-
Edit the content source that corresponds to your Microsoft Azure index.
-
Select the Advanced tab.
-
Scroll down to the Enrichment pipeline integration section.
-
Select the Enrichment web service option and specify the following:
-
Service URL: Enter the URL of the enrichment web service.
-
Authentication Mode: Select your authentication mode from the drop-down list.
-
Properties returned: Provide a list with the output properties in the following format: PropertyName,PropertyType,IsMultiValue. You must use a semicolon to separate list items.
-
PropertyName: The name of the property that was set in the AutoClassifier pipeline stage.
-
PropertyType: Decimal
-
IsMultiValue: true
-
Create vector metadata in Connectivity Hub
-
In Connectivity Hub, navigate to the Content Sources page.
-
Click the Actions button for the content source that corresponds to your Microsoft Azure index and select Metadata.
-
On the Metadata page, click New.
-
From the drop-down list, select Numeric metadata.
-
In the modal window, provide the details for the following fields:
- Title: Enter the name of the vector field. The name is case-sensitive and must be the same as the one that you configured in the Microsoft Azure index schema.
- Description: Enter a short description of the vector field.
- Value:
Select The value is calculated by an enrichment pipeline.
From the drop-down list, select your property.
- Active: Checked
- Searchable: Unchecked
- Full text index: Unchecked
- Multiple values: Checked
Since Microsoft Azure does not support changing existing fields, you will need to run a Target Content Reset task each time you change your vector metadata. The vector metadata must only be active and support multiple values.
-
Click Save.
Validate the implementation
To validate you implementation, you can do one of the following:
-
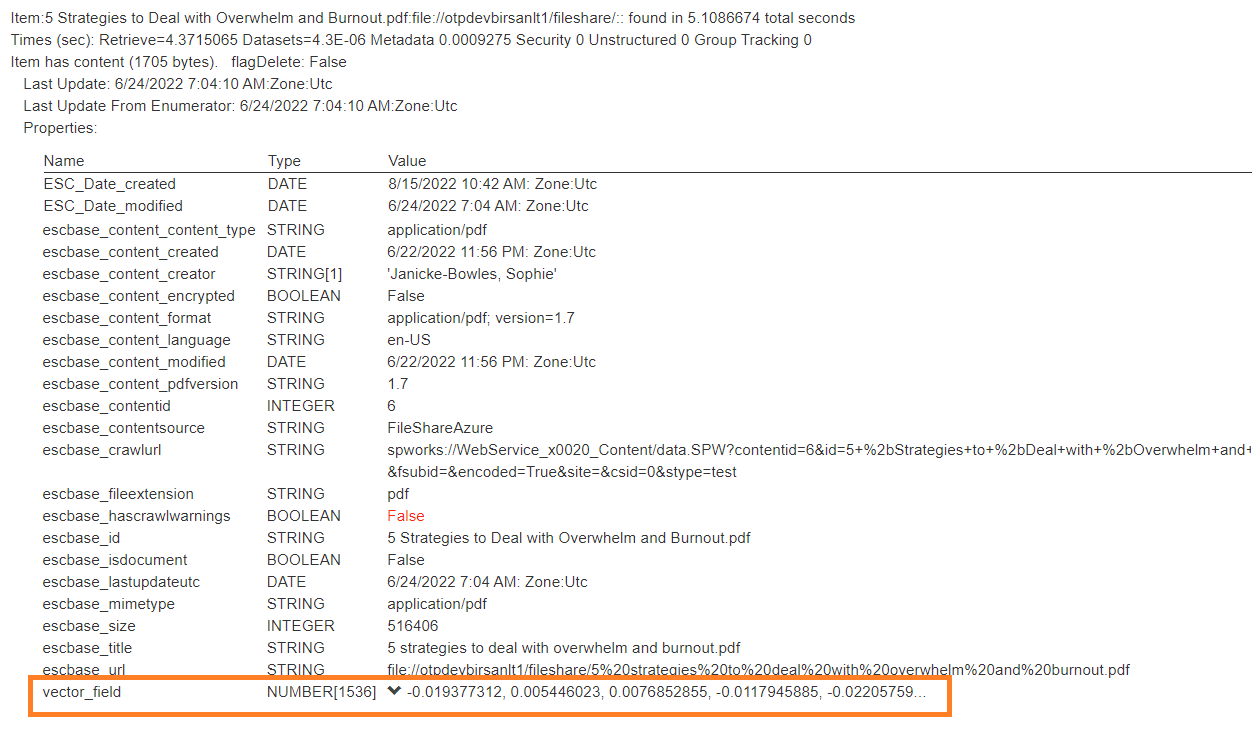
Run a Test Bench and validate that your vector field contains an array of float numbers. Verify that the dimension of the array matches the dimension of the vector field

-
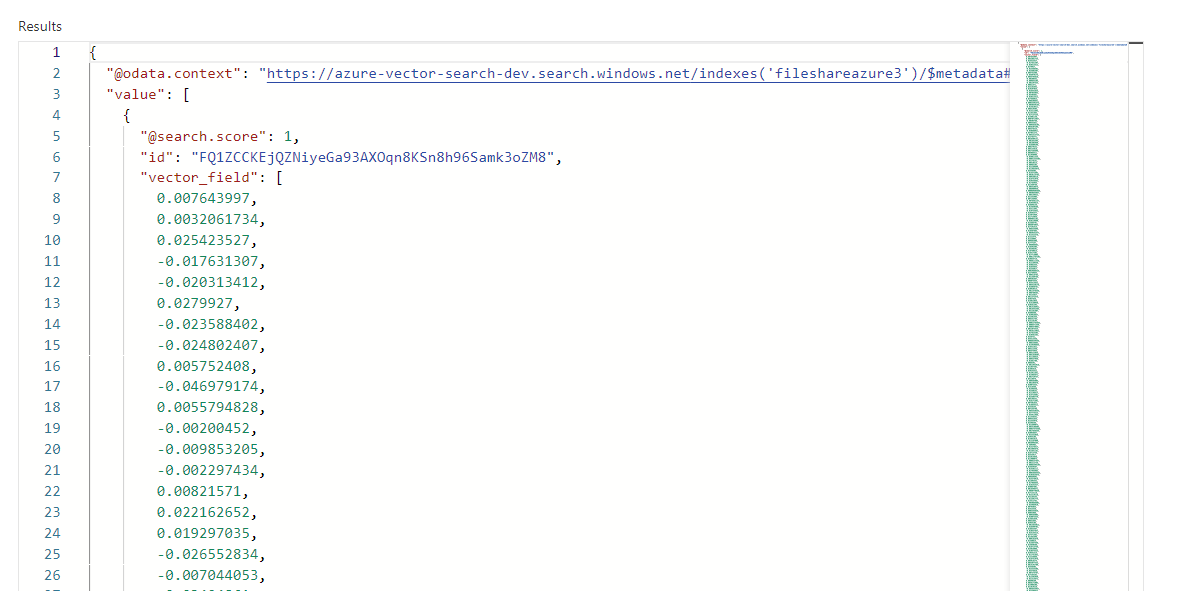
In the Microsoft Azure portal, verify that the vector field is populated in the index.
