How to Configure Your Elastic Target with App Authentication
The following topics describe how to create an Elasticsearch Target in Connectivity Hub.
Prerequisites
Elasticsearch Support
-
Connectivity Hub v3.x supports Elasticsearch v7 and v8.
Add the Elasticsearch Target
Before you can add your Target, you must install BA Insight Connectivity Hub.
- A Target is a set of configuration options used by your Content Source (that identify which search engine content is written to).
- Multiple Content Sources can point to the same Target
- For more about Targets, see What is a Target?
- Add at least 1 Target per search engine
- 1 Target: If you use the same crawl options across all Content Sources, use 1 Target per search engine
- Multiple Targets: If you use various crawl options across all Content Sources, use multiple Targets per search engine
- If you use Elasticsearch, your Target points to the entire elastic cluster
- 1 Content Source = 1 index in your search engine (Elastic, MS Search, etc.)
- You cannot map 2 Content Sources to the same index
- Connectivity Hub automatically names the indices based on the Content Source names
To add the Elasticsearch Integration target, follow these steps:
- Go to the Connectivity Hub Target page.
- Select New > Target.
- The Load Target page appears.
- Select the generic Elastic Target.
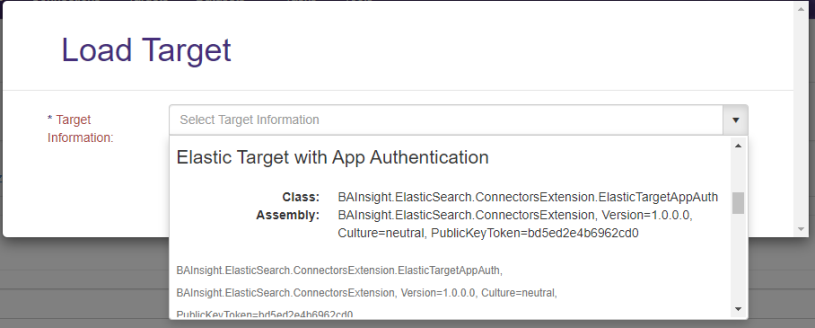
- Select the Target Info tab.
Enter the following information:- Title (required): Specify a name.
- Target Information (required): Auto-populates. Enter BAInsight.ElasticSearch.ConnectorsExtension.ElasticTarget.

-
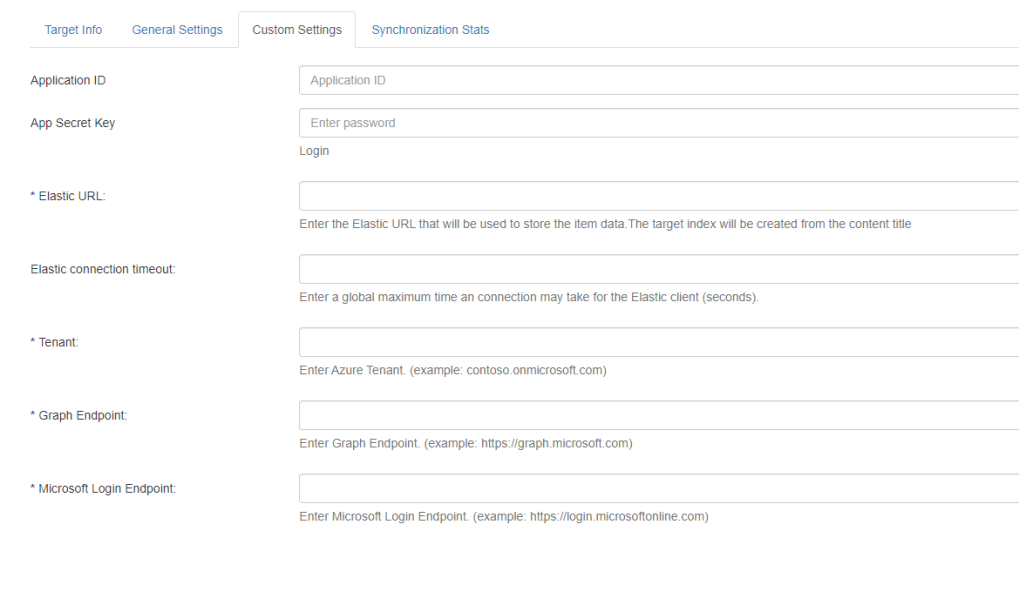
Select the Custom Settings tab.
-
Elastic index URL(required): Enter your URL in the format:
http(s)://[server_name]:[port_number]-
Connectivity Hub attempts to connect to the index in this address [index_name]. If the index does not exist, Connectivity Hub creates it.
-
To define the fields you want to see in your index use the Metadata page and set the Active, Refinable, Searchable, and Exact match settings for your metadata.
-
The fields are automatically created in your index, based on these settings.
-
If you need to query against the specific property, mark it as Active and Searchable
-
If you only care about the value of the property and only need to query against the content of the property, then mark is Active and Full text indexable
-
-
Application ID:
-
Enter App IDs from Azure App
-
-
AppSecret Key:
-
Enter Secret Key from Azure AppTenant ID
-
-
Tenant:
-
Enter Tenant ID from Azure
-
Example: contoso.onmicrosoft.com
-
-
Azure Scope:
-
Enter Azure Scope
-
Example: https://contoso.com/.default
-
-
Microsoft Login Endpoint:
-
Enter Microsoft login endpoint
-
Example: https://login.microsoft.com
-
-
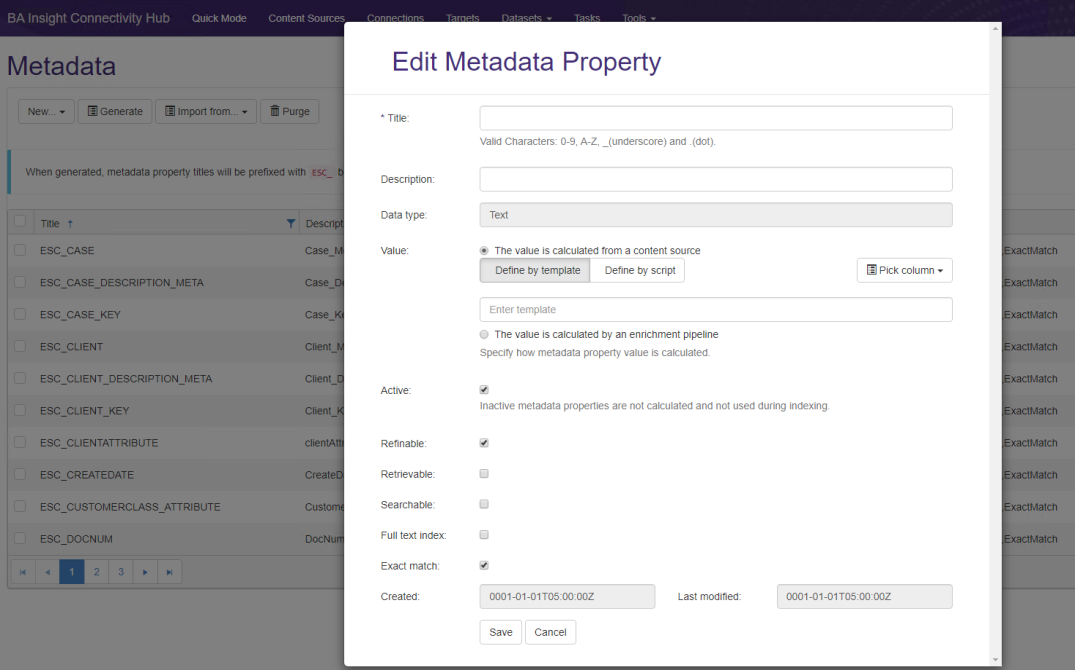
If you need to use the property as a refiner check both:
-
Active
-
Refinable (See the graphic below).
-
-
-
Click Save.
- Click Connect.
-
The Elastic schema is created automatically.
Target Content Reset
-
When executing aTarget Content Reset job, the existing Elastic index is deleted!
-
Using this option causes the loss of data in your existing index.
-
Use with caution!
How to Group All Non-refinable/Non-searchable Properties
You can group all non-refinable/non-searchable properties from Connectivity Hub in a bulk property in Elastic by setting the Active and Full text index property on your metadata:

After indexing, all values are found under the ElasticBulkValues property.
How to Run a Full Target Update Job
After you add a target, you must run an Full Target Update job.
To update the target after you have run a Full Target Update job, run a Incremental Target Update job.
To run a Full Target Update job, follow these steps:
- Go to the Connectivity Hub Tasks page.
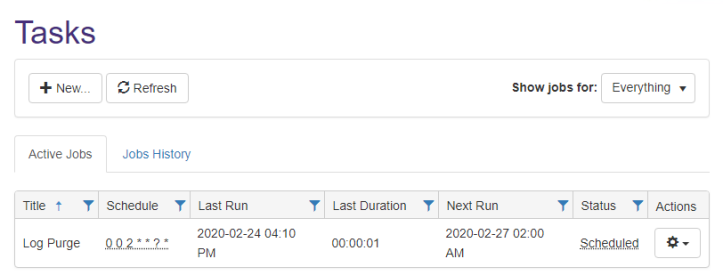
- Click New and the Edit Job page appears.
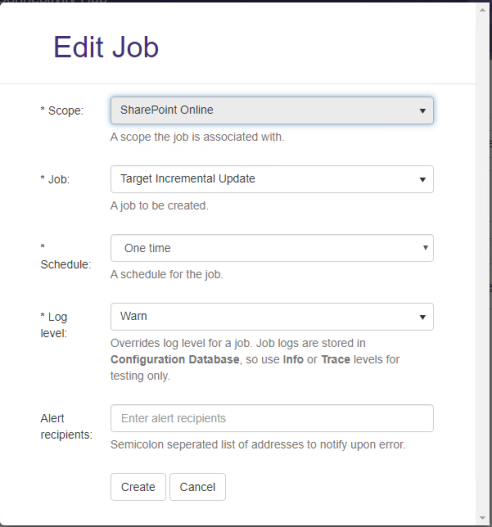
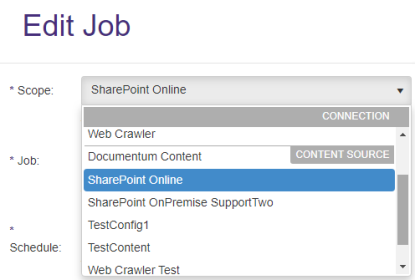
- In the Scope drop-down field, select the Content Source for which to run the full target update.
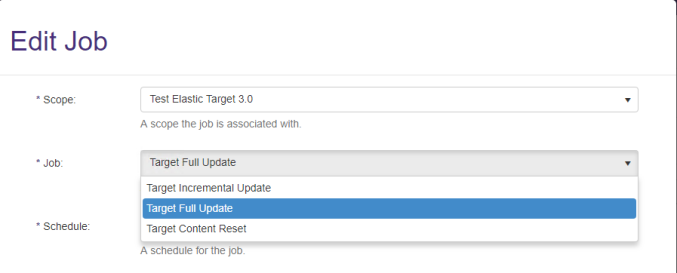
- Select Target Full Update from the Job drop-down list.
-
Click Create.
-
Logs- See these logs after you run a job:
-
Full
-
Incremental
-
Target Update
-
