How to Configure Your Kendra Target
The following topics describe how to create a Kendra Target in Connectivity Hub.
-
For more information about Targets, see What is a Target?
When BA Insight applications index into Kendra (via Connectivity Hub), a “Data Source” is created for each content source, such as SharePoint.
For another example: one Kendra "Data Source" is created for the Documentum content source.
A single Kendra Index - "DemoKendra" - that holds multiple data sources, each mapped to a SmartHub content source would look like this:
DemoKendra (Index):
- Documentum → (Kendra Data Source)
- SharePoint → (Kendra Data Source)
- File Share → (Kendra Data Source)
- and so on
This is important if two data sources use metadata properties with the same name but different settings.
For example, one metadata property may be refinable, but not the other of the same name.
How to Create a New Target
To add the Kendra Integration target, follow these steps:
- Go to the Connectivity Hub Target page.
- Select New>Custom API Target.
- Select New>Custom API Target.
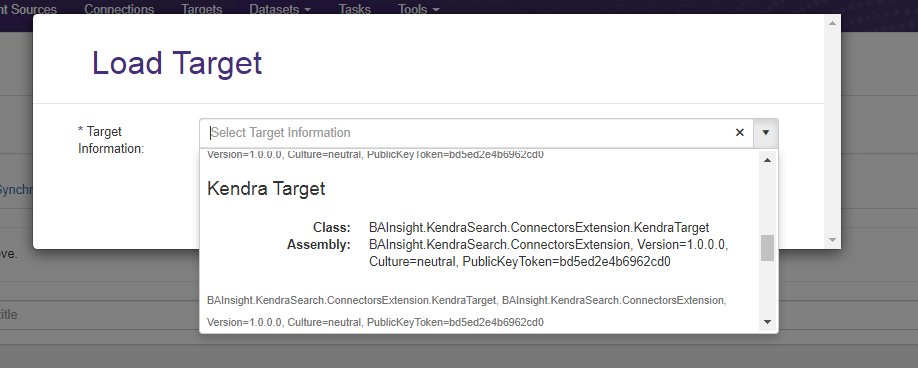
- The Load Target dialog appears.
- Select Kendra as the target from the drop-down menu.
Scroll down if you do not see your target.
- Enter a Target name.
- The Target name is the name of the Kendra Index.
- The Index can be an existing Index in AWS or else the Target will create the Index upon first usage.
-
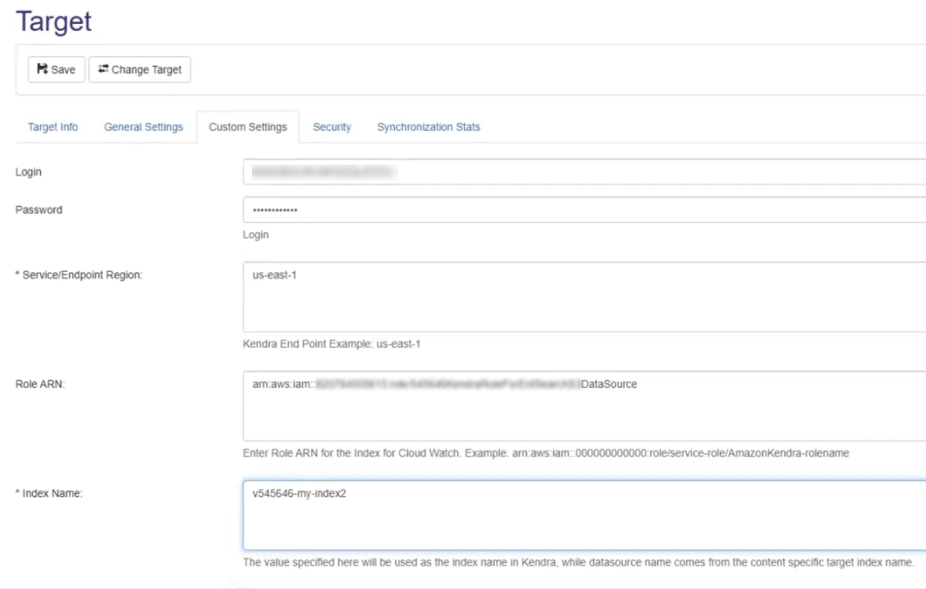
Select the Custom Settings tab.
-
Login: Enter an AWS Access Key.
-
Password: Enter the AWS Access key secret

-
- Service/End Point Region: Enter a Kendra Service Endpoint Region

-
Role ARN:
-
Optional (see screenshot above)
-
Enter a Role ARN (Amazon Resource Name) with either of the following:
-
Admin access
-
Permissions listed below:
- Kendra:ListDataSource
- Kendra:CreateDataSource
- Kendra:ListDataSourceSyncJobs
- Kendra:UpdateIndex
- Kendra:StartDataSourceSyncJobs
- Kendra:BatchDeleteDocument
- iam:PassRole
- Kendra:ListIndices
-
-
Amazon Kendra requires permissions to access your CloudWatch log.
-
Choose an existing IAM role with the correct permissions.
Info
Kendra SDK requires a role ARN (Amazon Resource Name) for CloudWatch: it requires permission to write logs to CloudWatch when it interacts with Amazon Kendra.
-
The role ARN is used to authenticate and authorize the SDK to access the CloudWatch service on your behalf
-
If you do not provide a role ARN for CloudWatch when using the Kendra Target, then your application cannot write logs to CloudWatch
-
This means no access to the detailed logs and metrics that can help you troubleshoot issues
-
-
Without CloudWatch logs, it may be more difficult to identify and diagnose errors that occur during the Kendra processes
-
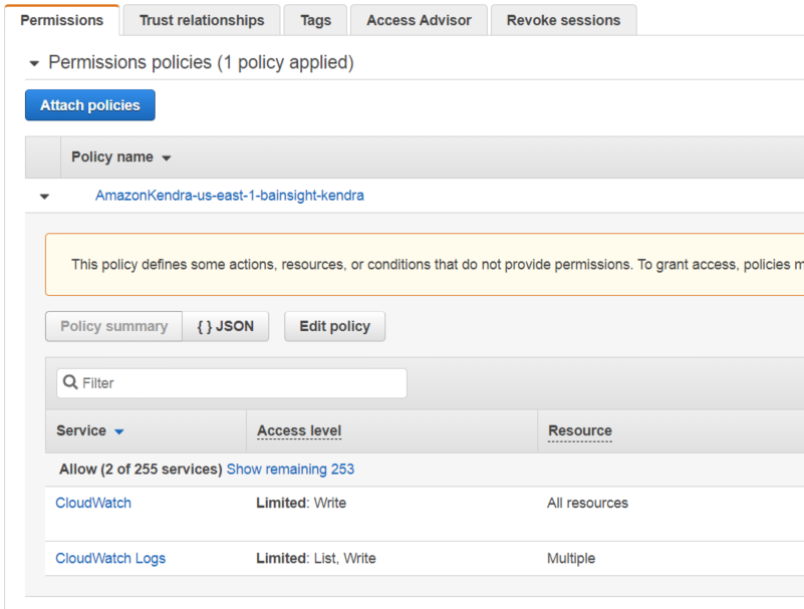
If you do not have an existing Role that has List and Write access to CloudWatch, create a new role in the AWS IAM Console
See the screenshot below:

-
- Click Save.