Egnyte Backend
About Egnyte
Egnyte is a secure content platform.
- For more information about Egnyte, see: https://www.egnyte.com/solutions/secure-enterprise-content-platform
- For information about Egnyte apps and API, see Egnyte Help.
Limitations
The following limitations of the Egnyte backend are due to the current Egnyte API:
- Egnyte API returns a maximum of 20 results
- Egnyte API accepts queries that are up to 100 characters
- Sorting can only be done by one property at one time
How to Set Up the Egnyte Backend
Use the following topics to set up and configure your Egnyte backend.
Add a New Backend to SmartHub
- Start by opening your SmartHub Administration site:https://<SmartHubSite>:<port>/_admin.
- Add a new backend.
- The Backend Settings page appears.
Select EgnyteBackend from the "Backend type" drop-down menu: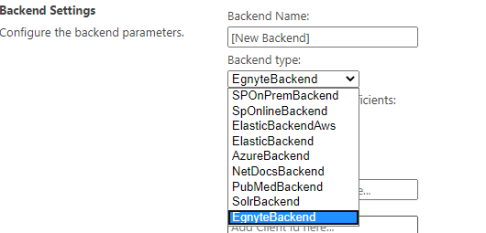
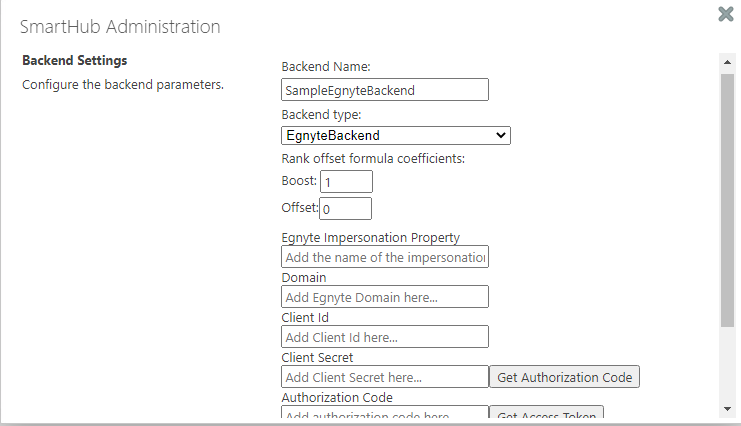
- Complete the following fields on the page:
- Egnyte Impersonation Property:
- The name of a property to be added to the client context properties that holds the user name of the user to be impersonated
-
Note: The script retrieves the Client Context object and uses the upn property to calculate the username of the logged user (without the domain) and add it to the Client Context in the custom property mentioned above.
-
Note: In case that, your Client Context object (JTW Token) contains a property of the logged user, without the domain, only the username, and the same username can be found in Egnyte App, you no longer need the Scripting stage, and that specific property must be added here.
- Backend Name:
- Name you give to your Egnyte backend
- Domain:
- The Egnyte domain you want to search.
- For example: myegnyteapp.egnyte.com
- Client Id:
- The Client ID provided when creating an Egnyte app
- Client Secret:
- The Client Secret provided when creating an Egnyte app
- The Client Secret provided when creating an Egnyte app
- Egnyte Impersonation Property:
- Click the Get Authorization Code button. This opens a new web page and redirects you there.
- On the new page enter your credentials.
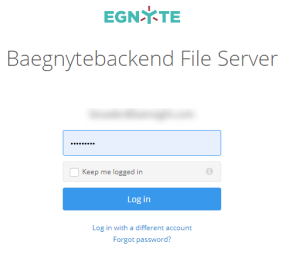
- After logging in, you are redirected to a page where you grant access to the Egnyte app.
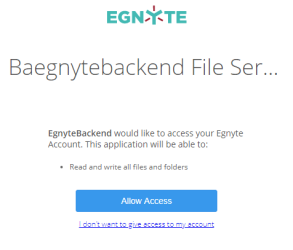
- On the new page enter your credentials.
- Click Allow Access. You are redirected to a new page.
- In the URL of the new page, select and copy the
codeparameter value. The value is found in the URL between the words "code=" and "&state":
Note: This page may display "Not found". This is acceptable as long as the code parameter is shown in the URL. - Copy the code.
- Go back to the Backend Configuration page and paste the code in the Authorization Code field. See the graphic below step 4/e., above.
- Press the Get Access Token button.
- You are redirected to a new page where you can see the Access Token.
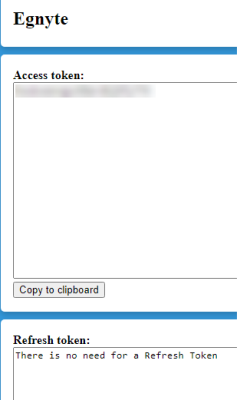
Note: As the text in the Refresh Token text area describes, a refresh token is not required. - Copy the access token using the "Copy to clipboard" button.
- Go back to the Backend Configuration page and paste the access token in the Access Token field. See the graphic below step 4/e., above.
- Click the Save button.
- Close all web pages opened during the authentication process.
Verify the Required Pipeline Stages
After the Backend is configured, ensure the Property Mapper pipeline stage Pipeline stages offer uniformity to the end user. Various functions include mapping names and values to match local refinements. is configured for both the Query and Results pipeline stages for your new Egnyte Backend.
If these pipeline stages are missing, add them using the following steps:
- Go to the General Settings page from the SmartHub Administration page: https://<SmartHub_web_app_url>/_admin.
- Select the Egnyte backend you have just created.
- Click Add a new Query Stage link.
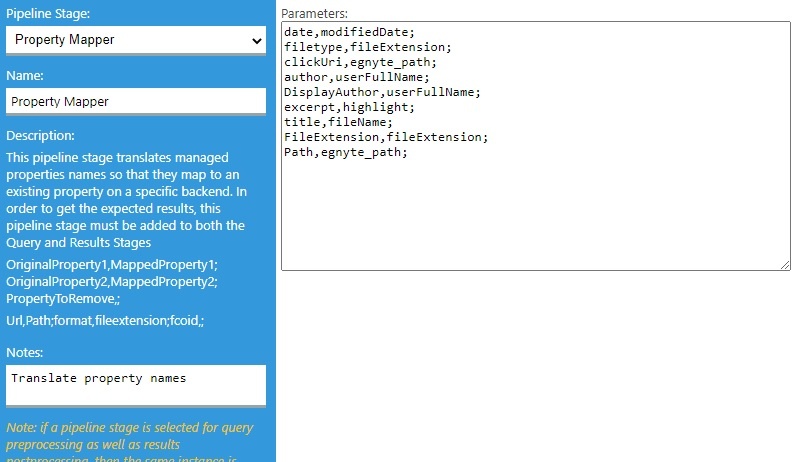
- In the newly opened window, select the Property Mapper stage from the "Pipeline Stages" drop-down.
- Add a new name for this state.
- In the text area on the right, add the properties you want to map in the format described on the left panel.
- Save and repeat these steps for the Result Pipeline stage.
Query Scripting Processor Stage
Next, you add a Query pipeline stage called a Query Scripting Processor.
This stage adds a custom property to the Client Context object with the same name as the one you selected during Configuration step 4, for the field Egnyte Impersonation Property, shown below.

ONLY C# scripting language is supported.
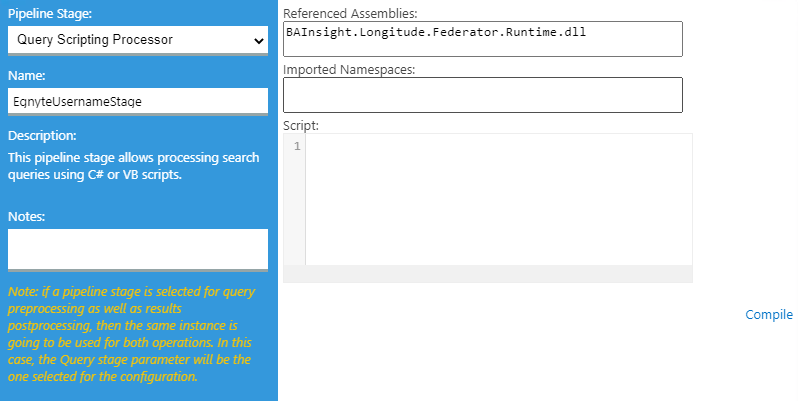
The script retrieves the Client Context object and uses the upn property to calculate the user name of the logged user (without the domain) and add it to the Client Context in the custom property mentioned above.
Note: The default script should resolve the Azure AD and Windows authentications.
If a different type of authorization is used, then the script may need to be changed.
Configure Your SmartHub Results Page
- Your SmartHub Results page is controlled by the file Results.html (or a modified version of that file if you use a customResultspage).
- Open your Results HTML page to edit.
- Reference the Egnyte backend name within a
coveo-tab-section. See the example below
Example:

Refiner Properties
The results can be refined by the following properties:
- fileName
- size (only with a range operator)
- modifiedDate (only with a range operator)
- fileExtension
- userName
- userFullName
- Every custom metadata created in the source system.
Default Refiners
Note: The 3 default standard refiners are already mapped to the following properties:
- Display Author → userFullName
- Result Type → fileExtension
- Modified Date → modifiedDate
Sorting Properties
As mentioned in the limitation section, the Egnyte backend supports sorting by only one property at one time.
The properties that can be used for sorting are:
- name
- score
- last_modified
- size
Total Results Count
Note: Since the Egnyte API returns only 20 results at maximum, the "total results count" is not accurate.
BA Insight recommends you remove the "total results count" from the results page.