Dynamics CRM Hub
Overview
The integration with Dynamics is done by installing the SmartHub solution into your Dynamics 365.
The SmartHub solution for Dynamics exposes two types of integration:
- Full search
- Where SmartHub Search Center is displayed as a full page.
- This will be accessible from the navigation menu BA Insight → SmartHub.
- Local search
- Where SmartHub Search Center is displayed as part of a section on the page (with the ability to interact between SmartHub and Dynamics).
- This will be accessible from the pages where the SmartHub Local Search component is added. For more information, see How to Add SmartHub Local Search Component.
Prerequisites
SmartHub must be installed and accessible using HTTPS
- This requires a trusted, valid certificate to be configured in the IIS bindings
Limitations
Note the following limitations with the SmartHub Dynamics Hub:
-
The SmartHub Dynamics Hub is not supported on the Power Apps dedicated app for mobile and desktop.
-
Users must allow pop-ups for the SmartHub Dynamics Hub on browsers where third-party cookies are blocked.
Additional Features
Note the following additional features for the Dynamics CRM Hub integration:
-
If the Microsoft Dynamics Global Search box is enabled, you can use that search box in your integration rather than the SmartHub search box.
-
When users select the Open button for the SmartHub Dynamics CRM Hub through the Microsoft PowerApps Mobile app menu, it will be opened in a mobile browser. You can configure the redirect message and the redirect delay for your users when they open the SmartHub Dynamics CRM Hub in this way.
How to Install the SmartHub Solution
- To install the SmartHub Dynamics App, navigate to the SmartHub installation directory under the /integrations/dynamics/SmartHubApp folder and create a zip archive with all the contents of the folder.
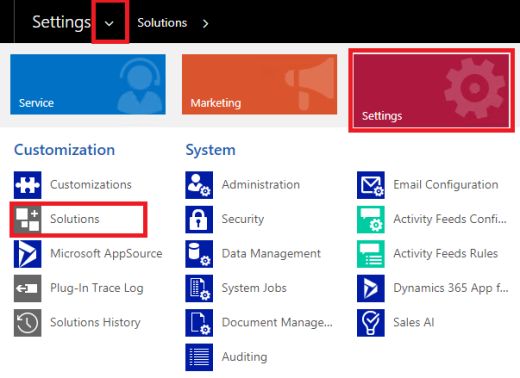
- Navigate to your Dynamics > Settings > Solutions page.
- Click on Import and choose to upload the application archive you created in step 1.
- Once the upload is complete you can proceed with configuring the SmartHub solution in your Dynamics CRM.
How to Configure the SmartHub Solution
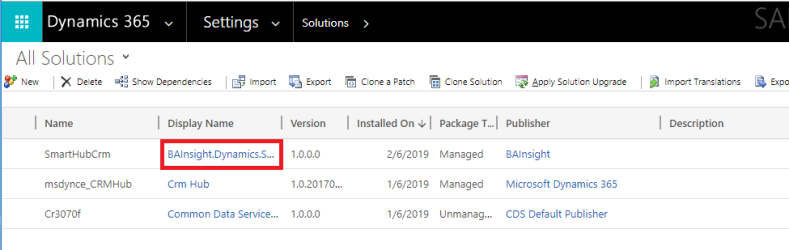
- Navigate to your Dynamics → Settings → Solutions page.
- Click on SmartHubCrm's display name to open the SmartHub configuration page, shown here:
Options to Configure
| Property Name | Usage | Sample values |
|---|---|---|
| Local search URL |
This is the SmartHub HTTPS address of the page that is opened by the Local Search component. This must be accessible from the machine where you are accessing Dynamics 365 from. If this page is hosted internally on your intranet, users must be connected to your intranet to access the page. You can use the following parameters to control page behavior:
|
https://smarthub.contoso.com/integrations/dynamics/DynamicsResults.html?ribbon=false |
| Full search URL |
This specfies the SmartHub HTTPS address of the page that is opened by the Full Search page. This must be accessible from the machine where you are accessing Dynamics 365 from. If this page is hosted internally on your intranet, users must be connected to your intranet to access the page. |
https://smarthub.contoso.com/Index.html |
| Entities to search |
This specifies a comma separated list of For example, if you are on the Accounts page, and you configured this property to be You can configure as many properties as you want in the format:
You cannot configure multiple fields form the same object:
To find the required object and field go to:
|
account.name,contact.firstname
|
| Redirect message | This specifies the message that is shown to the user when they are accessing the SmartHub Dynamics Hub through the Microsoft PowerApps mobile application. | "Enterprise Search will open in a separate browser window in a few moments. You can manually open it by clicking the 'Open' button" |
| Redirect delay in seconds | This specifies the delay, in seconds, before the browser is opened automatically when the user accesses the SmartHub Dynamics Hub through the Microsoft PowerApps mobile application. | 2 |
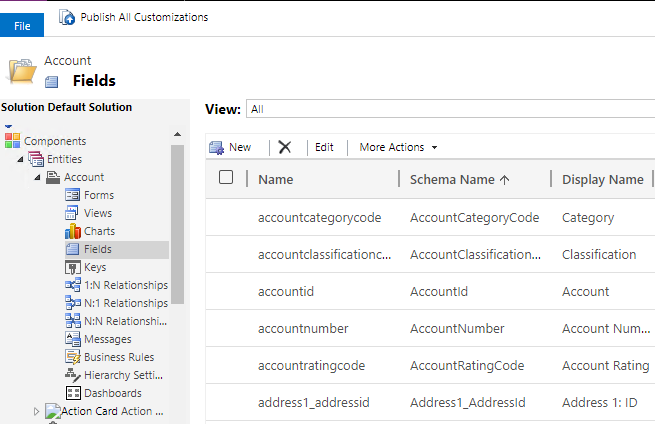
How to See All Configurable Entities
- Navigate to Dynamics → Settings → Customize the System.
- On the left side menu, under Components, expand the Entities.
- Expand the desired entity, click on Fields to see all properties for an entity.
How to Add SmartHub Local Search Component
- Navigate to a record where you want to show the Local Search integration.
- At the top menu, click on the Form button to edit the form.
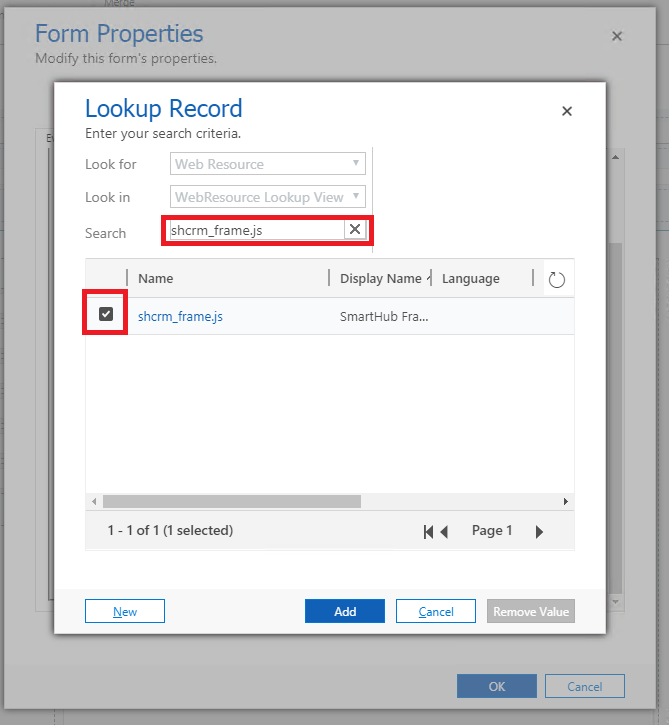
- On the Form Properties → Form Libraries add the shcrm_frame.js.
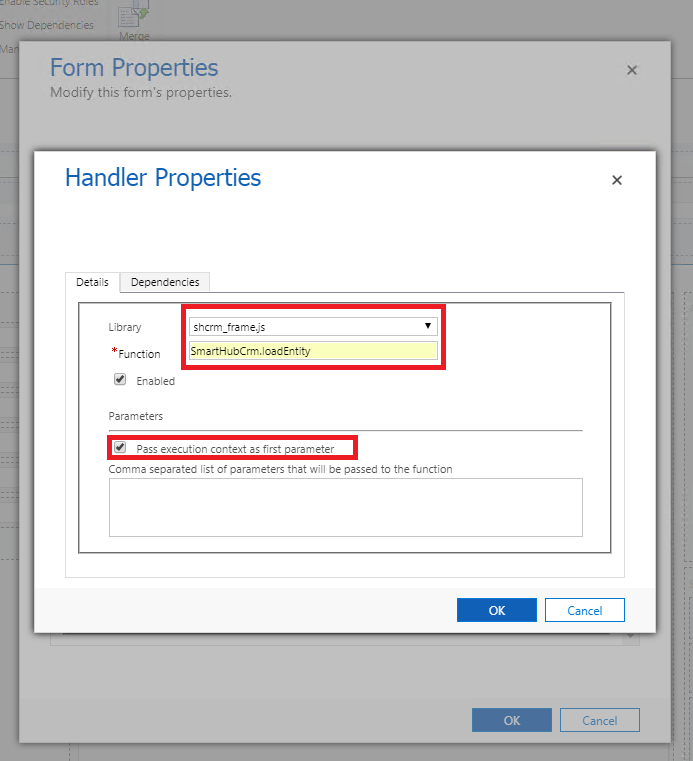
- On the Form Properties → Event Handlers add as a Form control and OnLoad event the SmartHubCrm.loadEntity function from shcrm_frame.js library and check Pass execution context as first parameter.
- Insert a new One Column Tab on the page.

- In the new Tab created insert the shcrm_frame.html as a Web Resource.

* To change the SmartHub Local Search component height on page, go to properties of the component's section → Formatting tab and change the Number of Rows from Row Layout section (max value is 40).
How to Remove the SmartHub Solution
- Remove the Local Search component (both web resource HTML and JavaScript form library) from all pages where you've added it.
- Navigate to your Dynamics → SettingsSolutions page.
- Select the SmartHub solution and delete it.
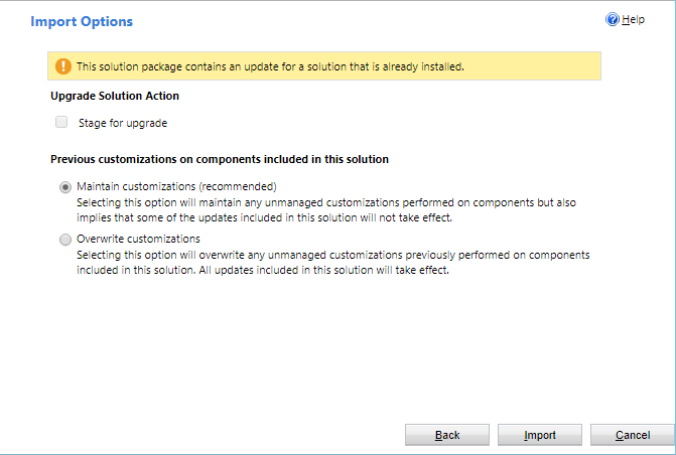
How to Update the SmartHub Solution
- Navigate to your Dynamics → Settings → Solutions page.
- Click on Import and select the new zip archive with the solution to upload.
* Be sure to check Maintain customizations in case you customized the Hub before.