Add SharePoint O365 App to Your Site Collection and Configure
The steps below describe how to add the SPO App to your site collection, and configure Smart Previews in your Search Results page.
Add the SharePoint App to the Site Collection
- Login to your SharePoint Online Search center as a SPO Global Admin.
- Navigate to "Site Contents"
- Click "New" > "App".
- Search and find the preview app you published to the App Catalog.
- Click the app to add it.
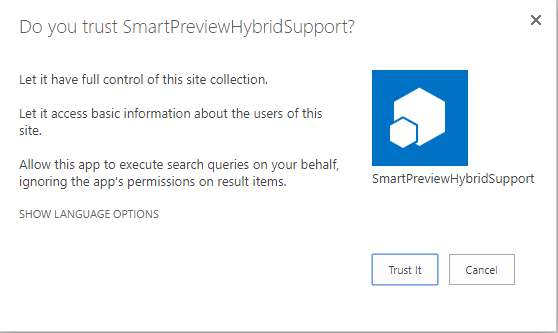
- Click "Trust it" in the confirmation window pictured below.
- The app will be added to the site collection.
It appears grayed-out initially, after it is added, until it is available.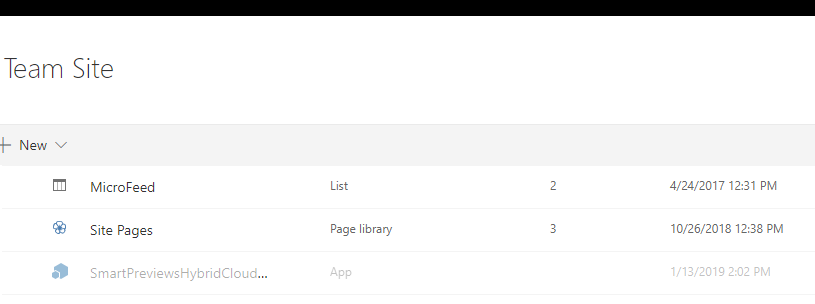
- Once the app is available (it typically takes 5-10 minutes) it is no longer appears grayed-out.
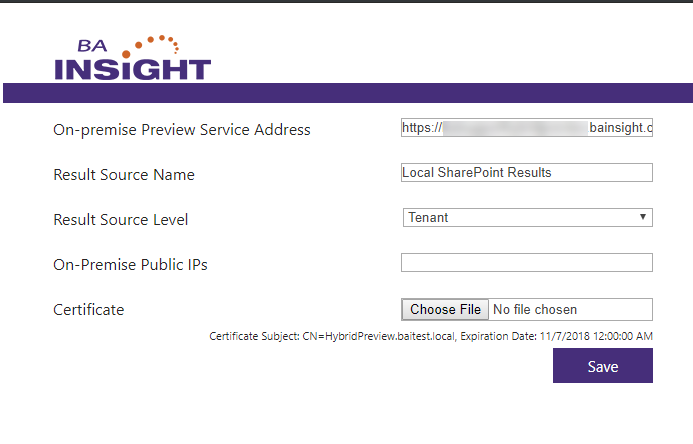
- When the app is available, click it to view the Preview App configuration options.
Provide the following information:- On-premise Preview Service Address:
- This is the public URL to the Smart Preview Hybrid service you created under the section labeled "Install and Configure On-Premise Preview Components."
- Result Source Name:
- This should be a result source that contains all items where you wish to make previews available.
- In most cases, "Local SharePoint Results" will encompass all documents.
- Result Source Level:
- This is the level where the result source identified in the previous setting exists.
- On Premise Public IPs:
- Optional.
- This setting can be used to identify IP ranges that requests might come from if the end user is working inside your corporate network.
- This disables the preview "download" option when request come from outside this range, for connector content (content which exists inside your network, and could not be downloaded when the end user is outside the network.)
- Certificate:
- This is the .cer file generated in the section "Install and Configure On-Premise Preview Components"; it is the self-signed certificate created in that section.
- This is the .cer file generated in the section "Install and Configure On-Premise Preview Components"; it is the self-signed certificate created in that section.
- On-premise Preview Service Address:
- Click "Save."
Add Smart Previews to your Search Center
Procedure:
-
Edit the search results page.
- Click "Add Web Part" in the main zone.
- Add the SmartPreviewsRouter. See the screenshot below.

- Edit the Web Part.
This Web Part shows no data on the page; these settings "hide" the Web Part from view.- Set Chrome Type to "None".
- Set the Zone Index to a high number, which will push it to the bottom of the page.
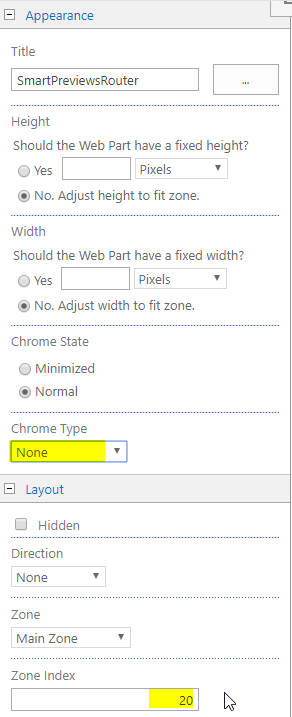
- Apply your changes.
- Edit the Search Results Web Part.
- Set the "Display Templates" > "Results Control Display Template" to "Smart Previews Result".
- Select "Use result types to display items" and then "Use Result type rules to decide".
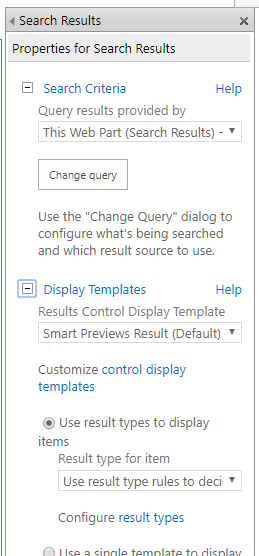
- Apply your changes.
- Check in the changes and publish the page.