Enterprise Service Management
For on premise customers, Enterprise Service Management is a Windows service that can be installed on one or more utility servers or workstations to monitor a FileBound site. The service communicates with the FileBound server every minute to determine if it is time to start an automation event.
In the FileBound cloud data center, there is a pool of FileBound services that are allocated to monitor all FileBound Cloud sites.
Install Enterprise Service Management
Configure Enterprise Service Management
Install Enterprise Service Management
Enterprise Service Management should be installed on a utility server that is not hosting a FileBound Server website or SQL database. Only one instance of Enterprise Service Management can be running on a server at a time. It is possible to have multiple services running on multiple machines all connected to the same FileBound Server website.
-
Download the Enterprise Service Management installer through Central Installation.
-
Extract the compressed files.
-
Double-click the FB-ES_Installer file.

-
Click Next to start the installation process.
-
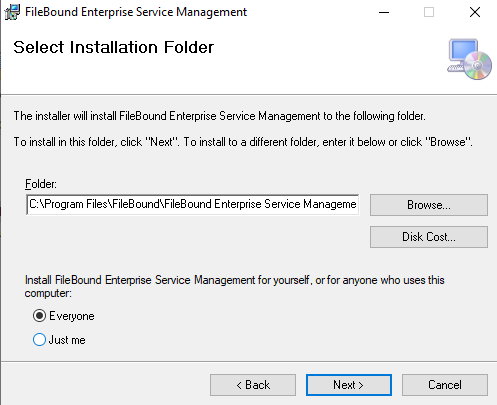
Select the installation folder and who has access to the program, then click Next.
-
Click Next to begin the installation process.
-
Click Close.
Configure Enterprise Service Management
There are only a few basic settings that initially need to be configured for Enterprise Service Management to be used. Once the following settings are configured and the service is started, you should not need to change these settings again. All other configuration is done withinAutomation Processes.
-
Right-click the FB-ES Management icon
 in the system tray, then click Settings.
-
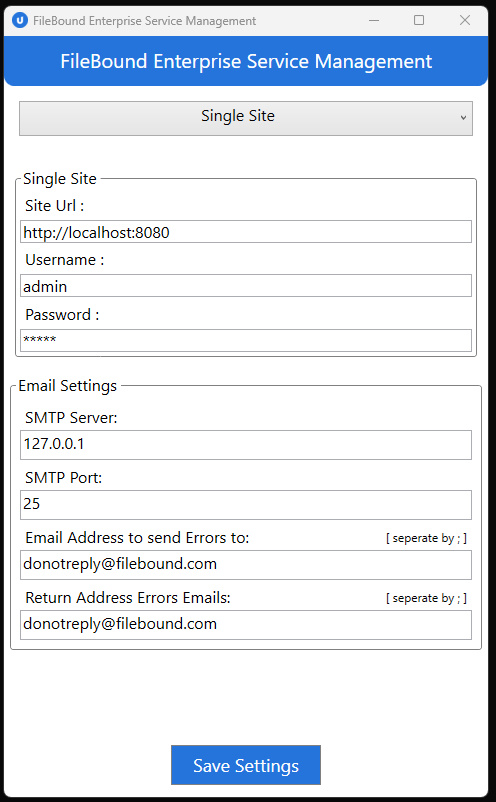
Enter the URL of the FileBound site to process in the Site Url box.
-
Enter the username and password of the user that will process automation events in the Username and Password boxes.
This is the user account that the service will use to connect to the FileBound site. It is recommend that this is a dedicated account for the service to use. This account should belong to a group that has full rights to any project that will be utilizing automation processes that need to be executed by the service.
-
Enter the SMTP server and name and port number in the SMTP Server and SMTP Port boxes. This is the email server that will be used to deliver emails that are sent by automation events.
-
Enter the email address to send errors to in the Email Address to send Errors to box.
-
Enter the email address to use for the return address on error emails in the Return Address Errors Emails box.
-
Click Save Settings.
-
Click OK on the confirmation message.
Add a new service
You can add as many services as you want on a single machine; however, only one OCR type event (Auto-OCR, Auto-Index, Site-OCR) can be added on the same machine.
-
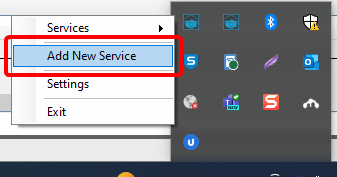
Right-click the FB-ES Management icon
 in the system tray, then click Add New Service.
-
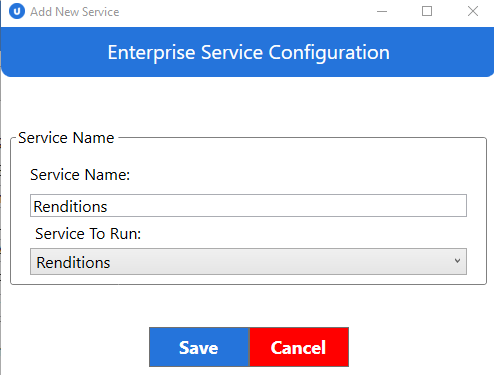
Enter a name for the service in the Service Name box.
-
Select an automation process from the Service to Run box. For more information on the services available here, see Automation Processes.
-
Click Save.
-
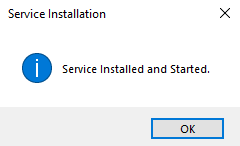
The service will automatically be started. When the service is running the Stop button will become active and the Start button is deactivated. Click OK on the confirmation message.
Start a service
-
Right-click the FB-ES Management icon
 in the system tray, then click Settings.
 -
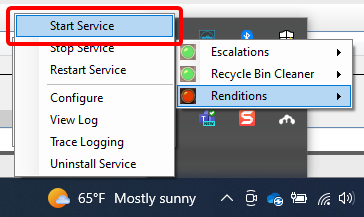
Hover over Services. Services that are stopped will have a red icon next to them.
-
Hover over the service you want to start, then click Start Service.
-
Click OK on the confirmation message. A green icon will now appear next to the service.
Stop a service
-
Right-click the FB-ES Management icon
 in the system tray, then click Settings.
 -
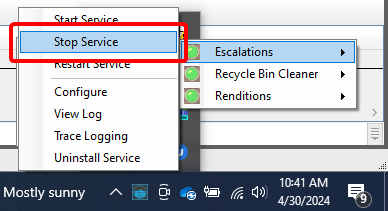
Hover over Services. Services that are running will have a green icon next to them.
-
Hover over the service you want to stop, then click Stop Service.
-
Click OK on the confirmation message. A red icon will now appear next to the service.
Restart a service
-
Right-click the FB-ES Management icon
 in the system tray, then click Settings.
 -
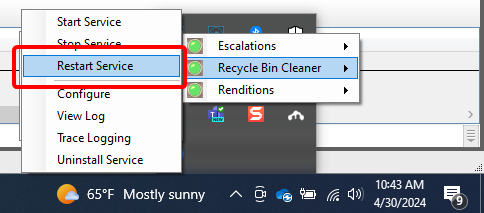
Hover over Services.
-
Hover over the service you want to restart, then click Restart Service.
-
Click OK on the confirmation message.
Configure a service
-
Right-click the FB-ES Management icon
 in the system tray, then click Settings.
 -
Hover over Services.
-
Hover over the service you want to configure, then click Configure.

-
The Enterprise Service Configuration screen will open. From here, you can:
-
Rename the service.
-
Select a different service to run.
-
Start the service if it is stopped.
-
Stop the service if it is running.
-
View the log for the service.

-
View the log for the service
You can monitor the automation process information by viewing the log. Log information is generated for each event.
-
Right-click the FB-ES Management icon
 in the system tray, then click Settings.
 -
Hover over Services.
-
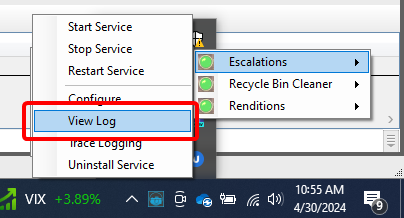
Hover over the service you want to view the log for, then click View Log.
-
The Enterprise Service log will be displayed. Use the Log Day and Level drop-down lists to filter log events.

View trace logging
-
Right-click the FB-ES Management icon
 in the system tray, then click Settings.
 -
Hover over Services.
-
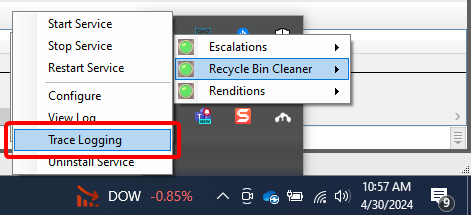
Hover over the service you want to view the trace logging for, then click Trace Logging.
Uninstall a service
-
Right-click the FB-ES Management icon
 in the system tray, then click Settings.
 -
Hover over Services.
-
Hover over the service you want to uninstall, then click Uninstall Service.

-
Click OK on the confirmation message.