Annotations allow a user to create an overlay directly on a document. You can add annotations to a document opened in the Content pane of the Web Viewer.
Annotations are not supported for documents in .pdf, .msg, .doc, .docx, .xls, .xlsx, or HTML formats.
As a prerequisite, adequate annotation group rights must be set by the System Administrator for the group you belong to. You can save the annotations with the document, depending on the rights set for your group.
Topics include:
Add an annotation
-
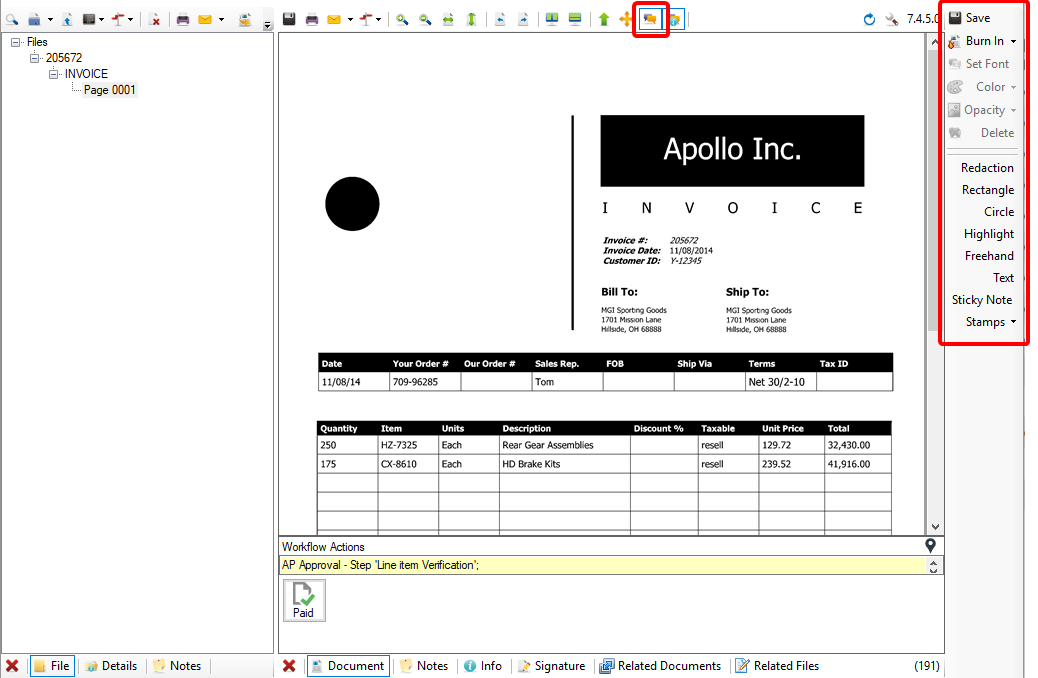
On the Content Toolbar, click Annotation Edit Mode. The annotation toolbar opens on the right side of the Windows Viewer.
-
Select the type of annotation you want to apply to the document. The following types of annotations are available:
 Redaction
Redaction annotations allow a user to hide or cover up specific information on the document. This is similar to applying white ink on a traditional paper document.
-
Click Redaction in the Annotations toolbar.
-
In the Content pane, move the pointer to the area in the document where you want to hide content. Click and hold down the left mouse button and stretch the area to the appropriate size, then release the left mouse button.
To re-size a redaction annotation, move the pointer to one of the four corners, and then click and hold down the left mouse button and stretch the area to the appropriate size.
-
Click Save.
 Rectangle
Rectangle annotations allow users to draw a border around a specific area in the document.
-
Click Rectangle in the Annotations toolbar.
-
In the Content pane, click and hold down the left mouse button and stretch the rectangle to the appropriate size, then release the left mouse button.
To re-size a rectangle annotation, move the pointer to one of the four corners, and then click and hold down the left mouse button and stretch the area to the appropriate size.
-
Change the attributes of the rectangle annotation as desired.
-
Click Save.
 Circle
Circle annotations allow users to draw a circle around a specific area in the document.
- Click Circle in the Annotations toolbar.
-
In the Content pane, click and hold down the left mouse button and stretch the circle to the appropriate size, then release the left mouse button.
To re-size a circle annotation, move the pointer to the bottom-right corner, and then click and hold down the left mouse button and stretch the area to the appropriate size.
- Change the attributes of the circle annotation as desired.
- Click Save.
 Highlight
Highlight annotations allow the user to highlight a selected area on the document.
- Click Highlight in the Annotations toolbar.
-
In the Content pane, move the pointer to the area in the document where you want to highlight content. Click and hold down the left mouse button and stretch the area to the appropriate size, then release the left mouse button.
To re-size a redaction annotation, move the pointer to the bottom-right corner, and then click and hold down the left mouse button and stretch the area to the appropriate size.
- Change the attributes of the highlight annotation as desired.
- Click Save.
 Freehand
Freehand annotations allow users to draw annotations by hand on documents.
- Click Freehand in the Annotations toolbar.
-
In the Content pane, click and hold down the left mouse button to draw the annotation, then release the left mouse button.
To re-size a freehand annotation, move the pointer to the bottom-right corner, and then click and hold down the left mouse button and stretch the area to the appropriate size.
- Change the attributes of the freehand annotation as desired.
- Click Save.
 Text
Text
Text annotations allow the user to insert text directly on the document.
- Click Text in the Annotations toolbar.
- In the Content pane, click the area in the document where you want the text to begin.
-
Once the text box is created, double-click the box type text.
-
Change the attributes of the text annotation as desired.
- Click Save
 Sticky Note
Sticky Note annotations allow the user to add eye-catching, movable notes to a document, much like notepad sticky notes. Users can then save text, add text, or replace text in the sticky note; then save this back to the file as needed.
Sticky notes cannot be burned in and are also not printed or added to the document when it is downloaded. They are meant as on-page, in-FileBound notes only. A text annotation can be used if you want to print or download the annotation.
- Click Sticky Note in the Annotations toolbar.
-
In the Content pane, click and hold down the left mouse button and stretch the sticky note to the appropriate size, then release the left mouse button.
To re-size a sticky note annotation, move the pointer to the bottom-right corner, and then click and hold down the left mouse button and stretch the area to the appropriate size.
-
Click the sticky note to type text.
- Change the attributes of the sticky note annotation as desired.
- Click Save.
 Stamp
Stamp
Stamp annotations allow users to place electronic stamps on a document. Stamps are added to FileBound by the System Administrator. Stamps can be configured for all users or specific users. For more information about configuring a stamp for all users, see Main Options - Plug-ins. Stamps configured for specific users are only available to that user for all projects the user has access to. For more information about configuring a stamp for a specific user, see User settings - Stamp tab.
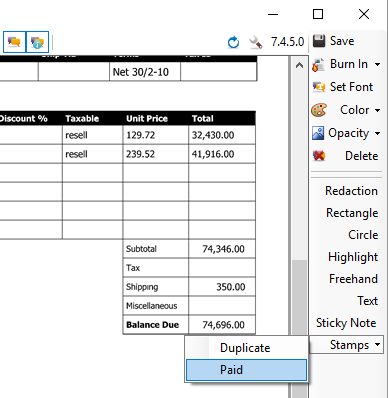
- Click Stamps in the Annotations toolbar.
-
Select a stamp from the list.
-
In the Content pane, move the pointer to the area in the document where you want the stamp to be located. Click and hold down the left mouse button and stretch the area to the appropriate size, then release the left mouse button.
To re-size a stamp annotation, move the pointer to the bottom-right corner, and then click and hold down the left mouse button and stretch the area to the appropriate size.
-
Click Save.
-
Save an annotation
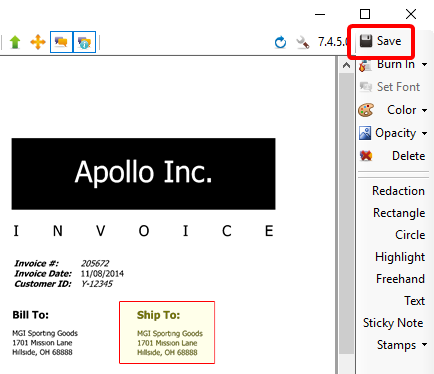
When you apply annotations to an open document, the annotations are available as separate layers on the document. The annotations are lost once you exit the FileBound session if the annotation was not saved. To save the annotation with the document permanently, you must save the annotations with the document explicitly.
Annotations can be saved with the document depending on the rights set for your group by the System Administrator. A System Administrator can also designate users who can apply annotations without allowing them to save the annotations.
- On the Content Toolbar, click Annotation Edit Mode.
- Apply an annotation to the document.
-
Click Save.
Burn in annotations
You can make one or more annotations permanent by burning the annotations into the document or image. When you burn in an annotation, the annotation layer is merged with the layer of the document or image, therefore creating a new image. If revisions are not enabled for the project, the original document will be replaced with the new document that includes the burned-in annotation. If revisions are enabled for the project, a new revision will be created that includes a copy of the original document and the applied annotation.
You can burn in annotations if you are assigned to a group that has the Burn in Annotations group right.
- On the Content Toolbar, click Annotation Edit Mode.
- Apply an annotation to the document.
-
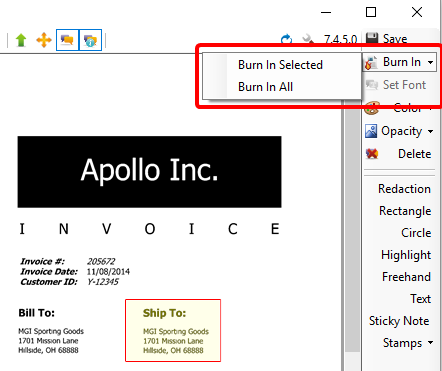
Click Burn in, then click Burn In Selected to burn in only the selected annotations or click Burn In All to burn in all of annotations applied to the document.
Delete an annotation
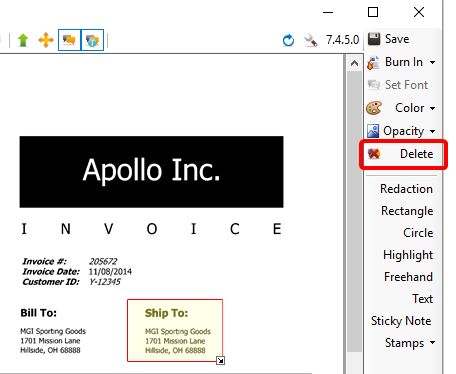
You can delete an annotation after it has been added to a document. Once an annotation has been burned in, it cannot be deleted.
- Select the annotation you want to delete.
-
Click Delete.
- Click Yes to confirm the deletion.