Import a screenshot
You can quickly import a screenshot of the active window into a file. The screenshot will be captured in PNG format.
- Search for or create a file to import into. See Search for more information.
- Select a separator (if applicable).
-
Press the hotkey configured for a screenshot import to take a screenshot of the active window. See Import Options for more information.
-
In the Screenshot Import window, edit screenshot import options as needed, and click Save.
Click Edit to open the image in Microsoft Paint for basic editing. You must use Save after making changes made in Paint. If Save As is used, the image path is changed and the un-edited image will be imported.
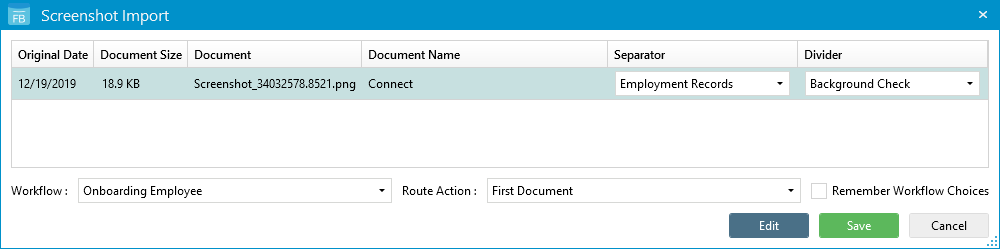 Note: If the Enable workflow selection check box is selected on the Import tab in Options, you will see the following settings on the Document Import dialog box. See Import Options for more information.Note: If a workflow process has been defined for automatic routing in the project settings, you will not be able to select a workflow when uploading documents.
Workflow: The workflow the document will follow when imported.
Route Action: Determines which pages or documents are routed in the workflow. Select one of the following:
- First Document: Routes only the first document of the selected file. Additional pages that are going into the same divider during the same upload process will not be routed if they are uploaded within 30 seconds of the last page uploaded into the same divider.
- Every Document: Routes the first page in a divider during the upload process.
Remember Workflow Choice: Saves the selected workflow settings for the project.
Menu