You must install the FileBound Connect Chrome extension in order for web integrations to work in the Chrome browser. The extension must be installed and configured on every computer that will be using a web integration.
- In the Chrome browser, open the Chrome Web Store.
-
Click Add to Chrome.

-
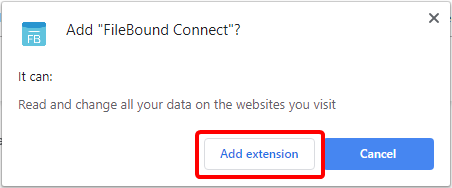
Click Add extension.
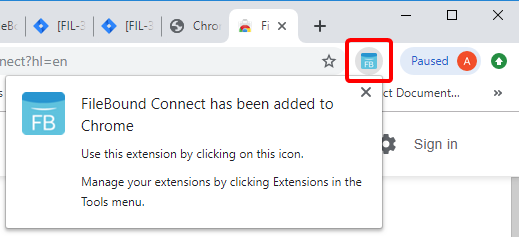
The FileBound Connect plug-in is installed and appears in the upper right corner of the browser window.
Add a website to FileBound Connect extension
The FileBound Connect Chrome extension will only work with websites that are specifically added to the extension. FileBound Connect web integrations will not work if you have not added the website to the list of sites that the FileBound Connect extension watches. You can add multiple sites to the extension.
- Navigate to the web application that you want to integrate with Connect.
- Click the FileBound Connect extension.
-
Click Add-Web application URL.
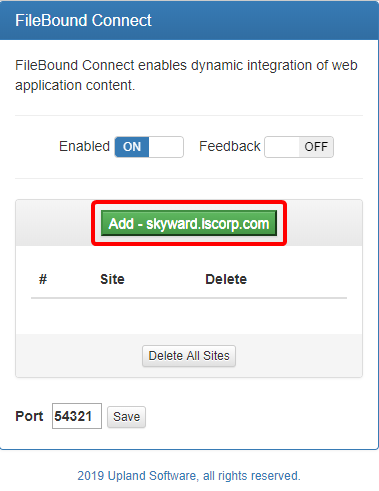
Enabled: When ON, the activity of the site is being tracked for integration. Set to OFF, if you do not want to track the activity of the site. The FileBound Connect icon in the upper-right corner of the browser will reflect the option selected for this setting.
Feedback: When ON, any new activity on the site triggers a beep on the user's computer.
Port: The port for the browser extension to use for web integrations. The default port value is 54321.
Menu