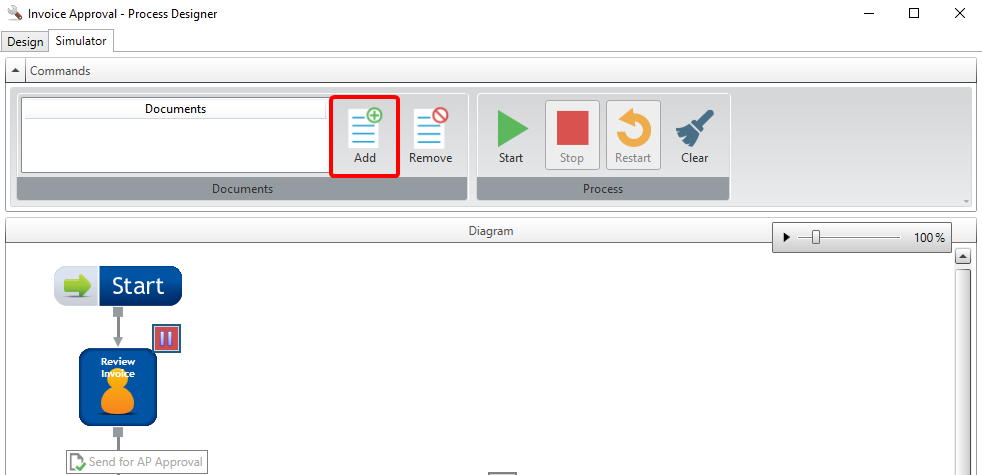
- Click the Simulator tab in the Workflow Process Designer.
- Pause any steps or decision stencils you want the simulator to stop on. See Pause a step in the Workflow Simulator for more information.
-
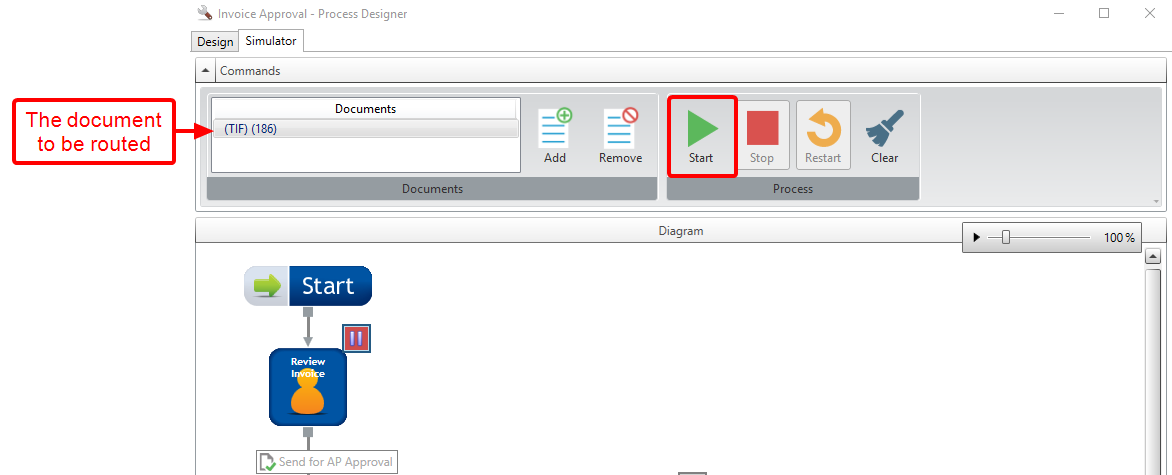
Click Add.
-
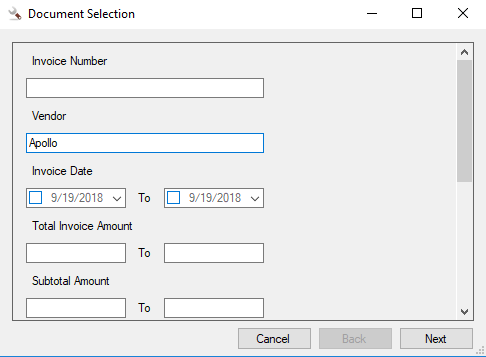
In the Document Selection dialog box, specify search criteria in the relevant index field boxes, then click Next. You can perform an open search by just clicking Next and not entering any criteria.
-
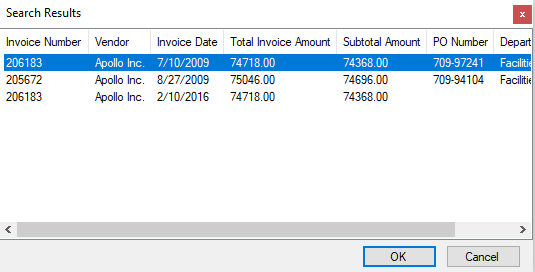
Select a file from the search results list, then click OK.
-
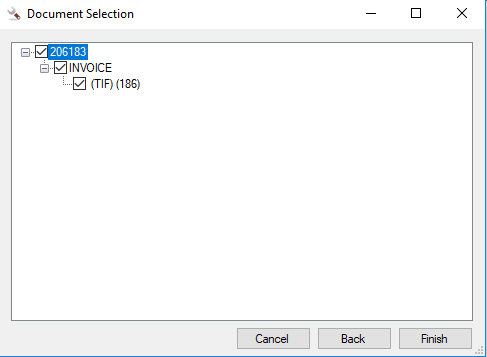
Select the check box next to the document you want to route through the workflow, then click Finish.
-
Click Start.
-
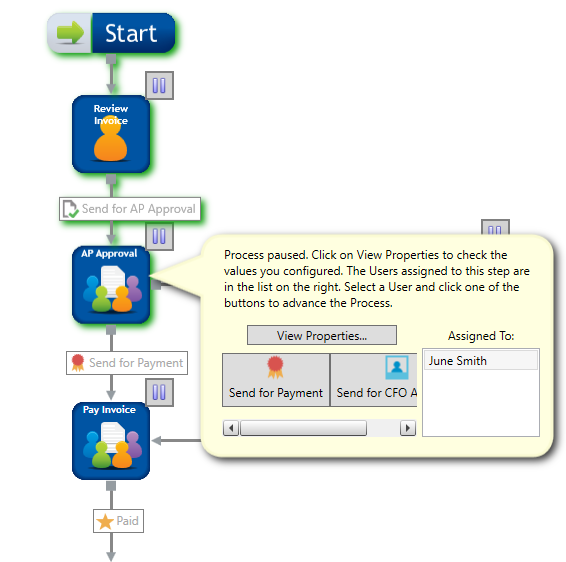
The simulator will pause when the document is routed to a workflow step that has multiple action buttons or a step or decision stencil that has been manually paused prior to running the simulator. You can view properties for the step, select a user, and click a task button to proceed through the workflow process.
If any errors are encountered while routing the document through the workflow process, an Error dialog box will be displayed. Click View Error Details to view a detailed explanation of the error.

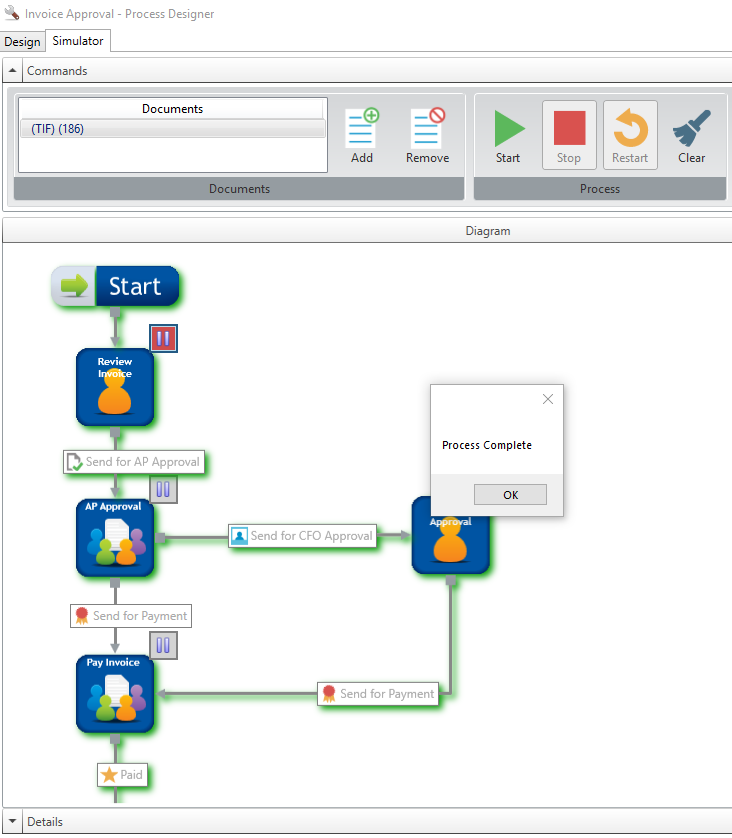
If the document is routed through the workflow process without encountering any errors, a "Process Complete" message will be displayed. Click OK to dismiss the message. The route that the document traveled through in the process will be highlighted in green.
Menu