Device Assignment
Device assignment allows you to assign specific device profiles to a user. If the device assignment feature is enabled, users are restricted to the assigned devices when logging into InGenius.
You can configure monitor InGenius "monitors" the integrated telephony device when a user logs in. This process is referred to as a monitor. parameters for your telephony system via the InGenius Configuration Tool. Any monitor parameters enabled from the Configuration Tool can be added to a device assignment profile.
To enable device assignment:
- In the InGenius Admin App, select the Telephony page.
- Select the telephony profile you want to enable device assignment for.
- Select Device Assignment from the sidebar.
- On the Device Assignment page, click the Enable device checkbox.
Once you have enabled the device assignment feature, you can configure assignments for your users.
There are two methods to create a new assignment profile:
- New Assignment Button
- Import a Template
1. New Assignment Button
Select the  button to create a new device assignment profile.
Depending on your telephony system, you are prompted to fill out several fields and/or monitor parameters.
Ensure to fill out the User and Display Name fields:
- User: The username for the user you wish to assign the profile to. Begin by typing the username and select it from the dropdown list.
- Display Name: The name of the device assignment profile and the name the user sees when choosing a device profile in InGenius. You cannot use the same Display Name for the same user and telephony provider profile.
2. Import a Template
You can create a new device assignment profile or edit an existing profile via a template file. Any changes made to the template file are reflected on the Device Assignment page when you import it. Creating or editing a profile via a template may be useful if you wish to create or edit many assignments at once, or allow someone without access to the Admin App to do so.
With this method, you must first download a template:
- From the Device Assignment page, select the More Options
 icon.
icon. - From the dropdown list, select Download template.
- A csv. file is downloaded to your computer. Open the file and edit the device assignment fields as desired.
Note: Ensure that the user ID field in the template is entered as the user's email, and that the default template row "(User) (Display Name) (Extension)" has been removed, otherwise there will be an error when importing the template into the admin app.
Once you have edited the csv. file, you can import it back into the InGenius Admin App. Changes made to the file appear on the Device Assignment page when the file has been imported successfully.
To import device assignment information via a csv. file:
- Select the More Options icon.
- From the dropdown list, select Import from file.
- Next, either drag and drop the file or browse your computer for the file.
- Select Import. The page updates with the information from the .csv file.
Note: Any field that contains a comma must be placed in quotes for the data to be imported correctly from the .csv file. Example: "John,Doe".
Note: The Work Mode values in the template file must match what the phone system expects (case sensitive), not the "friendly names" displayed in the UI. These values are: Auxillary Work: AUX_WORK, Auto-In: AUTO_IN, Manual-In: MANUAL_IN, After-Call Work: AFTER_CALL_WORK.
Note: The values for Work Mode in the template file must be case sensitive. The valid values are: Unspecified: AWM_UNSPECIFIED, Auto In: AWM_AUTO_IN, Manual In: AWM_MANUAL_IN
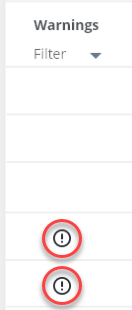
Warnings
A warning icon appears when there is a corresponding incomplete device assignment. Hover over the warning icon with your mouse to see more information about the warning and how to correct it:
Assignments with a warning icon are unavailable to users until the warning is fixed.
You can filter warnings by clicking the Warnings heading and selecting the Incomplete and/or Complete checkboxes:
- Incomplete = shows assignments with a warning.
- Complete = shows assignments with no warning.
The Warnings column disappears when all warnings are fixed and the page is published and reloaded.
Select this checkbox to ensure users with a single assignment are automatically logged in to InGenius:
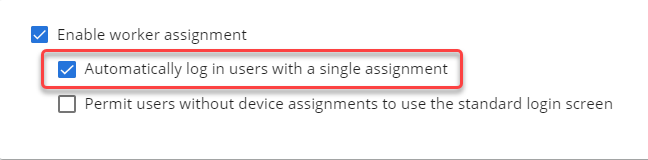
As long as this checkbox is selected, users with a single device assignment do not encounter a login screen for InGenius This allows these users to launch and use the product faster.
If this checkbox is unselected, users with a single assignment must select the Connect button to log in to InGenius.
Note: The Disconnect option is unavailable when the Automatically log in users with a single assignment feature is enabled.
Select this checkbox to allow users without a device assignment to log in to InGenius using the standard login screen:

As long as this checkbox is selected, users without a device assignment are able to login to InGenius.
If this checkbox is unselected, users without a device assignment are unable to connect via the login screen, as shown in the following image:
