Setup User Access to InGenius
Before users can use InGenius in their
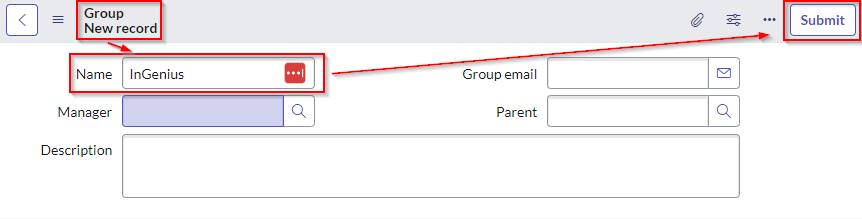
Create New User Group
-
Login to your ServiceNow Instance.
-
Click the All tab, and search for and navigate to 'Groups', under User Administration.
-
Click the New button on the top-right corner.

-
Add a user group with the Name Field "InGenius", no other configuration is required.
-
Click Submit to save the new user group.

Add Roles to ServiceNow Admin
-
Login to your ServiceNow Instance.
-
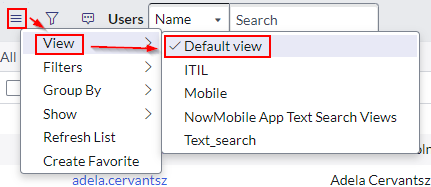
Click the All tab, and search for and navigate to 'Users', under User Administration.
-
Click the folding menu in the top-left corner, and select View | Default View.

-
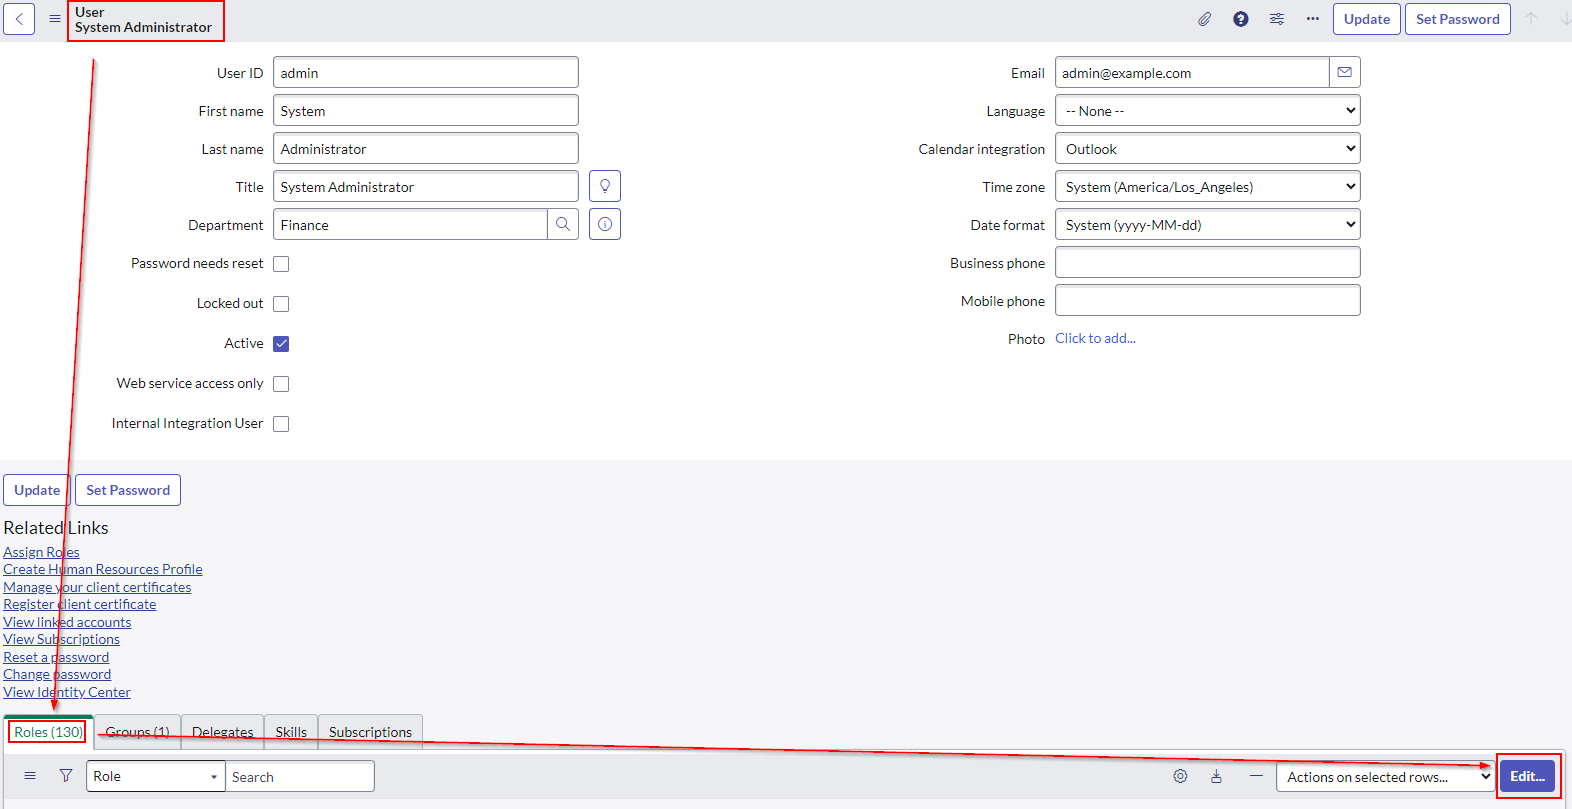
Search for a user with the User ID 'admin', and select the user.
-
Select the Roles tab from the bottom of the page, then click the Edit button.

-
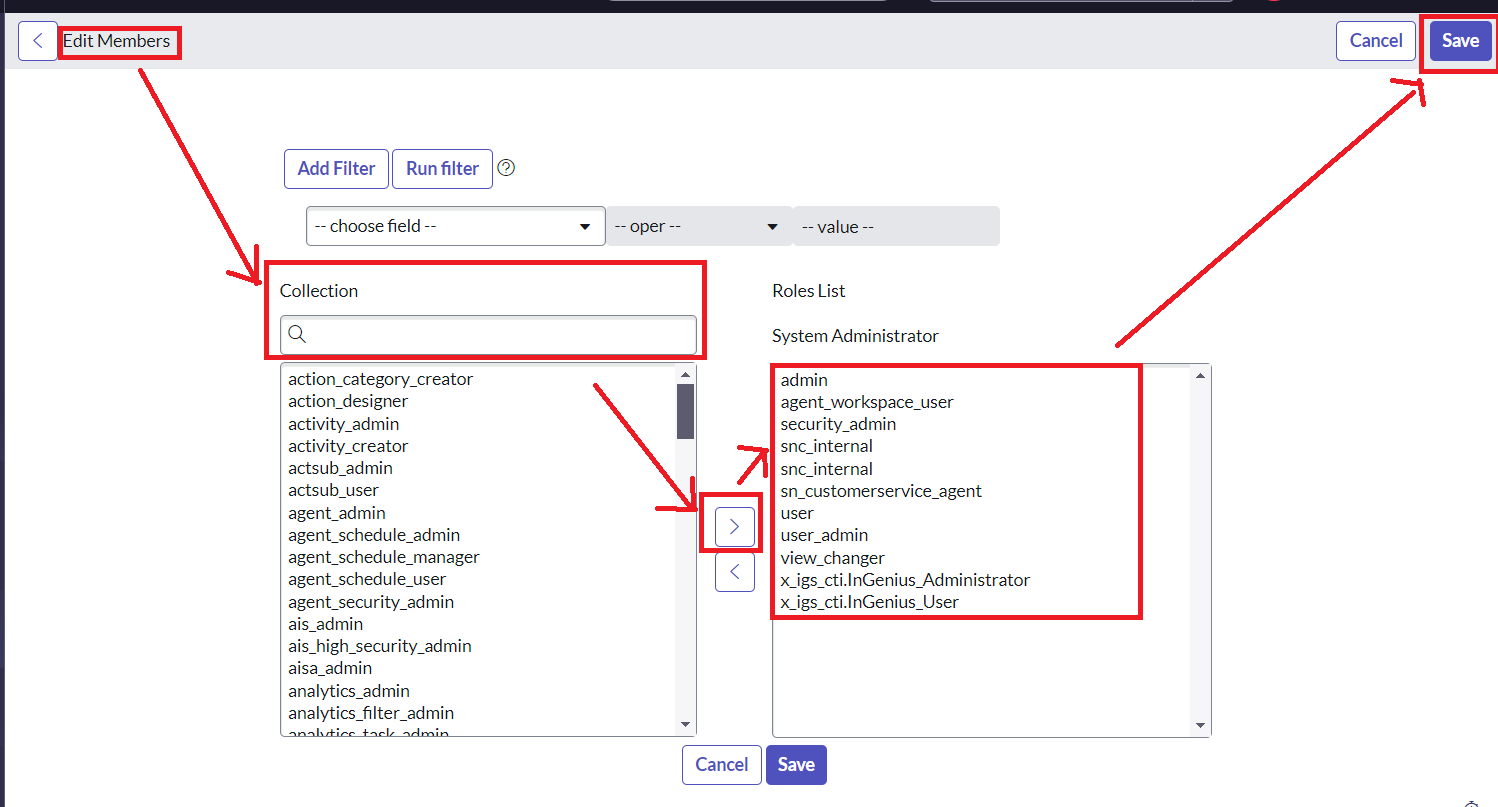
Search for the following roles and add them to the Roles List on the right:
-
view_changer - Provides access to the InGenius View for tables.
-
agent_workspace_user - Provides access to the HR Agent Workspace app.
-
sn_customerservice_agent - Provides access to the Customer Service entities.
-
x_igs_cti.InGenius_Administrator - Provides access to the InGenius Admin app.
-
x_igs_cti.InGenius_user - Provides access to the InGenius Client app.
-
user and user_admin
-
The admin, security_admin, and snc_internal roles should already be populated in the list.

-
-
Click Save.
Assign the InGenius Security Role
After having imported the InGenius solution zip file during deployment, the Microsoft Dynamics security role users must be assigned to will have been created. This security role allows users to access InGenius Connect in their Microsoft Dynamics instance. For more information on security roles, consult the Microsoft Dynamics documentation here.
Follow the instructions below to assign your users:
-
Login to your Microsoft D365 instance, and then select the Settings cog wheel from the top menu, and then select Advanced Settings.
-
Navigate to Settings | Security | Users.
-
From the list, select the user account(s) that you would like to assign the security role to, then select the Manage Roles button from the top menu.
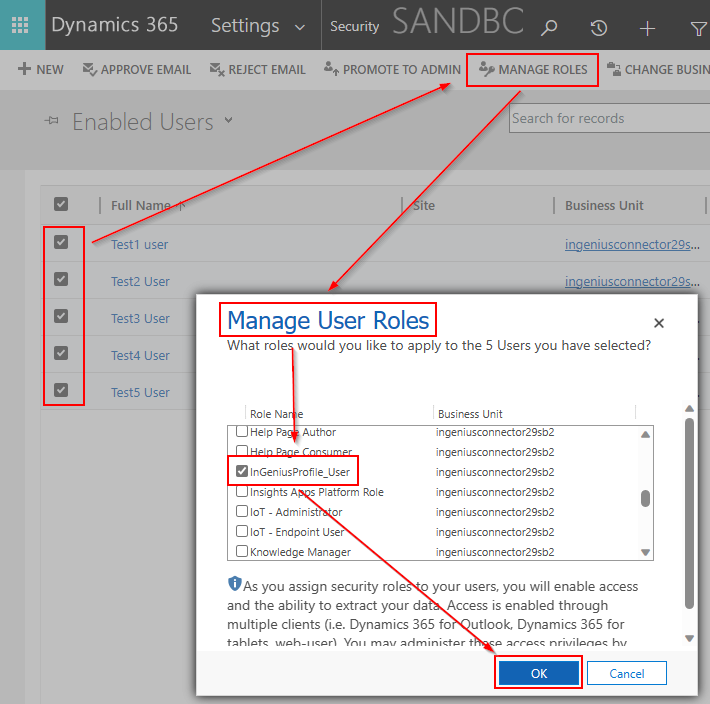
Select the 'Omnichannel Users' drop down and select Enabled Users.
Note: For users requiring access to the InGenius Admin App, you must assign the "InGeniusProfile_admin" user role.
-
The user role imported from the solution file will be called 'InGeniusProfile_User', select this role and then click the OK button to apply the changes.
Note: If the 'InGeniusProfile_User' role is not there, ensure you have correctly imported the InGenius solution file provided to you during deployment. Refer to the deployment page.
Caution: Contact centers are exclusive to the environment in which they are generated and cannot be used in any other Salesforce org.
Downloading the Contact Center
The Admin App will generate a unique key for your organization and include it in the contact center XML definition file. The downloaded contact center file is ready to be imported into Salesforce without any modifications.
-
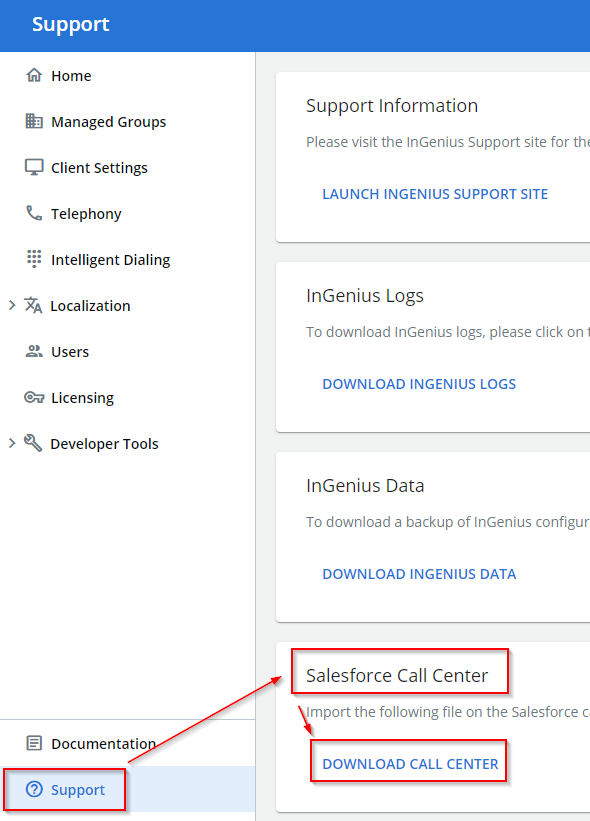
In the Admin App, navigate to Support.
-
Select Download Contact Center.
-
Save the contact center XML file to a location on your computer.
Note: The "Data download successful" prompt might not appear even if the download is successful. Make sure to check your browser's download history after downloading.
Importing the Contact Center Into Salesforce
The contact center file can be imported using Salesforce.
-
In the Salesforce search bar, type in "Partner Telephony Contact Centers" and select the first option.
-
In the top right corner, select Create Contact Center.
-
In the 'Select your telephony provider' page, select either 'InGenius BYOT (Production Org)' or 'InGenius BYOT (Sandbox Org)' depending on the environment you are installing in and click Next.
-
Press the Upload XML file button, select the contact center XML file downloaded from the previous section, and click Open.
Contact Center Lightning App
Create a lightning app to be used within your SCV Salesforce org.
-
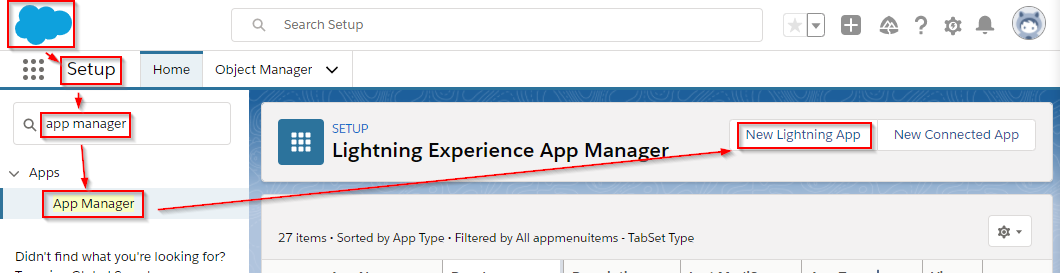
Login to your SCV Salesforce Org and navigate to Setup | App Manager.
-
Select New Lightning App , enter your contact center name under App Details and click Next.

-
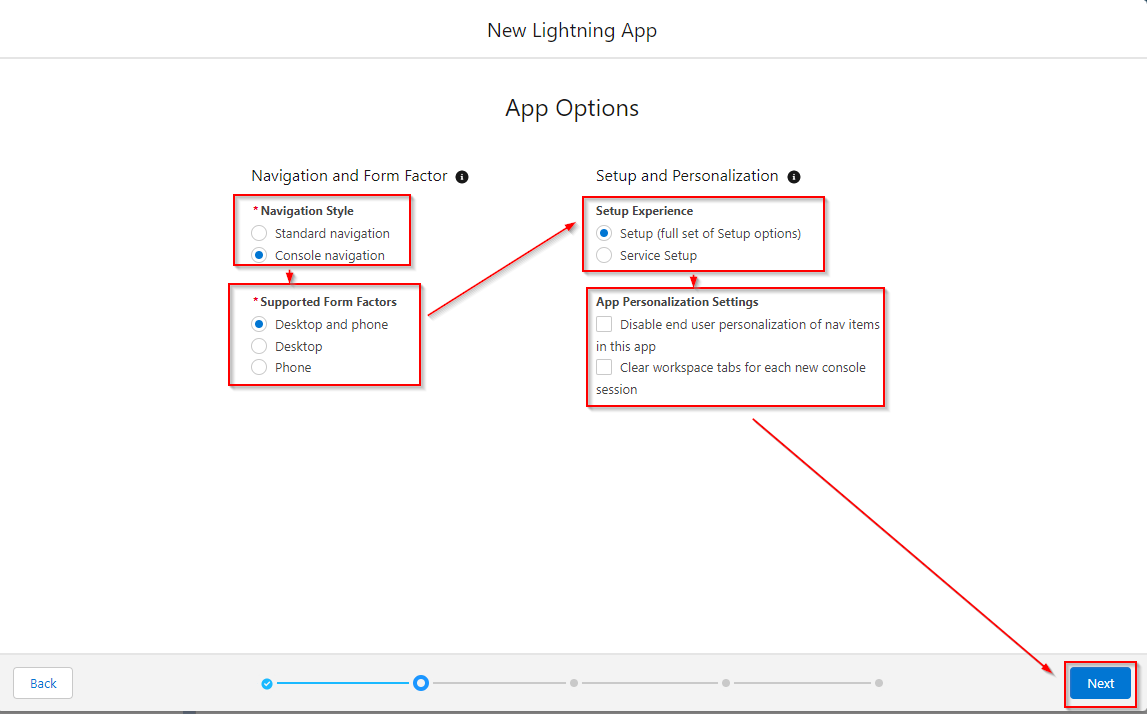
In the App Options page:
-
Select Console navigation under Navigation Style
-
Select Desktop and phone under Supported Form Factors
-
Select Setup (full set of Setup options) for Setup Experience
-
Unselect the option for 'Disable end user personalization of nav items in this app'
-
Unselect the option for 'Clear workspace tabs for each new console session'
-
Click Next.

-
-
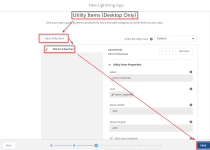
Select Add Utility Item.
-
Select Omni-Channel to add Omni-Channel to the utility item and click Next.
-
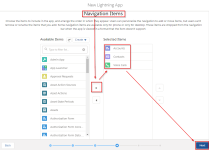
Use the search bar to find the "Voice Calls", "Contacts", and "Accounts" navigation items. Select each one and click Add, then click Next to continue.
-
Leave the Navigation Rules values as their defaults and click Next.
-
In the User Profiles screen, add System Administrator and Standard User to Selected Profiles and click Save & Finish.


Add Users to Call Center
Users must be in an InGenius contact center in Salesforce to receive an InGenius license. You can assign users to the contact center through Salesforce.
For more information on how to assign a user to the InGenius contact center, consult the Salesforce documentation here.
Add Users to SCV Contact Center
For users to be able to view and use the contact center, they must first be added to it.
-
Login into the SCV Salesforce Org with the imported InGenius Contact Center.
-
Navigate to Setup | Feature Settings | Service | Voice | Partner Telephony Contact Centers.
-
Select the InGenius Contact Center.
-
Navigate to the Contact Center Users section and select Add.
-
Select the User(s) assigned with the SCV Permission Set.
-
Select Done.