Create Telephony Provider Profile
You must create and configure a telephony provider profile within the Admin App to use your telephony system with InGenius. To create a new telephony provider profile:
-
In the Admin App, select the Telephony tab.
-
Select Create Telephony Provider.
-
Select the Telephony type dropdown and select your telephony system.
-
Name the profile.
-
Select Set Telephony Type.
-
Select Publish.
Note: You will be unable to publish your profile until after you've gathered information from your Genesys telephony page. Keep the telephony profile page open and proceed to the Telephony Configuration and then the Configure Telephony Profile section.
On-Premises Telephony Profile Configuration
This section requires you to use the InGenius Admin App and the InGenius Configuration Tool.
For information on device assignment, consult the documentation here.
For information on high availability, consult the documentation here.
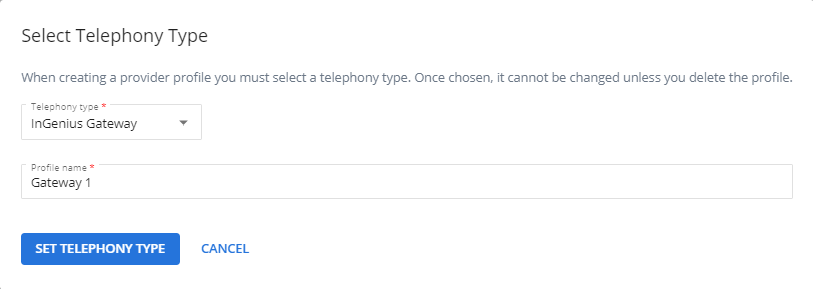
Create New Provider Profile
To create a new telephony provider profile:
- In the Admin App, select the Telephony tab.
- Select Create Telephony Provider.
- Select the Telephony type dropdown > InGenius Gateway.
- Name the profile.
- Select Set Telephony Type.
Configure Telephony Gateway Profile
Next, you need to link the telephony gateway to InGenius using the gateway URL found in the Configuration Tool.
To link the telephony gateway with InGenius:
- Navigate to the InGenius Configuration Tool.
- Select the Configuration tab, then the General sub-tab.
- Highlight and copy the gateway URL. The URL is located under the HTTPS Service Configuration heading in the Configuration Tool. The location is shown in the image below:
- Navigate back to the gateway telephony profile created in the Admin App.
- Paste the copied gateway URL into the Primary Gateway URL field (location shown in the image below). Ensure to include HTTPS:// before the URL text.
- (Optional) Select the More Options icon
 > Telephony Gateway Settings to configure additional settings, such as the logging level and TAPI lines, if required by your phone system. For more information, refer to the Telephony Gateway Settings section on this page.

Note: If you are using a non-standard port other than 443, ensure to include the port number at the end of the URL, separated by a colon. Example: https://server.domain.tld:800

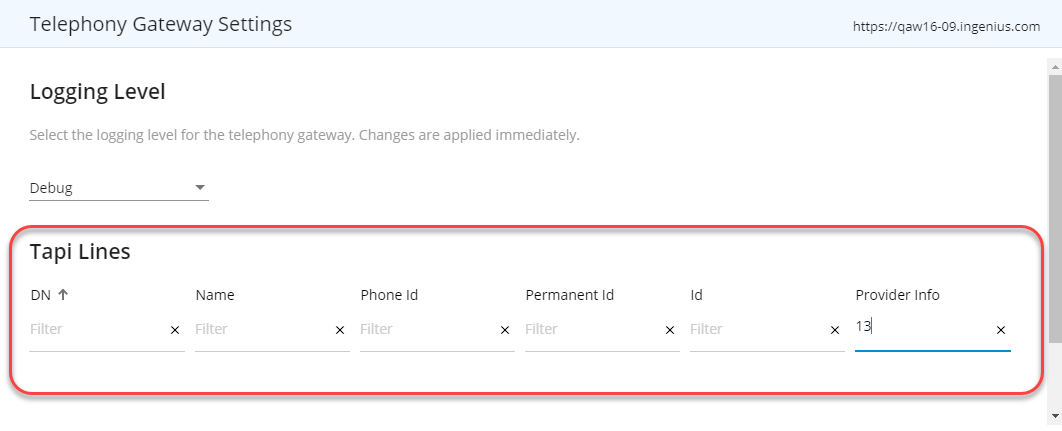
Telephony Gateway Settings
Depending on your phone system, you can configure the following in the Telephony Gateway Settings:
- Logging level
- View and refresh TAPI lines.
Select More Optionsnext to the desired Gateway URL field to access Telephony Gateway Settings.
You can set the logging level to provide certain amounts of detail found in the gateway logs.
The logging level options include:
- Debug: This is the default setting and records all informational messages from gateway, client and telephony systems.
- Restricted: Records a subset of informational messages from the gateway, client and telephony systems.
- Off: No related call log information is recorded in the data file.
You can view, sort and refresh TAPI lines in the Telephony Gateway Settings.
To display more data related to TAPI lines, select the Advanced View button to display the following additional information:
- Phone ID
- Permanent ID
- ID
- Provider ID: Provider Info
To refresh TAPI lines, select the Refresh TAPI Lines button (Cisco UCM phones only).