Configure Salesforce Messaging for In-App and Web User (MIAW)
Note: This section is not applicable to your CRM and/or telephony.
In order to allow transcription to function, you must enable and configure Messaging for In-App and Web Users to use the API to create the conversation objects where the transcripts will be stored. This page will guide through all of the configuration steps necessary to do. Ensure that you have already completed all of the necessary steps in Pre-Deployment and Installation & Configuration before proceeding.
Enable Skills-Based and Direct-to-Agent Routing
-
Navigate to your Salesforce Org.
-
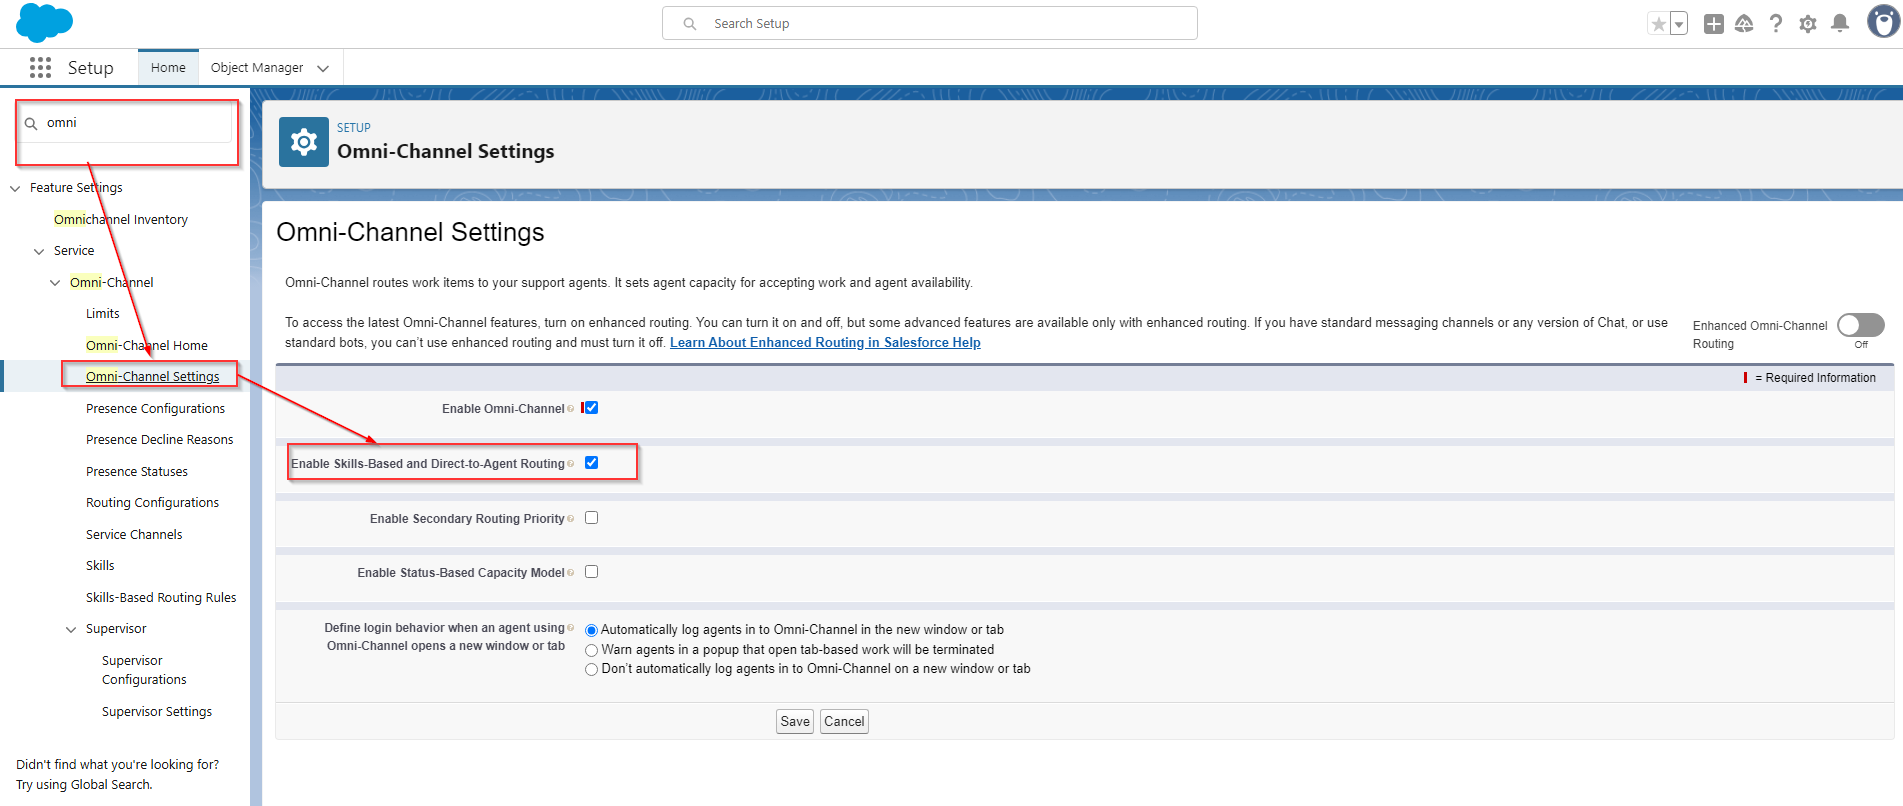
Navigate to Setup, and in the Quick Find box, search for and select 'Omni-Channel Settings'

-
Select the 'Enable Skills-Based and Direct-to-Agent Routing' option and then click Save.
Create Salesforce Omni-Channel Presence Statuses
The presence statuses that agents can use to indicate their availability must be defined.
-
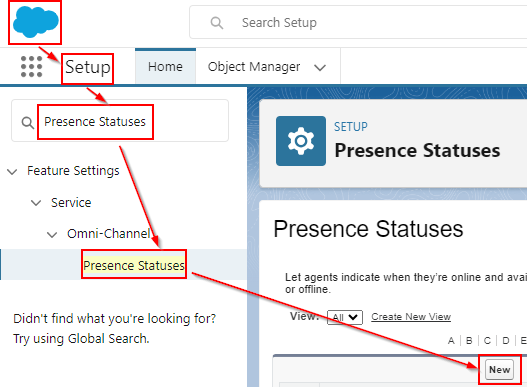
Navigate to Setup, and in the Quick Find Box, search for and select 'Presence Statuses'.
-
Click the New button in the Presence Statuses page.

-
Create a "Busy" Status as follows:
-
Status Name: NR
-
Developer Name: NR
-
Status Options: Busy
-
-
Click the Save button to apply your changes.
-
Create another New Presence Status 'Available' as follows:
-
Status Name: Available
-
Developer Name: Available
-
Status Options: Online
-
Service Channels: Add 'Messaging' from Available Channels to Selected Channels
-
-
Click the Save button to apply your changes.
Configure Two-Way Agent Presence Status
Ensure that you have enabled Omni-Channel Integration and configured your presence federation mapping table in the Client Settings section of your InGenius Admin App as described in this section.
You must at least have the following Off Queue Presence Mappings configured:
-
Map the Ready status to the Available Salesforce Status
-
Map the Not Ready status to the NR Salesforce Status
-
Map the Logged Out status to the Offline Salesforce Status.
Set Up Presence Configurations
It is important to determine how much work agents are allowed to handle, to define how these work requests are handled, whether agents can decline work items, and the reasons that they can decline them.
-
Navigate to Setup
-
In the Quick Find box, search for and select 'Presence Configurations'
-
Click New, and fill in the following information:
-
Presence Configuration Name: InGenius_Voice_Messaging_Configuration
-
Developer Name: InGenius_Voice_Messaging_Configuration
-
Capacity: 100
-
-
In the Audio Settings section, uncheck the 'Play a notification sound for work requests' box.

Note: This will prevent hearing double notification sounds when receiving a call with transcription.
-
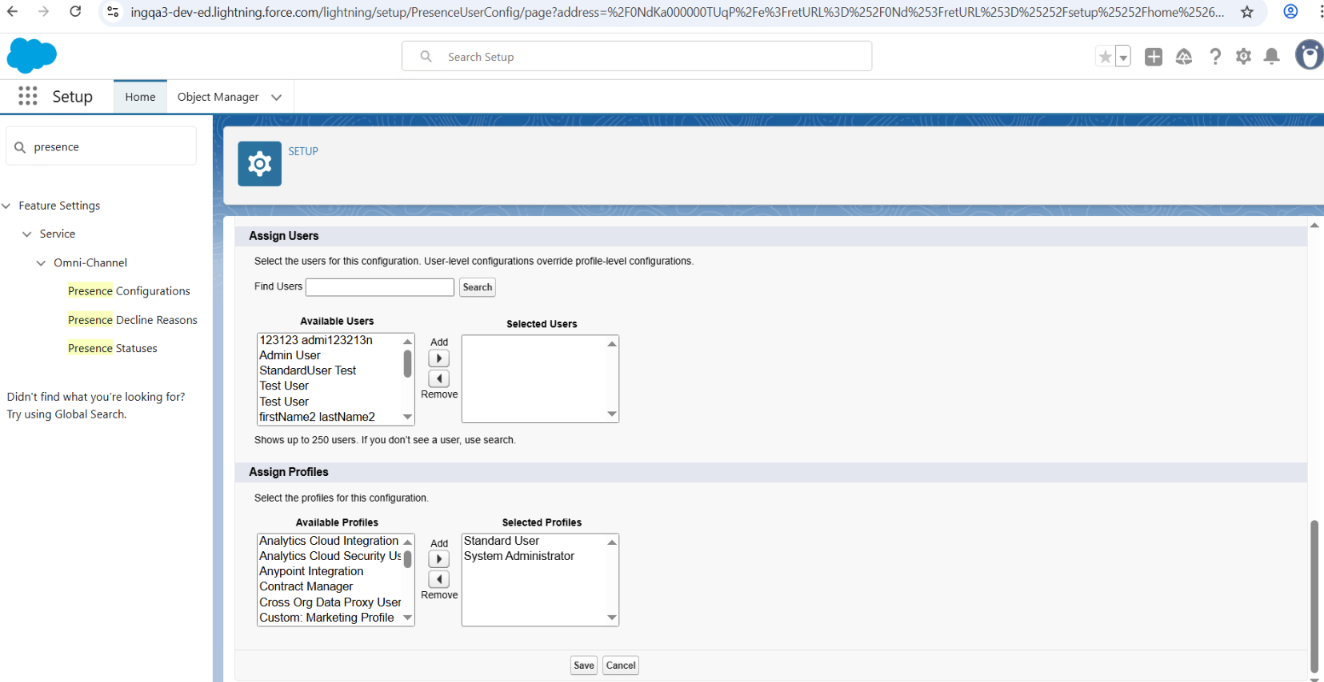
Assign them to your profiles that will use transcription, and then click Save.
Note: If you have not done so already, ensure you have at minimum created Salesforce Presence statuses for Busy and Online options and assigned them to your users. For more information, refer to the Salesforce documentation.
Create Routing Configurations
Routing configurations determine how work items are routed to agents. It priorities the relative importance and size of work items from your queues. That way, the most important work items are handled accordingly, and work is evenly distributed to your agents.
-
Navigate to Setup.
-
In the Quick Find box, search for and select 'Routing Configurations'
-
In Routing Configurations, click New and fill in the information for the new configuration as follows:
-
Basic Information
-
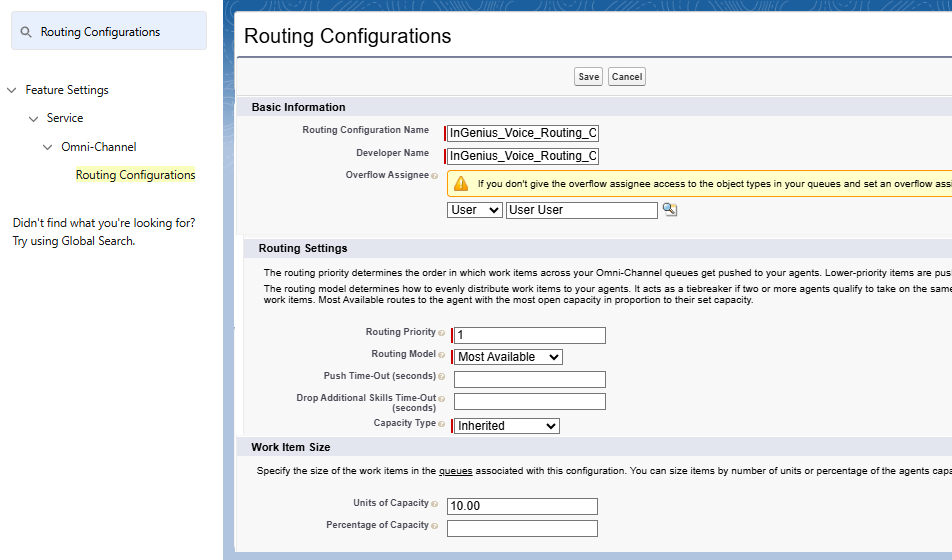
Routing Configuration Name: InGenius_Voice_Routing_Configuration
-
Developer Name: InGenius_Voice_Routing_Configuration
-
Overflow Assignee: <Your-SF-User>
-
-
Routing Settings
-
Routing Priority: 1
-
Routing Model: Most Available
-
Push Time-Out (Seconds): <Blank>
-
Capacity Type: Inherited
-
-
Work Item Size
-
Units of Capacity: <blank>
-
Percentage of Capacity: 100

-
-
Create a Salesforce Queue
-
Navigate to Setup.
-
In the Quick Find box, search for and select "Queues".
-
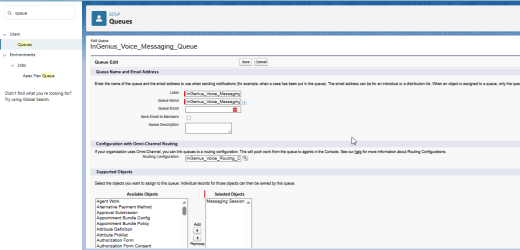
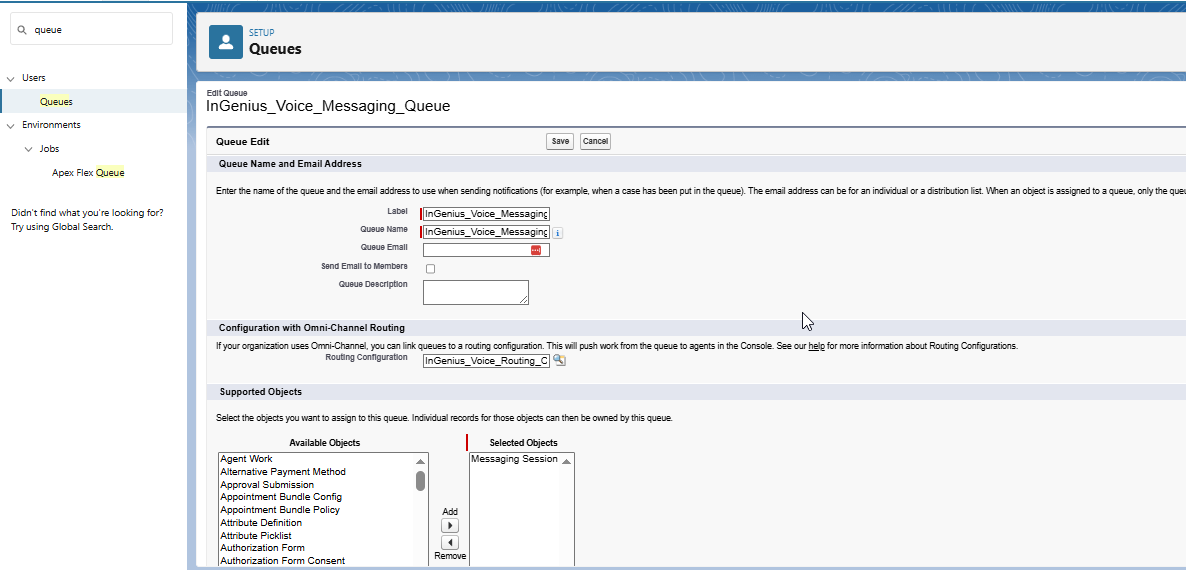
In the Queues page, click New and fill in the information for the new Queue as follows:
-
Queue Name and Email Address
-
Label: InGenius_Voice_Queue
-
Queue Name: InGenius_Voice_Queue
-
Queue Email: <Leave Blank>
-
Send Email to Member: Unchecked
-
-
Configuration with Omni-Channel Routing
-
Routing Configuration: InGenius_Voice_Routing_Configuration
-
-
Supported Objects
-
Selected Objections: Messaging Session
-
-
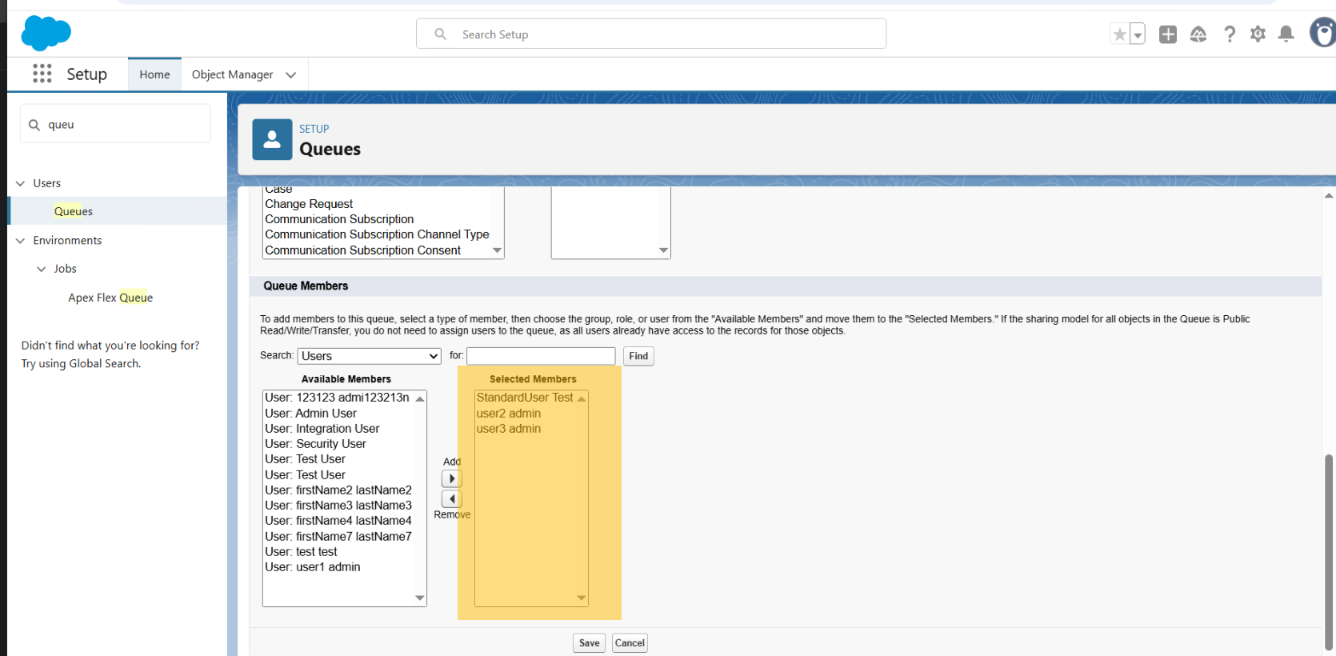
Queue Members
-
Selected Members: <Your-SF-Users>
-
-
-
Click Save to apply your changes.
Create Omni-Channel Flow
-
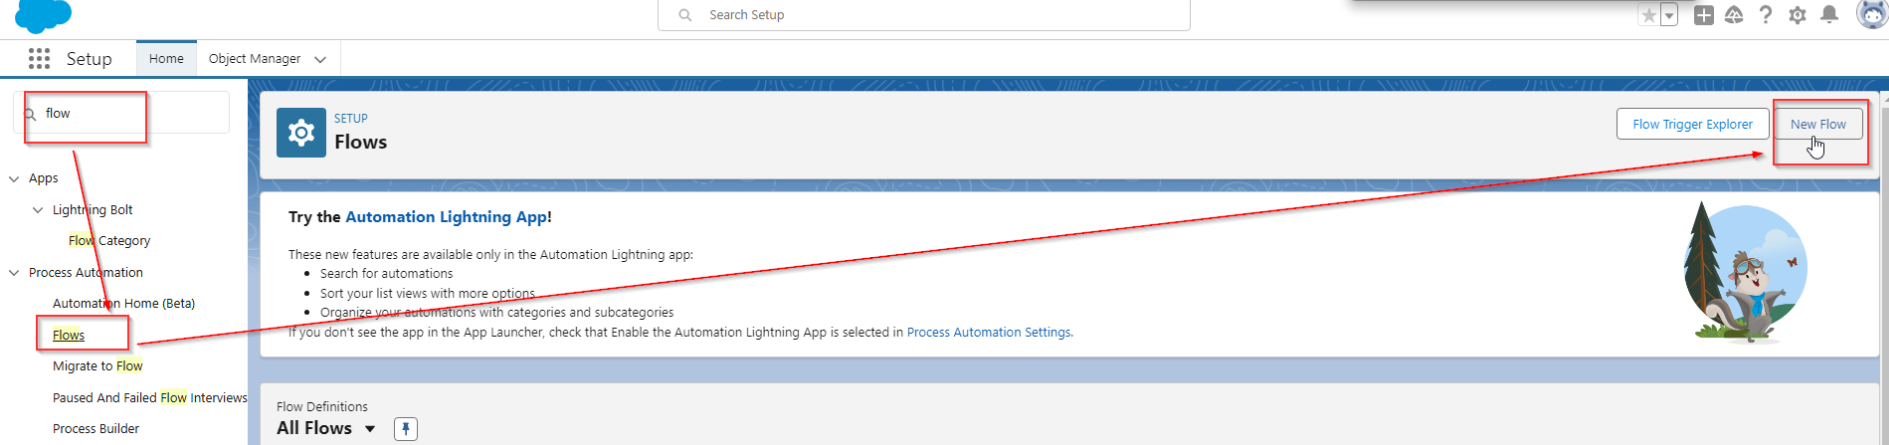
Navigate to Setup
-
In the Quick Find box, search for and select Flows.
-
In the Flows section, click the New Flow button.

-
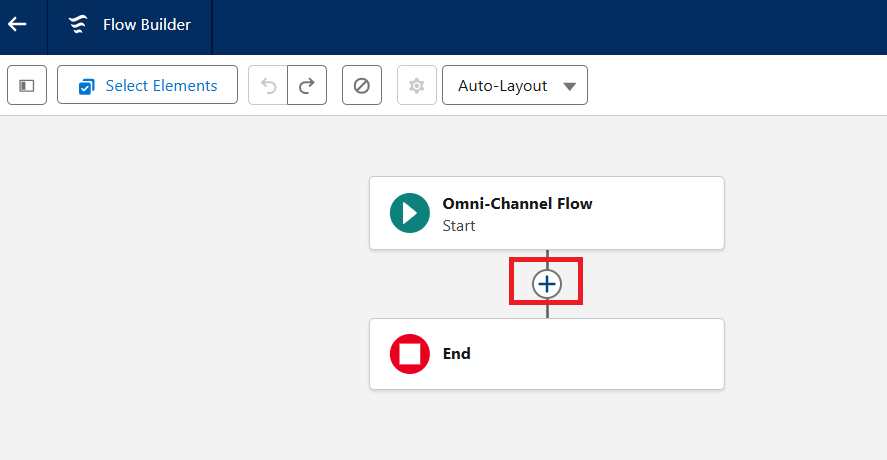
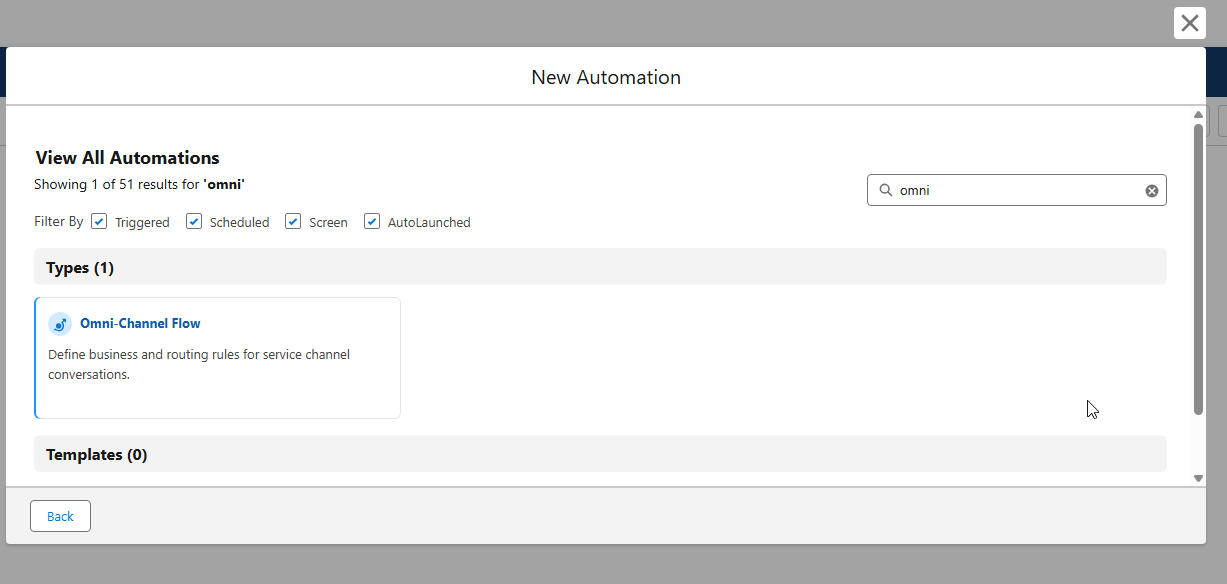
In the 'New Automation' card, search for and select "Omni-Channel Flow".

-
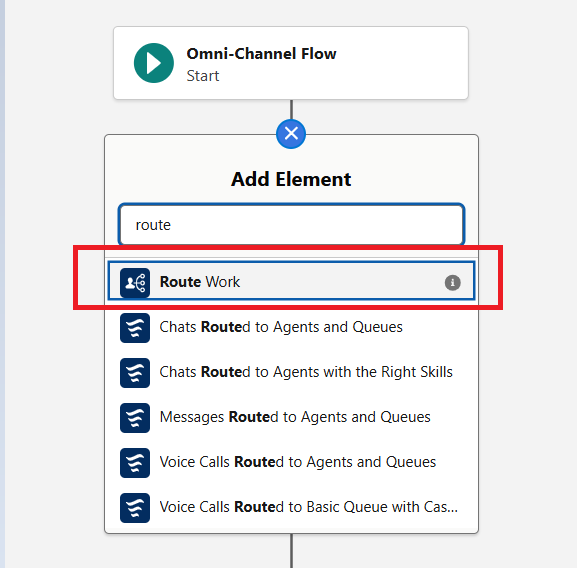
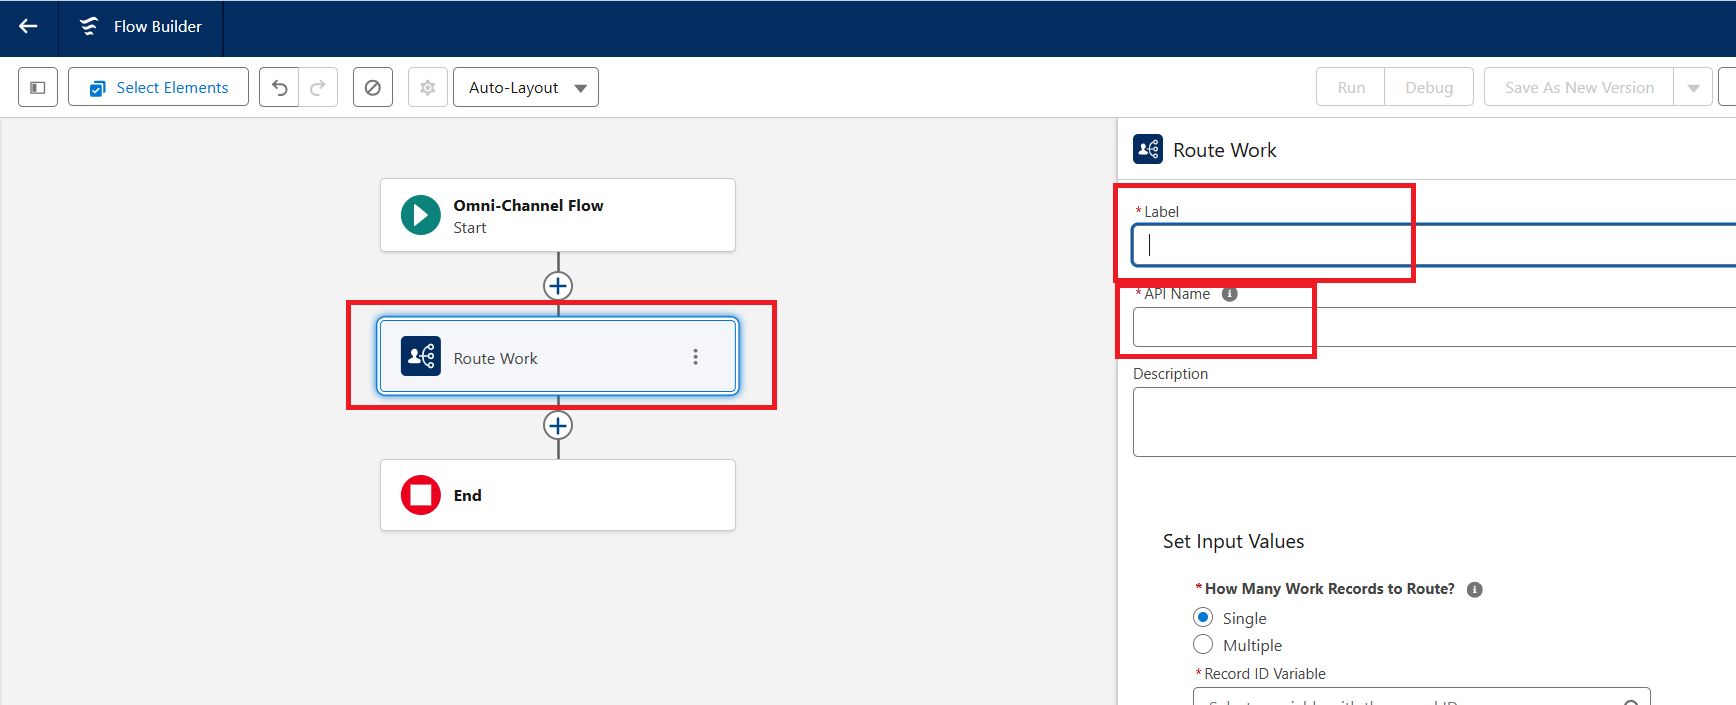
In the Flow Builder, click on the '+' circle below 'Omni-Channel Flow'
-
In the 'Add Element' box, search for and select 'Route Work'
-
Fill in the resultant 'Route Work' variable panel on the right-hand side as follows:

-
Label: Route direct to Agent
-
API Name: Route_direct_to_Agent
-
-
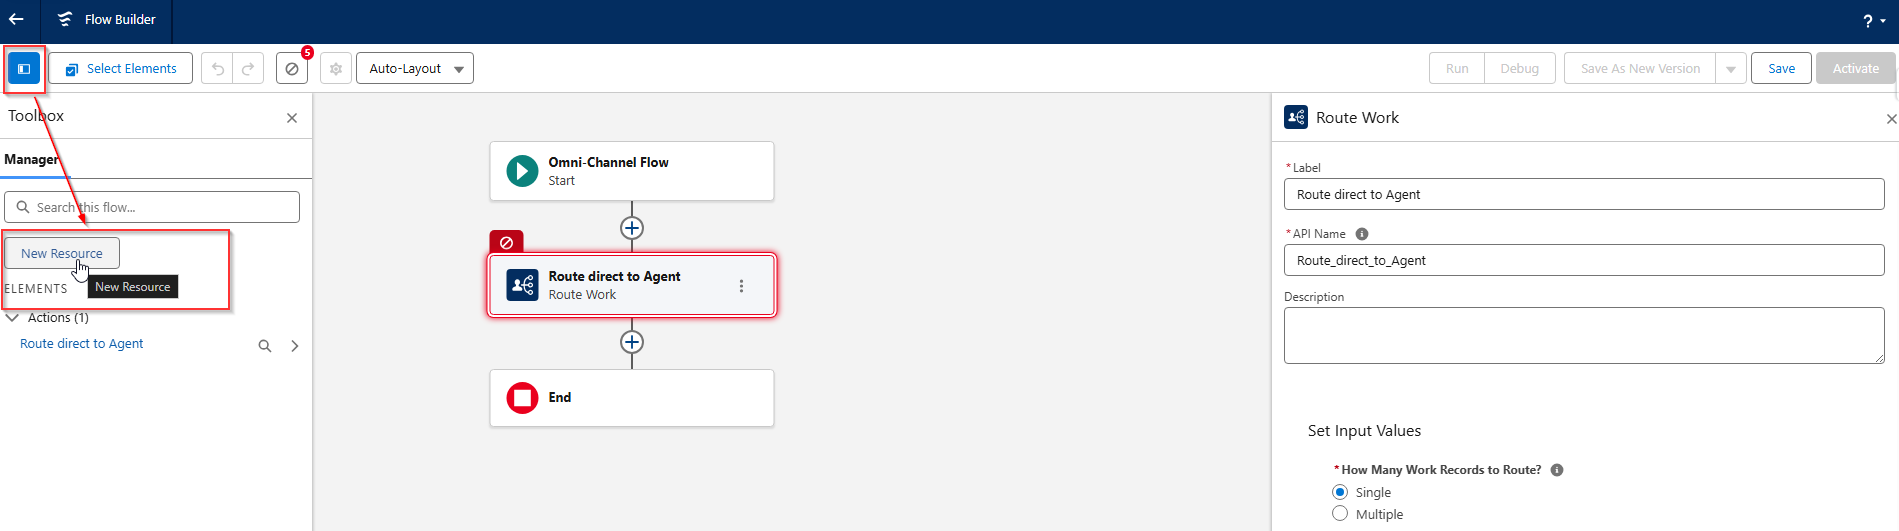
Click on the Toolbox icon in the top left and then select the New Resource button

-
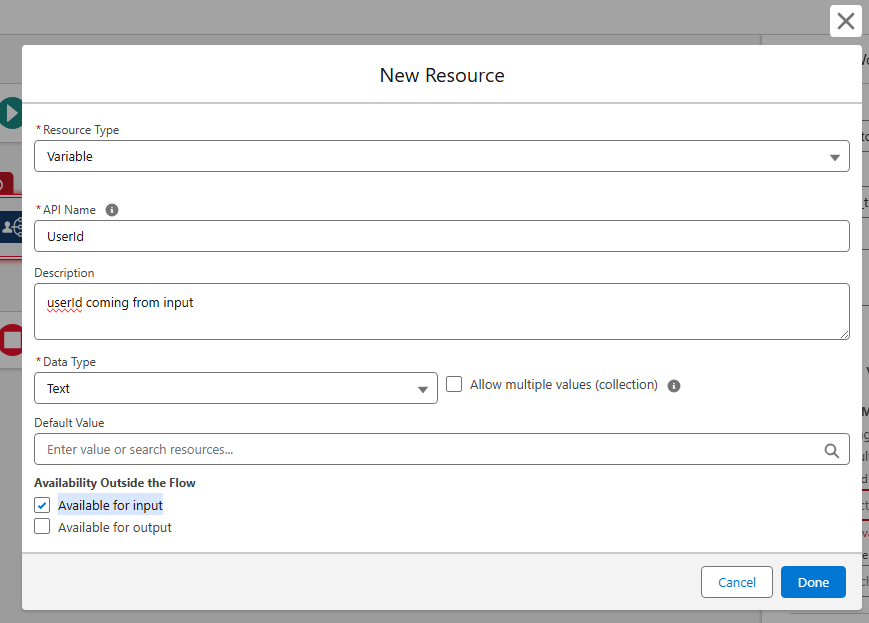
Fill in the following information for the new resource:
-
Resource Type: Variable
-
API Name: UserId
-
Description: userid coming from input
-
Data Type: <Select 'Text'>
-
Enable the 'Availabile for Input' option.
-
-
Click Done
-
Create a new variable by clicking the New Resource button again and fill in the information as follows:
-
Resource Type: Variable
-
API Name: recordId
-
Description: The Id of the record
-
Data Type: Text
-
Enable the 'Available for Input' option
-
-
Click Done
-
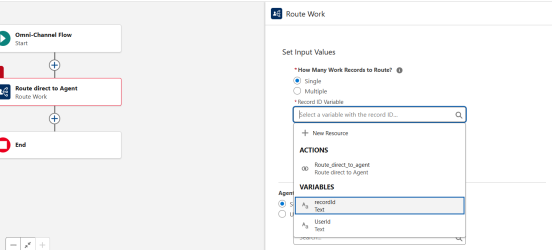
Select the 'Route direct to Agent' box in the Flow Editor, and assign the newly created 'recordId' variable to it.
-
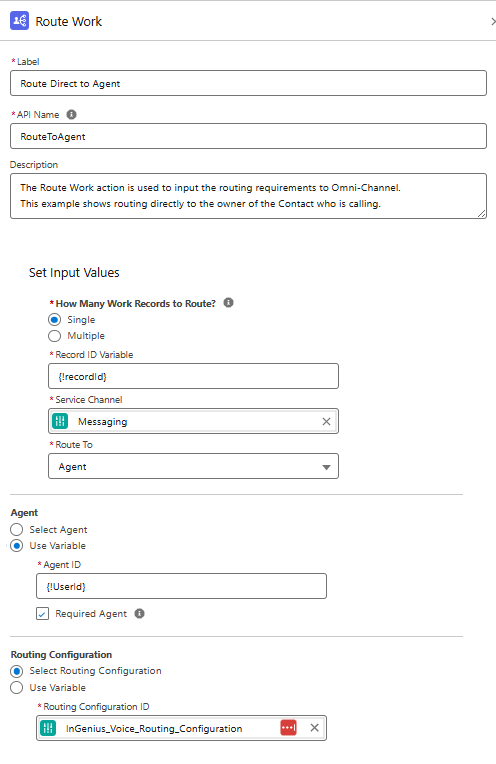
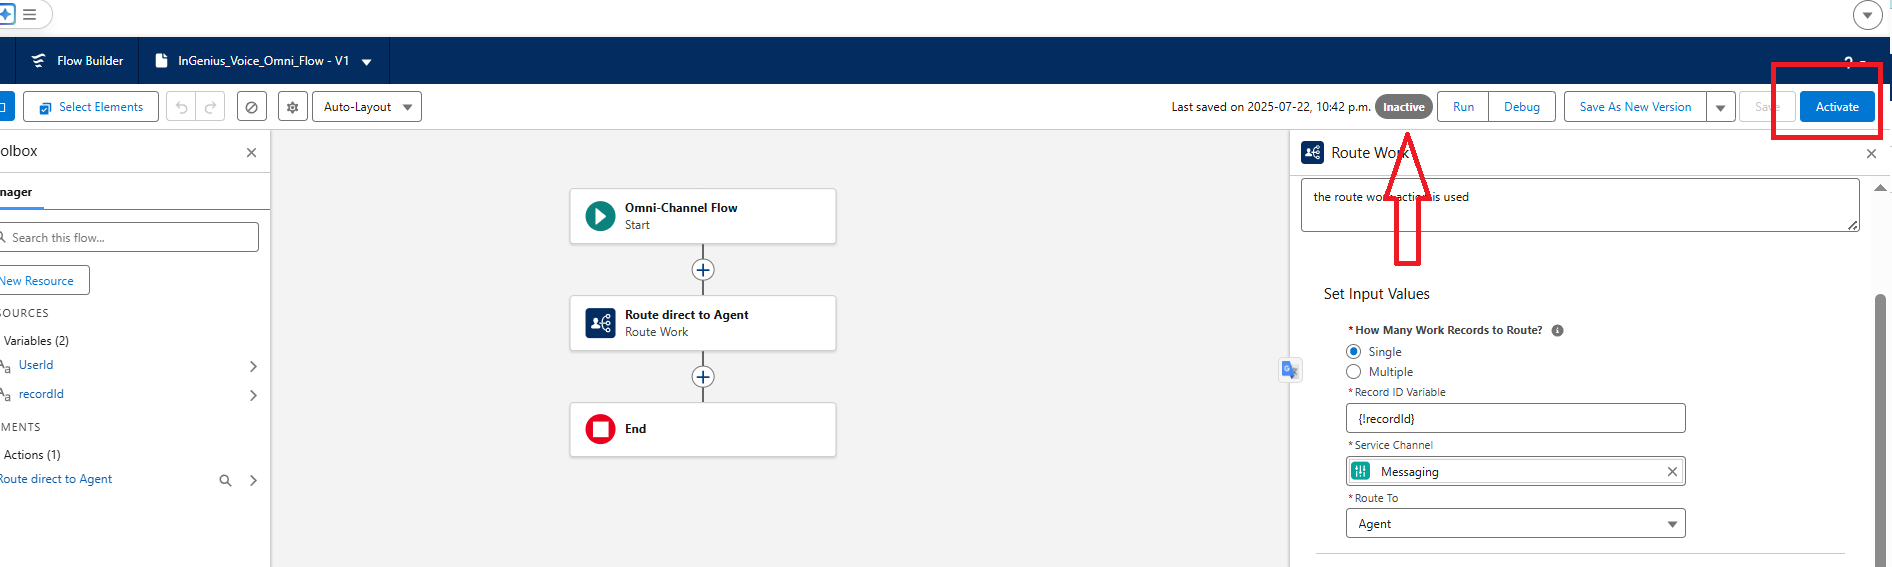
In the right-hand panel, with 'Route direct to Agent' selected, fill in the information as follows:
-
Label: Route Direct to Agent
-
API Name: RouteToAgent
-
Description: The Route Work action is used to input the routing requirements to Omni-Channel. This example shows routing directly to the owner of the contact who is calling.
-
Set Input Values
-
How Many Work Records to Route: <Select Single>
-
Record ID Variable: {!recordId}
-
Service Channel: Messaging
-
Route To: Agent
-
-
Agent
-
Select <Use Variable>
-
Agent ID: {!UserId}
-
Enable the Required Agent box
-
-
Routing Configuration
-
Select the <Select Routing Configuration> option
-
Routing Configuration ID: InGenius_Voice_Routing_Configuration'
-
-
-
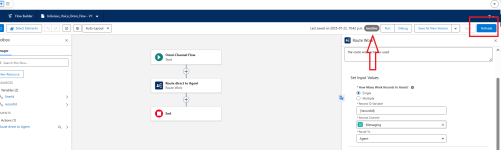
Click Save.
-
When prompted, fill both the 'Flow Label' and the 'Flow API Name' with "InGenius_Voice_Omni_Flow" and click Save.
-
Activate the flow from the top-right button.

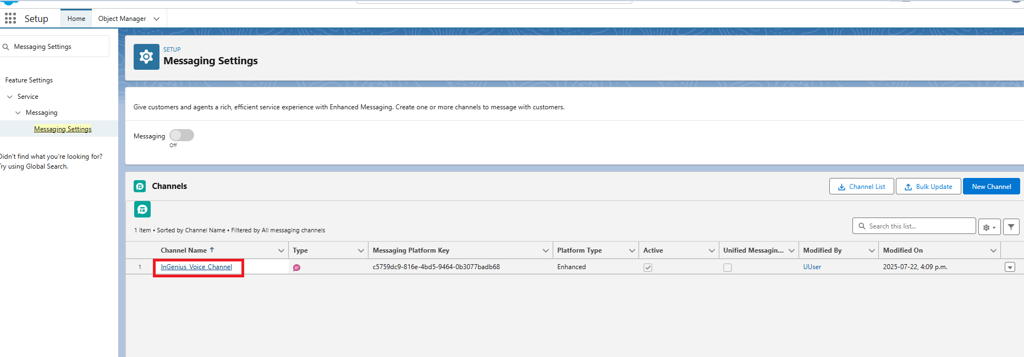
Create Messaging Channel
This channel will allow customers to initiate conversations with the support team from either your mobile app or website. Follow the steps below to create a Messaging Channel:
-
Navigate to Setup.
-
In the Quick Find box, search for and select 'Messaging Settings'
-
Click the 'New Channel' Button
-
Select Start to begin the messaging channel setup.
-
When prompted, select 'Messaging for In-App and Web' or 'Enhanced Chat' and click Next.
-
Fill in the channel name as follows:
-
Channel Name: InGenius_Voice_Channel
-
Developer Name: InGenius_Voice_Channel
-
-
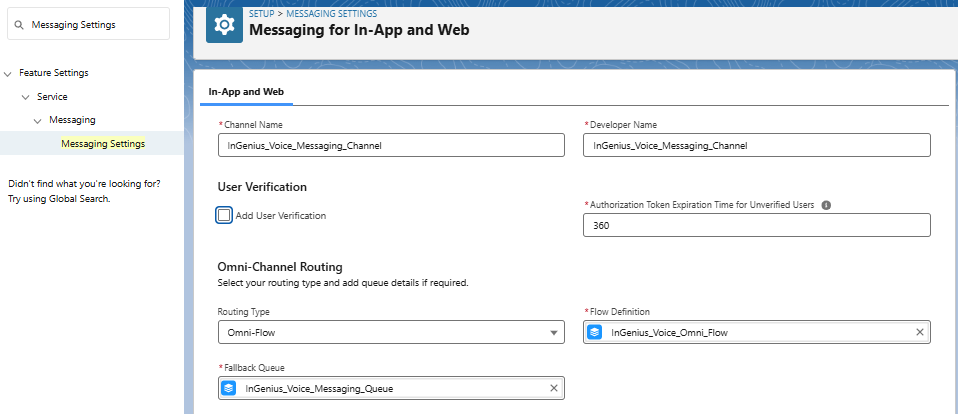
Click Next, and then edit the details as follows and select Save:
-
Routing Type: Omni-Flow
-
Flow Definition: InGenius_Voice_Omni_Flow
-
Fallback Queue: InGenius_Voice_Queue

-
-
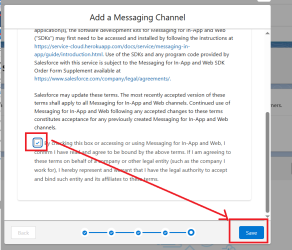
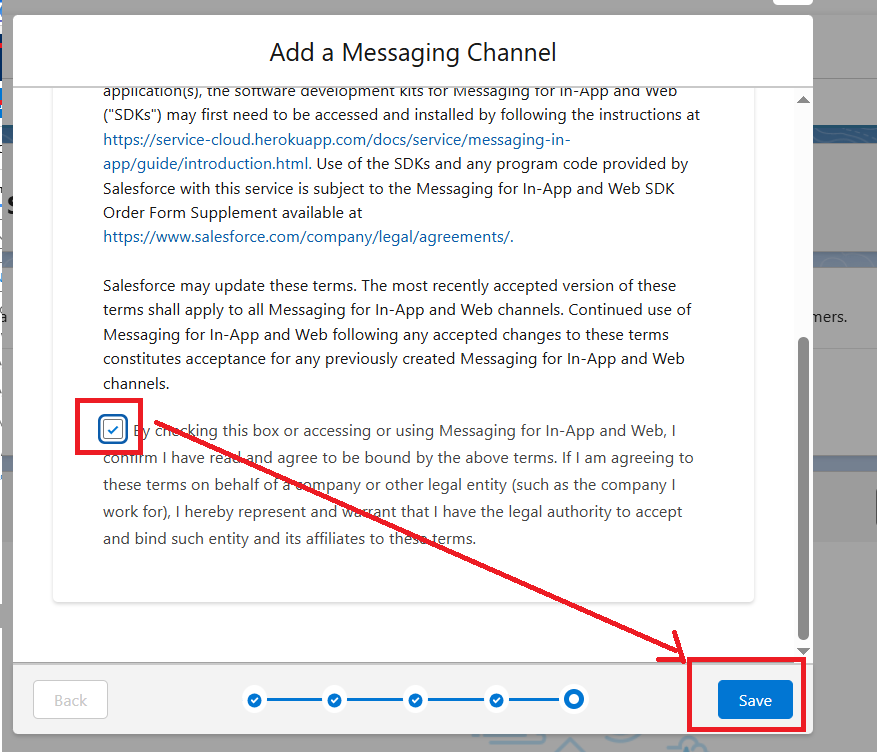
When prompted, check the acknowledgment then click Save.
-
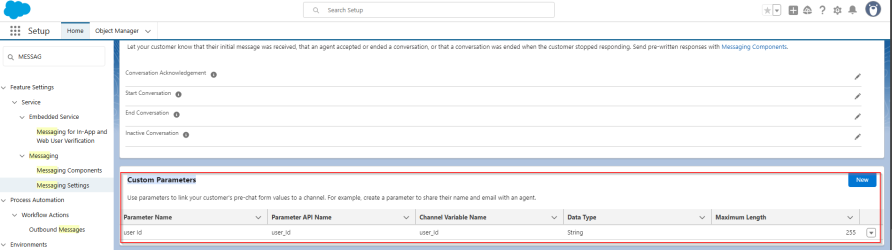
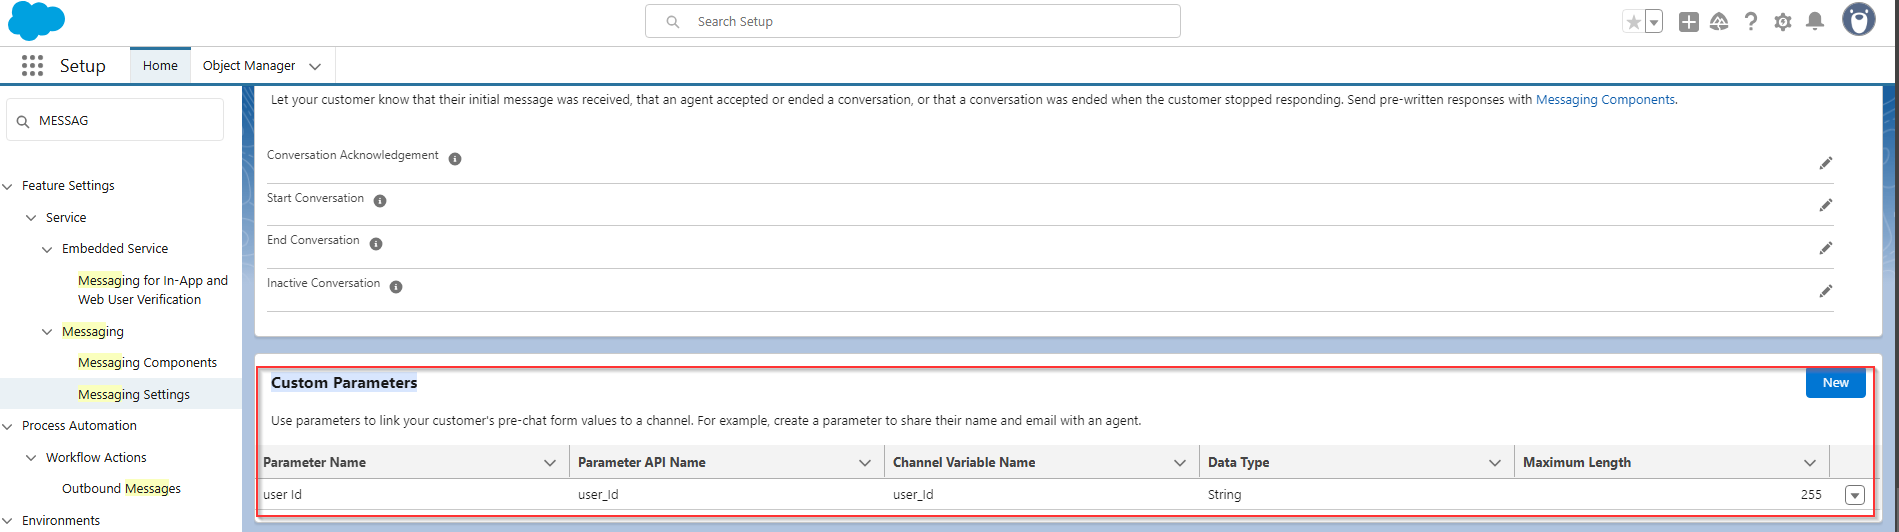
Scroll down and create a custom parameter with the following properties:
-
Parameter Name: UserId
-
Parameter API Name: UserId
-
Channel Variable Name: UserId
-
Data Type: String
-
Maximum Length: 255
-
-
Save the Channel.
-
Activate the Channel.
Create Embedded Service Deployment
Set up an Embedded Service Deployment to setup the Messaging for your users. Follow the steps below:
-
Navigate to Setup.
-
In the Quick Find box, search for and select Embedded Service Deployments.
-
Click the New Deployment button.
-
When prompted, select 'Messaging for In-App and Web' or 'Enhanced Chat' and click Next.
-
Select Custom Client and click Next.

-
Fill in the 'Edit Embedded Service deployment' page as follows:
-
Embedded Service Deployment Name: InGenius_Voice_Custom_Client
-
API Name: InGenius_Voice_Custom_Client
-
Messaging Channel: InGenius_Voice_Channel
-
-
Click Save.
-
Click Edit Pre-Chat
-
Add a New Custom Field as follows:
-
Field Type: Text
-
Channel Variable Name: user_id
-
-
Save and Publish the deployment.

Note: If done correctly, you should see a green 'Active' bubble in the Pre-Chat card.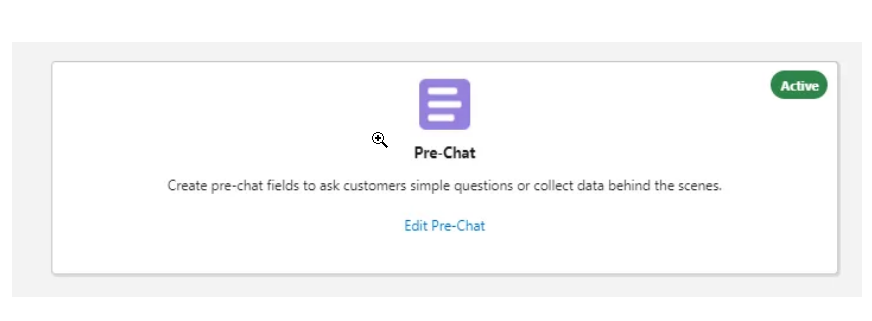
Capacity Management
To prevent conflicts during transcription, it is highly recommended to set phone calls to consume 100% of a user's capacity. Upland Transcription Service currently only supports status based capacity. Do not enable tab-based capacity while utilizing Upland Transcription Service.
Enable Status Based Capacity in Omni-Channel
The following configuration is recommended:
-
Navigate to Setup
-
In the Quick Find box, search for and select Omni-Channel Settings
-
Enable 'Enhanced Omni-Channel Routing' from the right side switch

-
Check the 'Enable Status-Based Capacity Model' box.
-
Save your changes.

Enable Status Based Capacity in Service Channels
-
Navigate to Setup
-
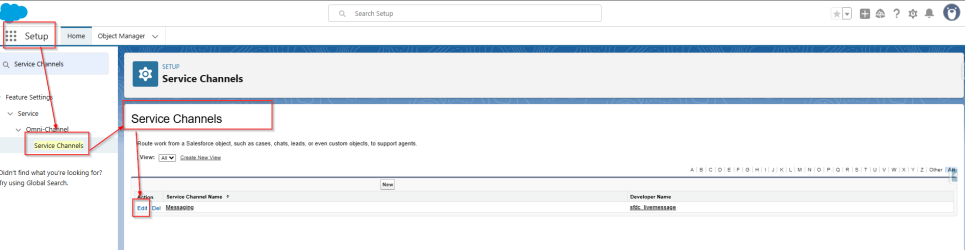
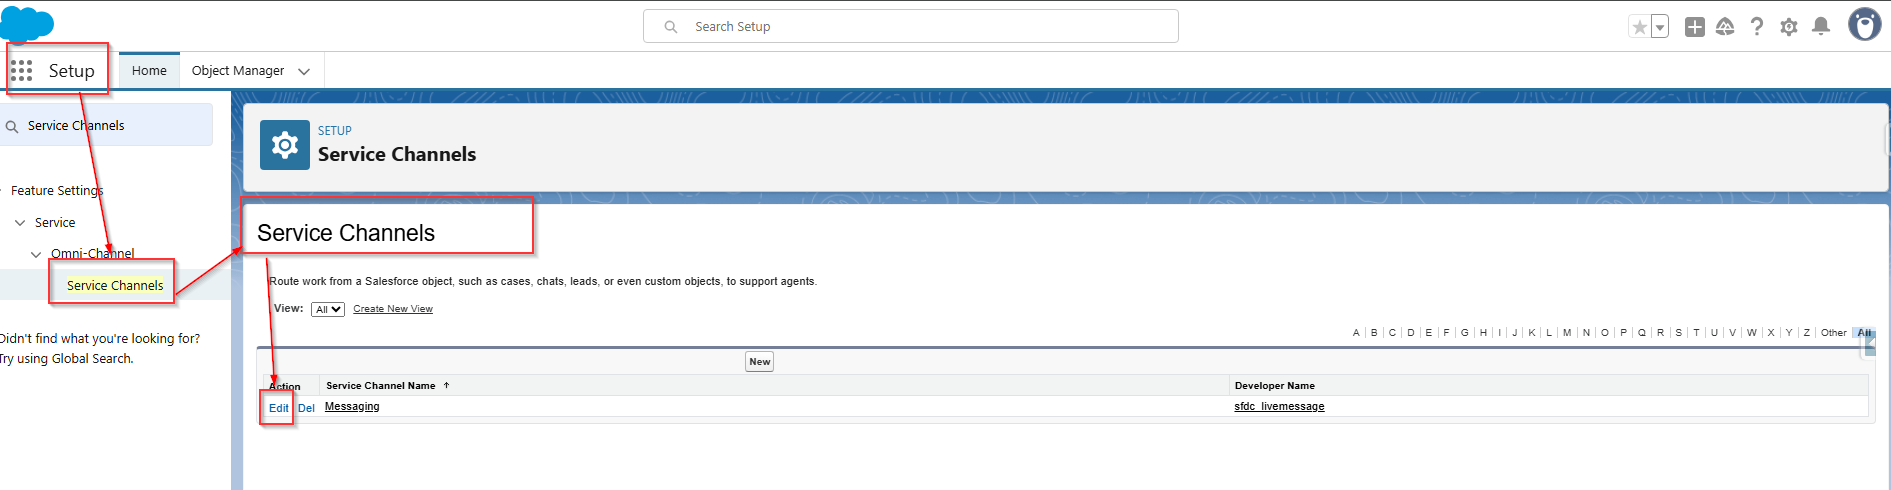
In the Quick Find box, search for and select Service Channels
-
Edit the messaging channel
-
Scroll down to the Capacity Settings section and select 'Status Based' from the Capacity Model dropdown.
-
Save your changes.
Setup Messaging Session
In order to be able to see the message UI for your call session during transcription, you must create a Messaging Session Lightning Record page with 'Enhanced Conversation'.
Create Salesforce Console App
If you have not already done so, you must first create a Salesforce Console application. Follow the steps below:
-
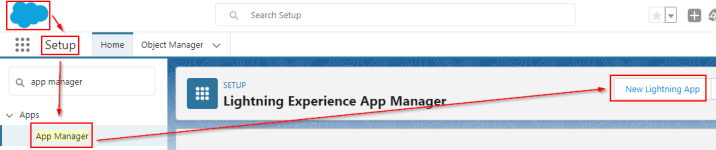
Navigate to Setup
-
In the Quick Find box, search for and select App Manager, then click the New Lightning App button.
-
Fill in the App Details as follows then click Next:
-
App Details
-
App Name: <Enter an appropriate name>
-
Developer Name: Test_Console_App
-
Description: <Empty or as desired>
-
-
App Branding
-
Image: <Default image>
-
Primary Color Hex Value: <Default>
-
Org Theme Options: <Unchecked>
-
-
-
Fill in the App Options section as follows and then click Next:
-
Navigation and Form Factor
-
Navigation Style: Console Navigation
-
Supported Form Factors: Desktop and Phone
-
-
Setup and Personalization
-
Disable end user personalization of nav items in this app: <Unchecked>
-
Clear workspace tabs for each new console session: <Unchecked>
-
-
-
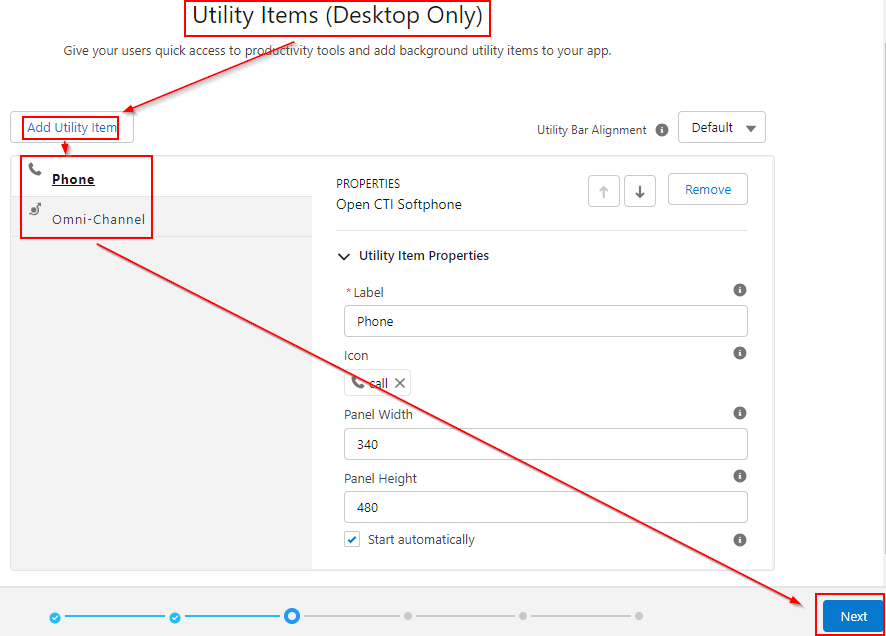
Fill in the Utility Items (Desktop Only) section as follows and then click Next:
-
Click the Add Utility Item in the top right corner and add the following:

-
Search for 'Omni-Channel' and select it, leaving the default values.
-
Search for 'Open CTI Softphone' and select it, leaving the default values.
-
-
-
Leave the default values in the Navigation Items section, and click Next.
-
Leave the default values in the Navigation Rules section, and click Next.
-
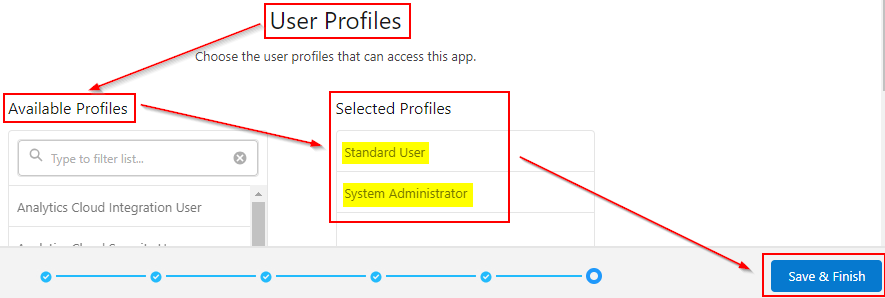
Fill in the User Profiles section as follows and then click Save & Finish:
-
Move the following Profiles from the Available Profiles column to the Selected Profiles column:

-
Standard User
-
System Administrator
-
-
-
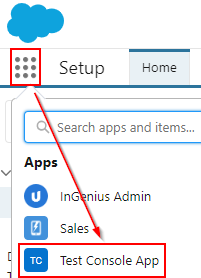
Confirm you have successfully set up the application by locating it under your Apps in your Salesforce Org:

Setup the Messaging Session Lightning Record Page
Follow the steps below:
-
Navigate to Setup
-
In the Quick Find box, search for and select App manager
-
Edit the Test Console App (or the app you created in the previous step, if it was created under another name).
-
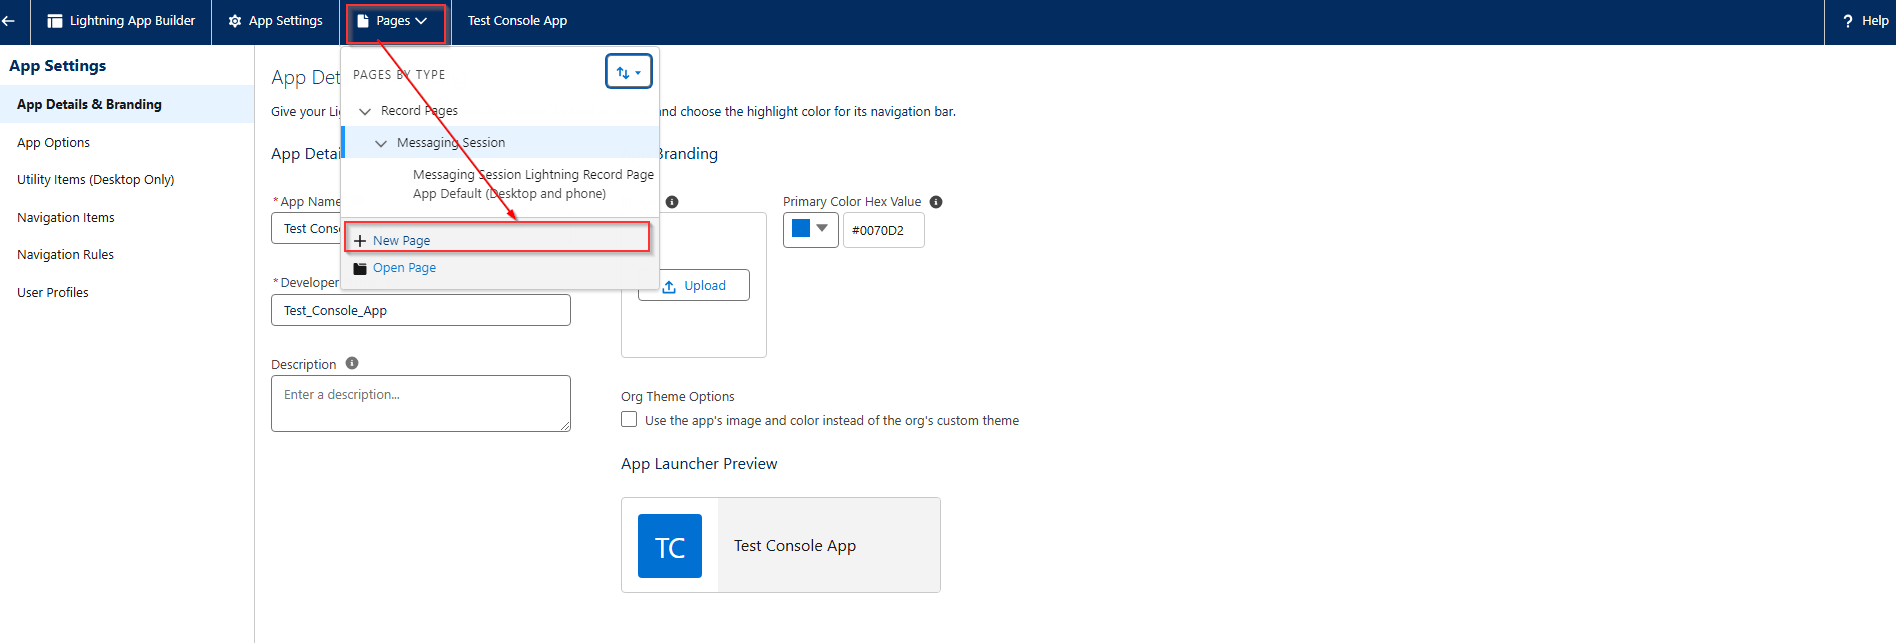
Select Pages from the top banner, and then click New Page

-
In the 'Create a new Lightning Page' card, select Record Page and click Next.
-
Fill in the information as follows:
-
Label: <Desired Name>
-
Object: Messaging Session

-
-
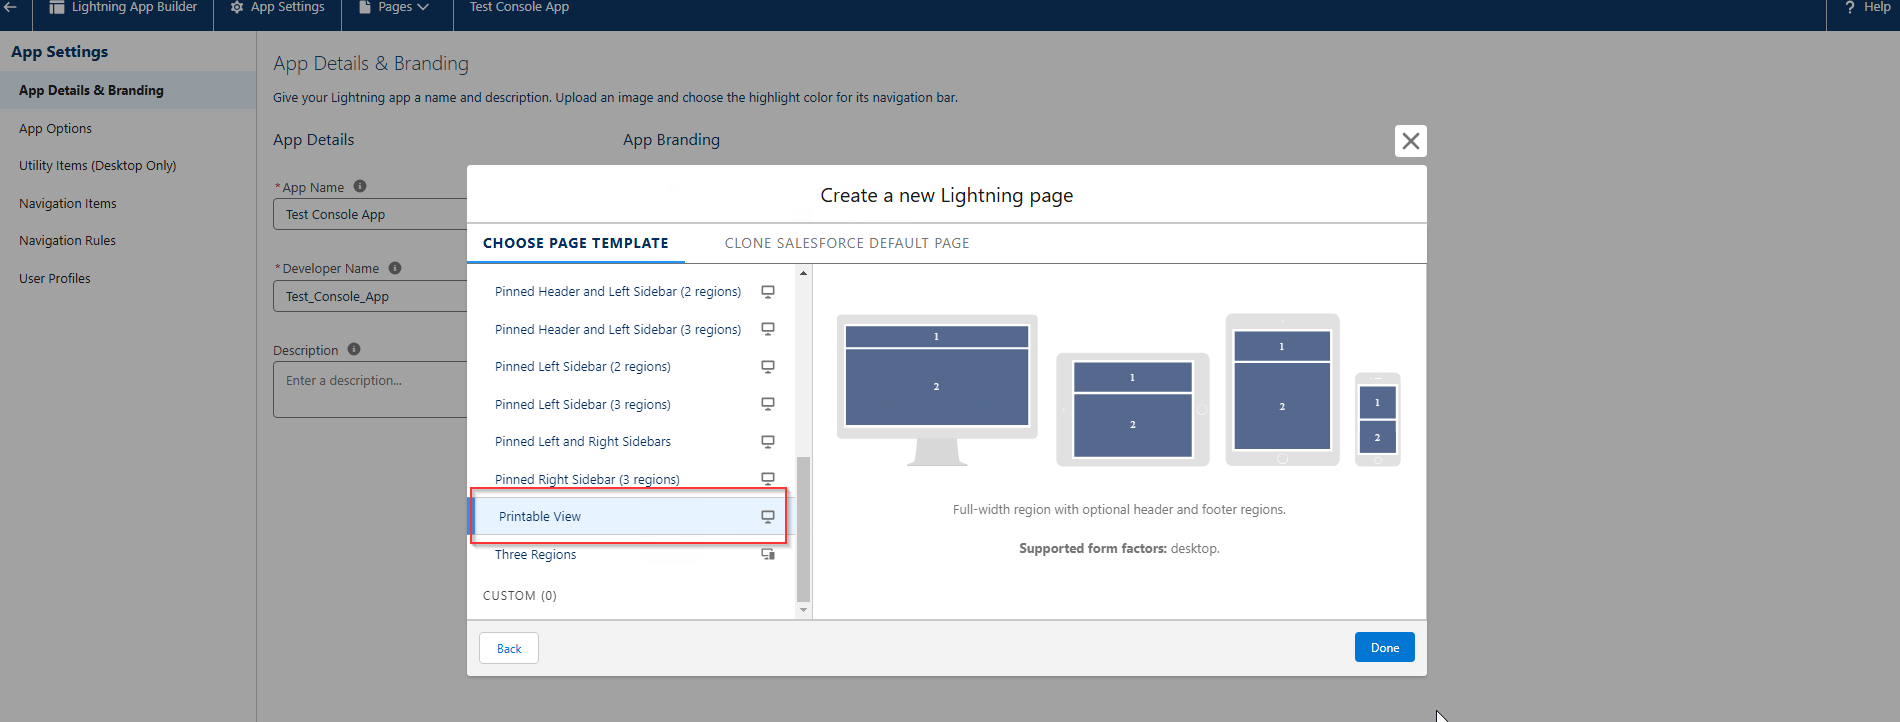
Select Printable View as the page template and click Done.
-
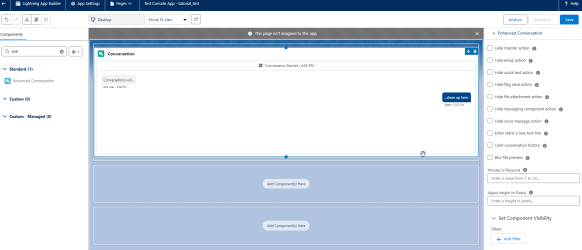
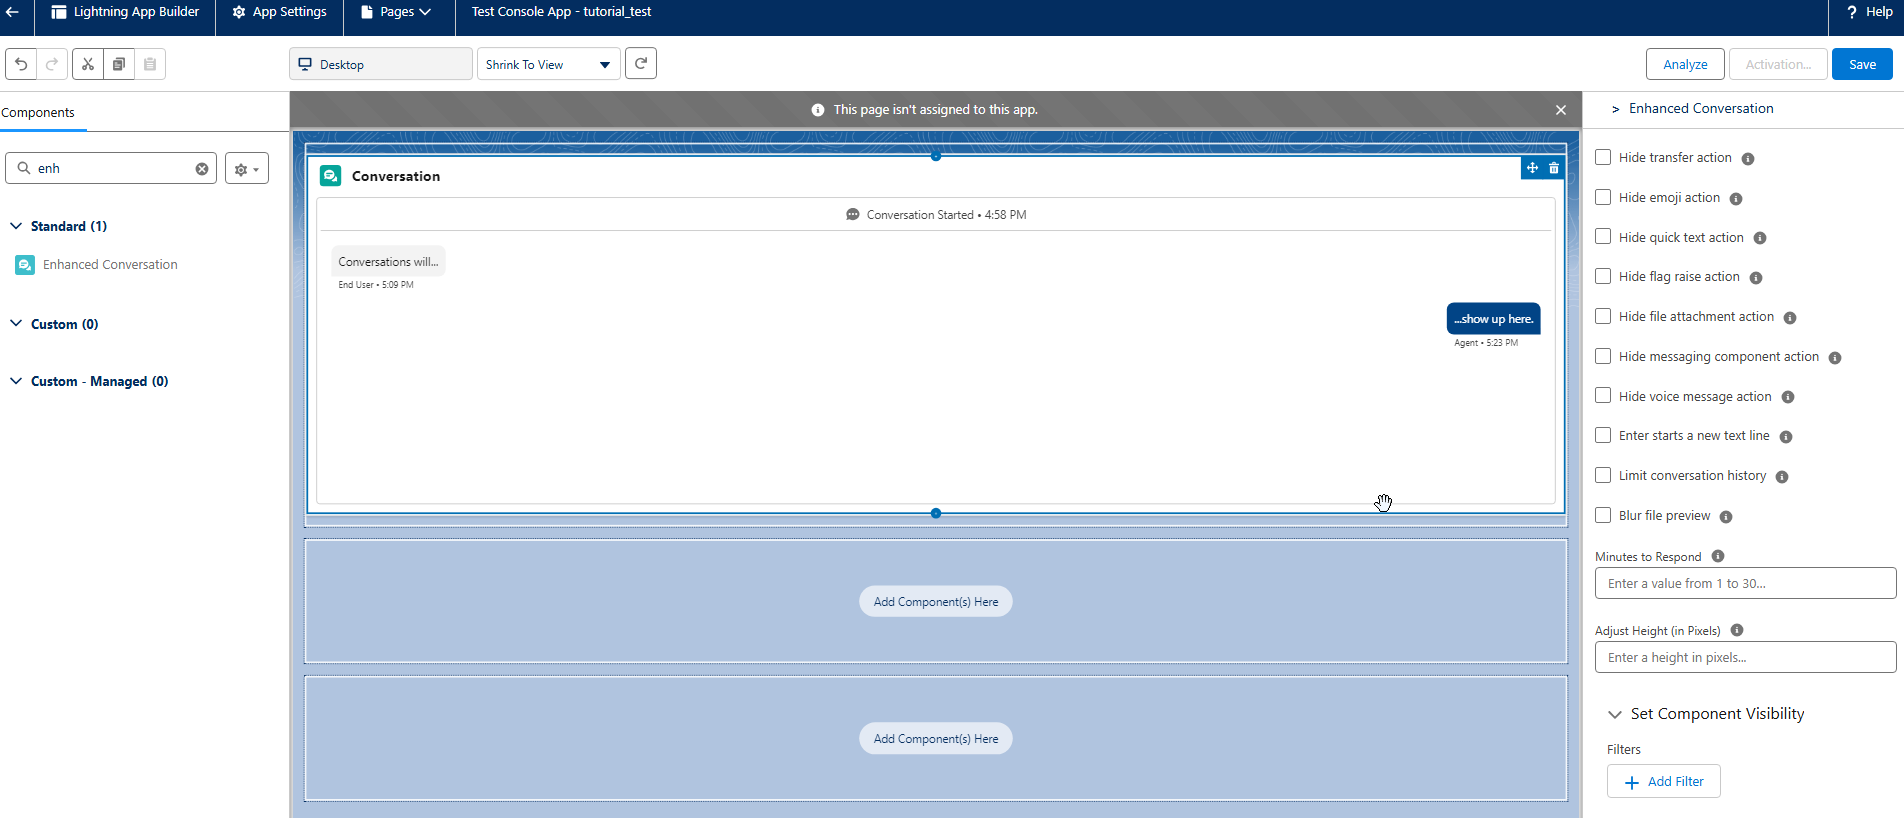
Search for "Enhanced Conversations" from the search box on the index of the Lightning App Builder, and then drag and drop Enhanced Conversations to one of the views.
-
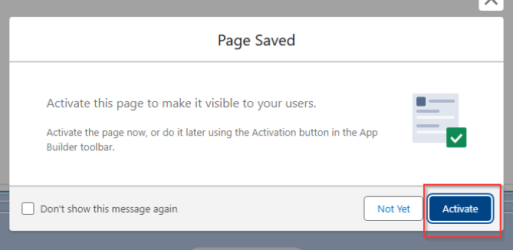
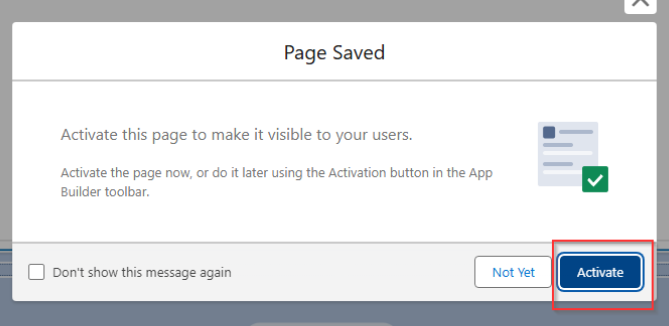
Click Save and then click Activate when prompted.
-
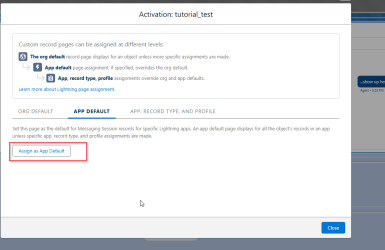
In the Activation card, select the App Default tab and then click the 'Assign as App Default' button.
-
Select the Test Console App (or the application you created in the previous step, if named differently) and then Next.
-
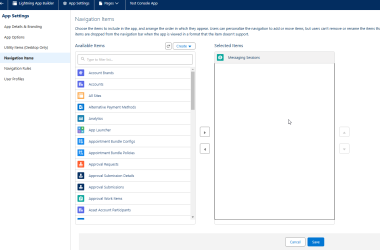
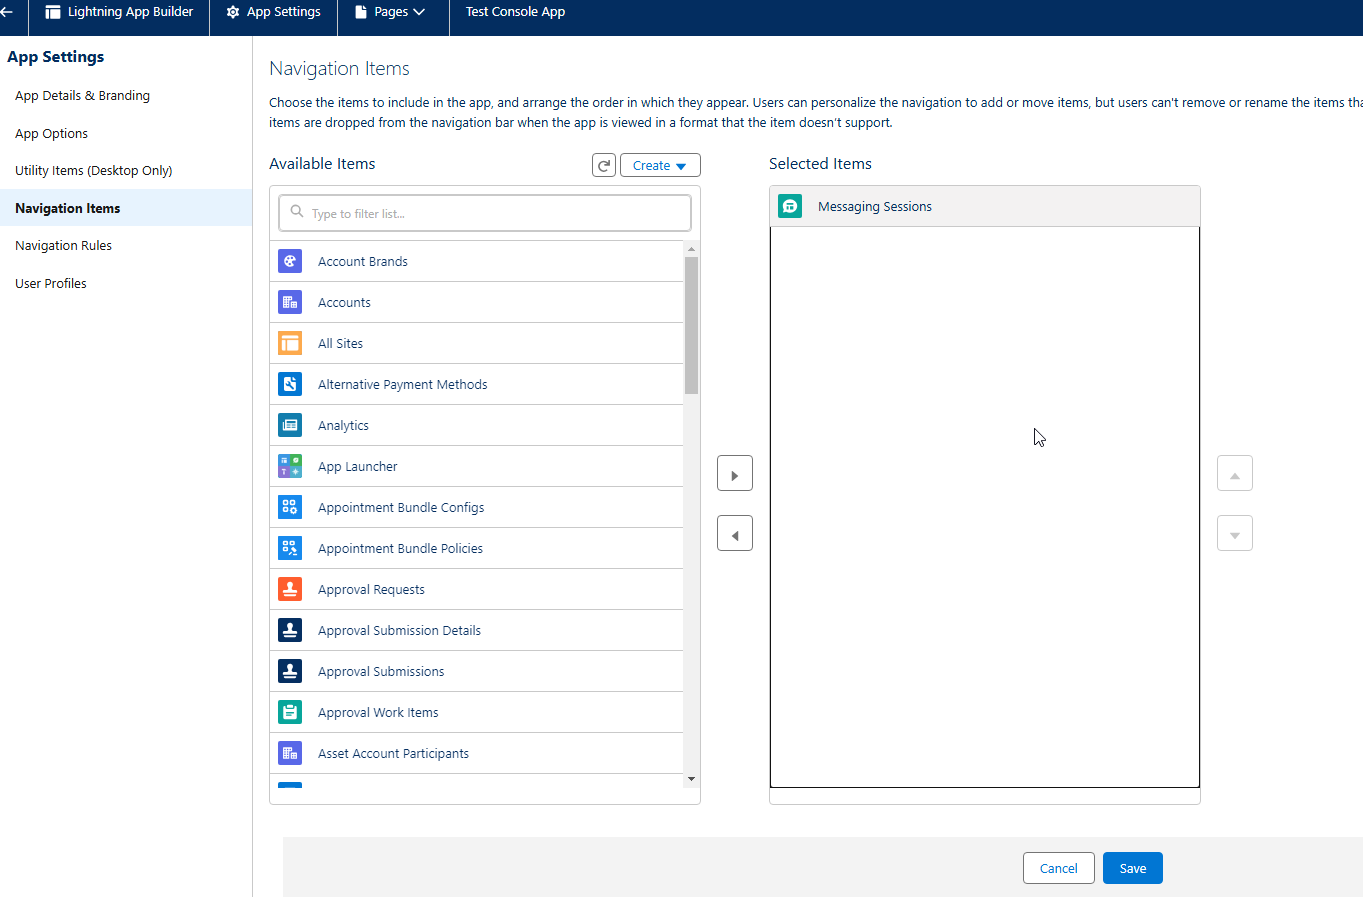
Under the App Settings for the Test Console App, select Navigation Items and move "Messaging Sessions" into the selected items column.
Note: This last step is required to allow the messaging session open automatically.
-
Click Save.

Setup Standard User Access
To allow your standard non-administrator users to access transcription, you will need to configure it for that particular user to view and work with it. Follow the steps below:
User Configuration
-
If you have not done so already, create the standard user profile in Salesforce.
-
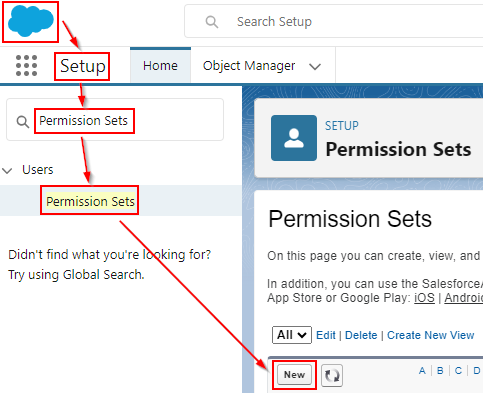
From the Quick Find Box, search for 'Permission Sets' and then click the New button.
-
Fill in the Permission Set with the following information and then click Save.
-
Label: Omni_Channel_Permission_Set
-
API Name: Omni_Channel_Permission_Set
-
Session Activation Required: <Unchecked>
-
License: <None>
-
-
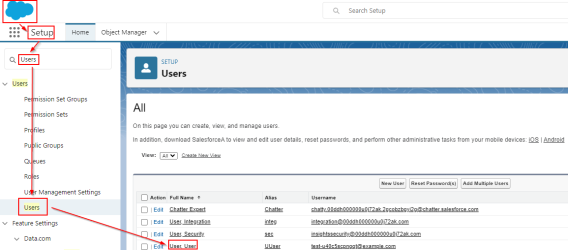
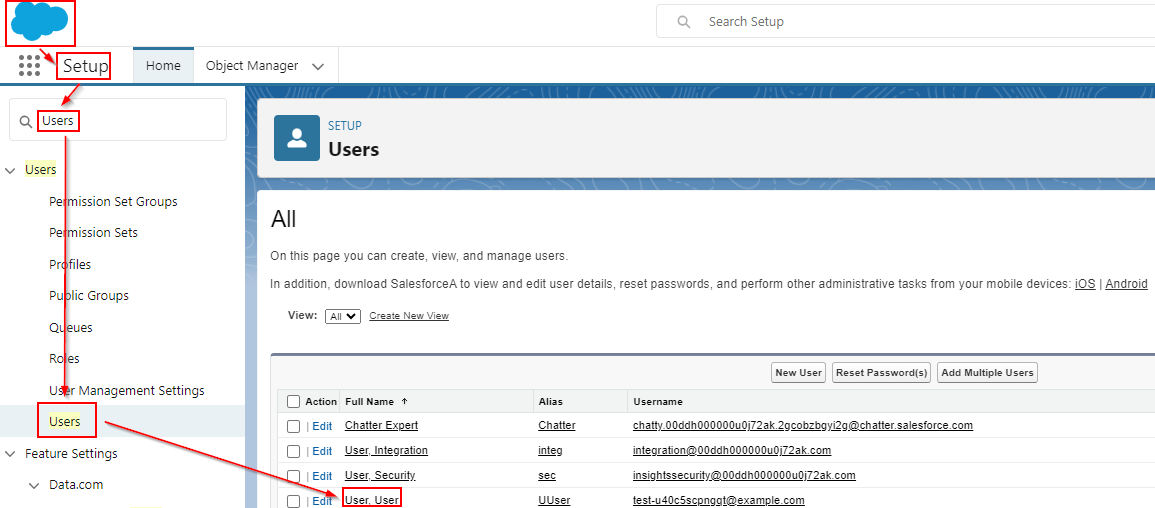
Return to the Quick Find Box and search for Users
-
Select your standard user that you wish to give access to.
-
At the top of the page, click the Permission Set Assignments shortcut.

-
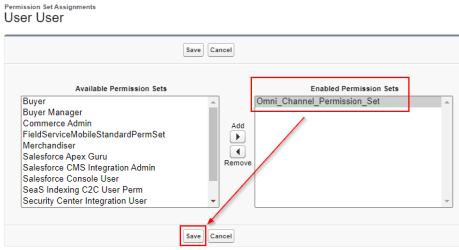
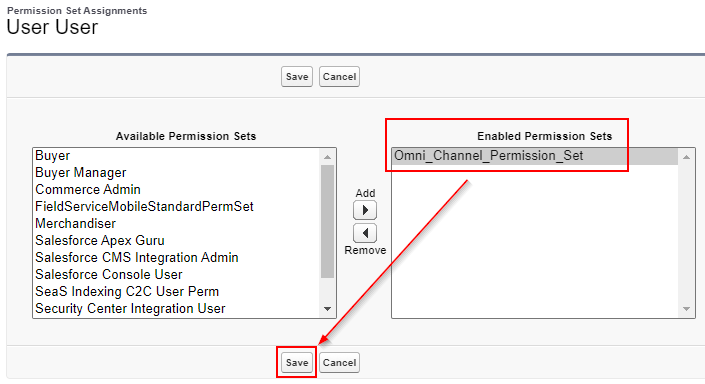
Click the Edit Assignments button under the Permission Set Assignments section.
-
Move the previously created Permission Set from the Available Permission Sets list to the Enabled Permission Sets list, then click Save to apply your changes.
-
Return to the Users section and select your standard user's profile.
-
Ensure that your user has the Service Cloud User checkbox selected.

-
Ensure the user profile you have created is included under the Selected Profiles list in 'Assign Profiles' in the Presence Configuration page.
-
Confirm that the user is also assigned to the queue that was created earlier, in the Queues page.
Assign the Messaging for In-App and Web User Permission Set License
-
From Setup, search for and select Users in the Quick Find Box.
-
Select the user you want to assign the permission set license to.
-
In the Permission Set License Assignments related list, click Edit Assignments.
-
Enable the Messaging for In-App and Web User permission set license.
-
Click Save.
-
Repeat this process for all users that require Messaging for In-App and Web.
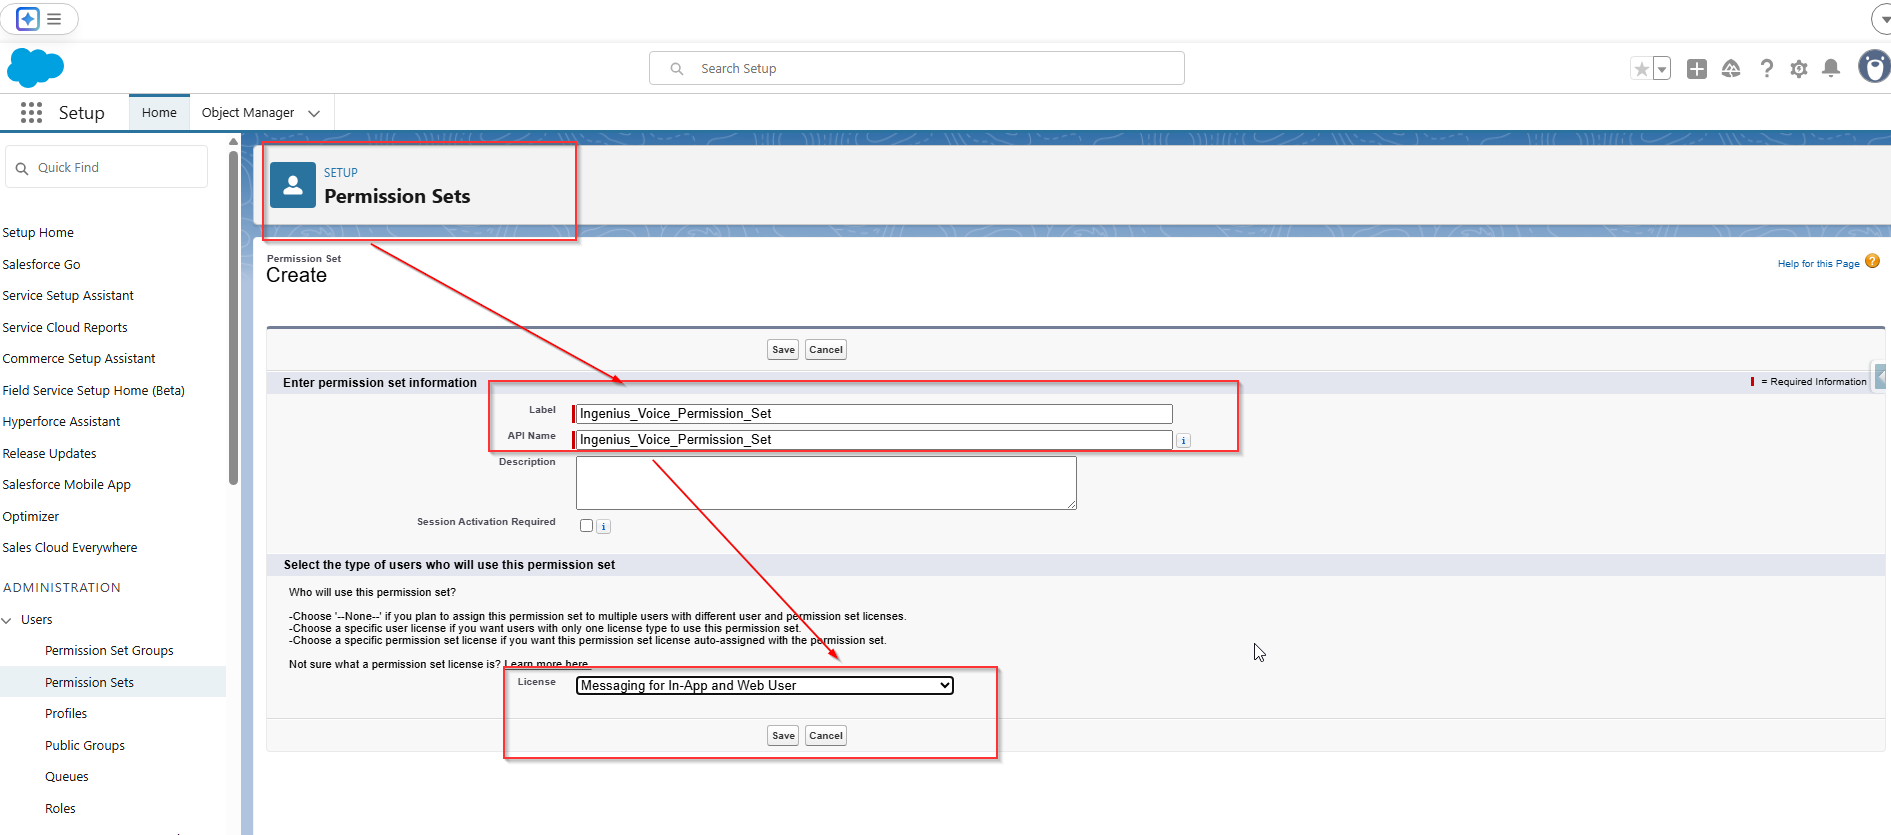
Create InGenius Voice Permission Set
-
Navigate to the Setup section, and from the Quick Find Box search for and select Permission Sets.
-
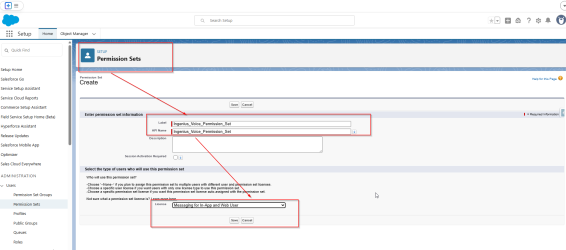
Click the New button from within the Permission Set page.
-
Fill in the Permission Set as follows and then click Save to apply your changes:
-
Label: Ingenius_Voice_Permission_Set
-
API Name: Ingenius_Voice_Permission_Set
-
Session Activation Required: <Unchecked>
-
License: Messaging for In-App and Web User
-
-
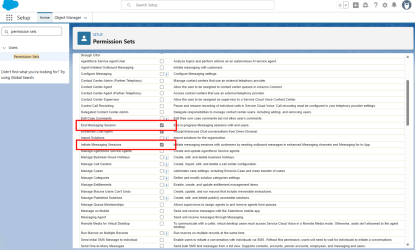
Select App Permissions
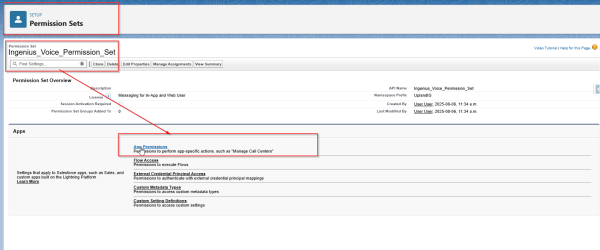
-
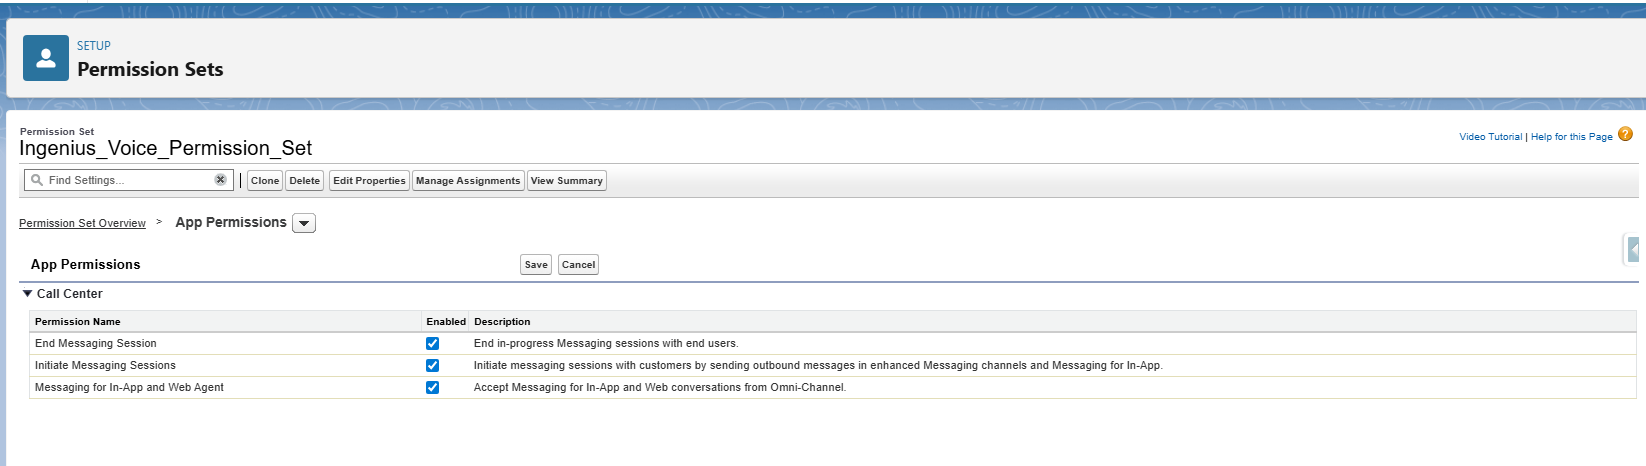
Click Edit and enable the following boxes:
-
Messaging for In-App and Web Agent
-
End Messaging Session.
-
Initiate Messaging Sessions
-
-
Save your changes.

Create Messaging Session Permission Set
-
Navigate to Setup, and in the Quick Find Box search for and select Permission Sets.
-
Click the New button from within the Permission Sets page.
-
Fill in the Permission Set with the following and then click Save:
-
Label: Ingenius_Messaging_Session_Permission_Set
-
API Name: Ingenius_Messaging_Session_Permission_Set
-
Session Activation Required: <Unchecked>
-
License: None
-
-
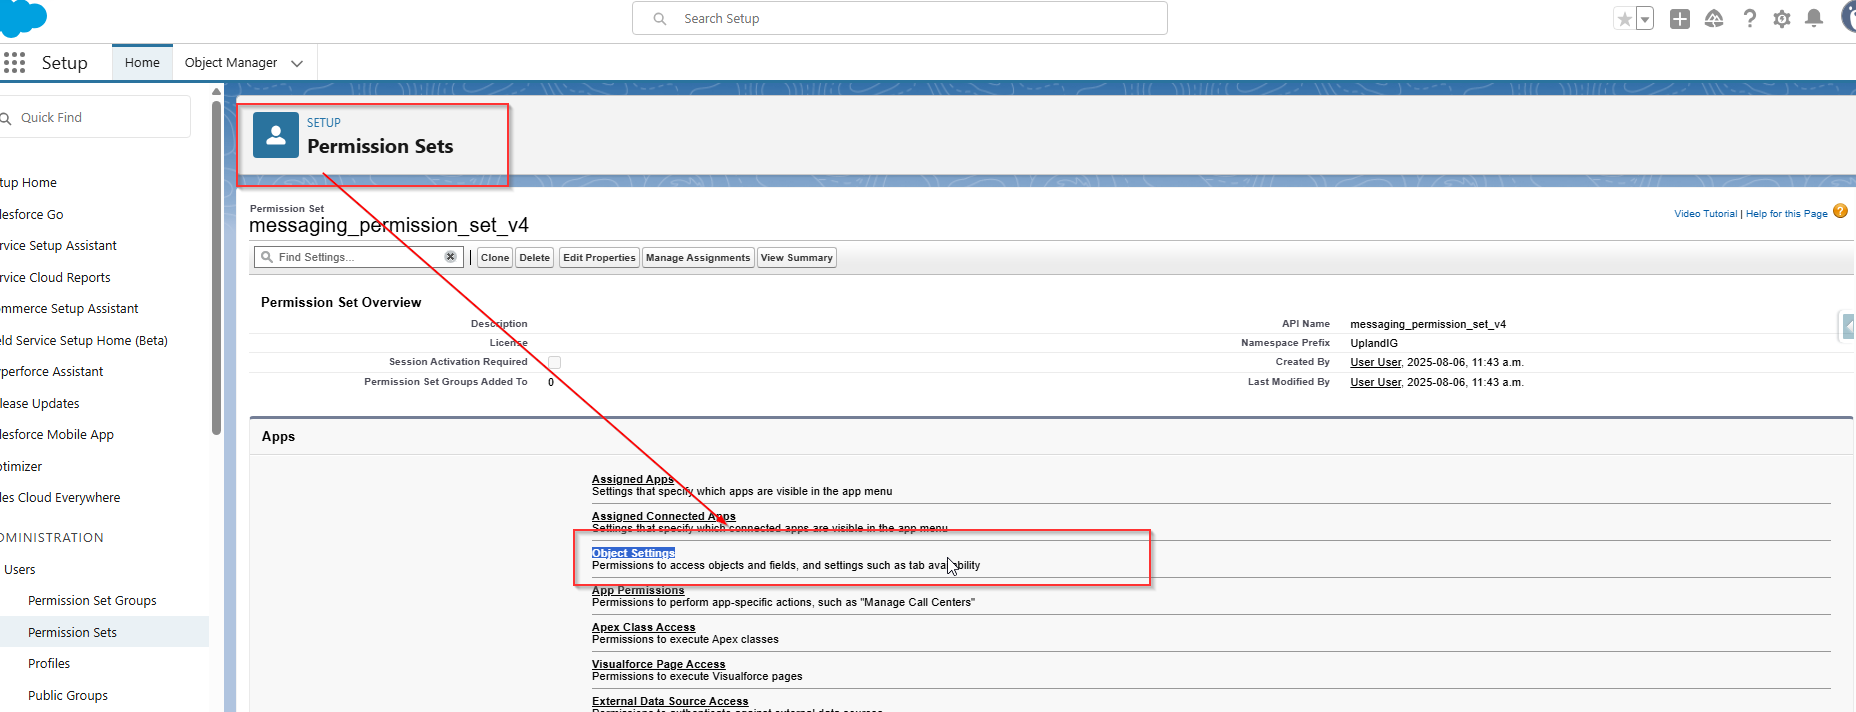
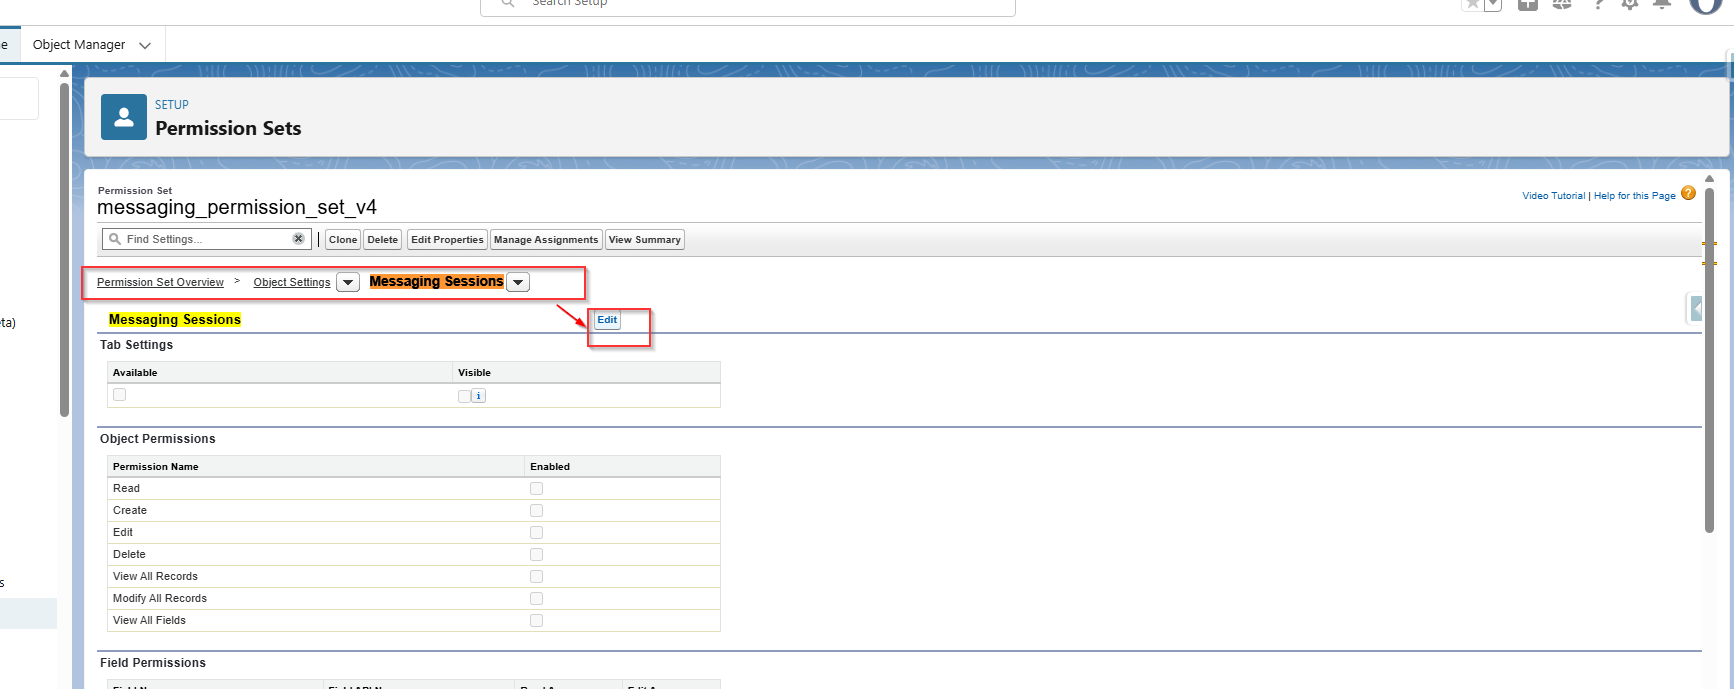
Click the name of the newly created permission set from the related list, and select Object Settings.

-
Select Messaging Sessions from the list.
-
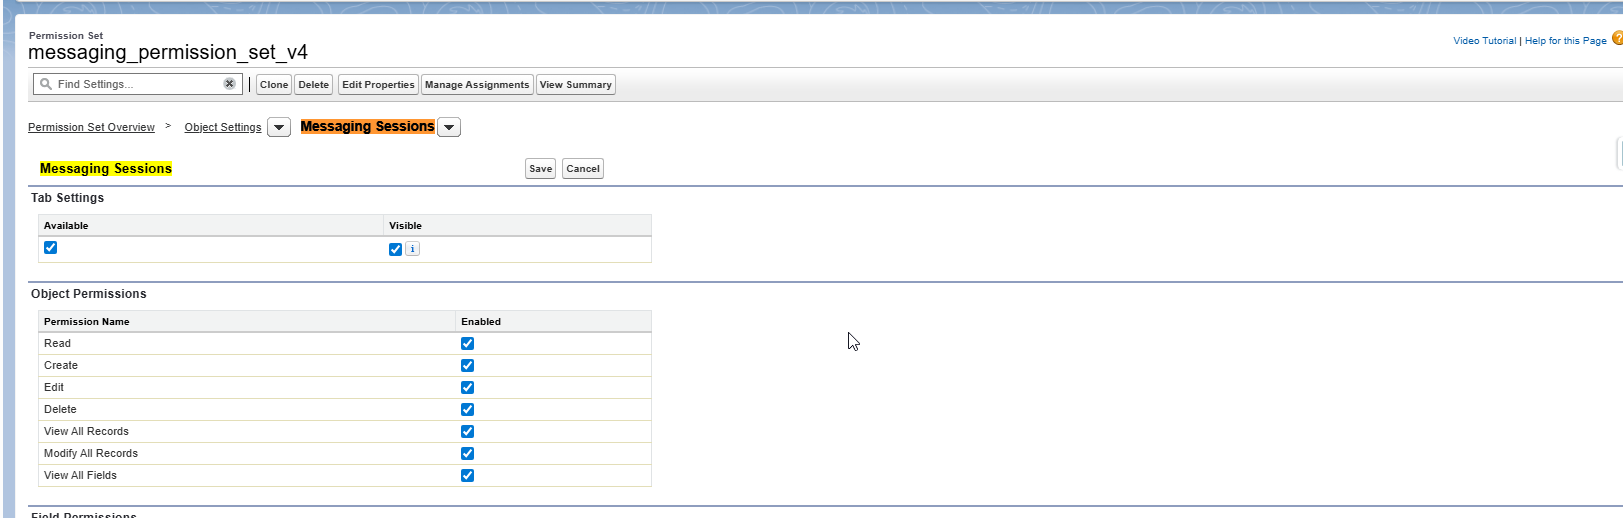
From within the Messaging Sessions page, click Edit.

-
Click all of the following permissions to enable them, as in the screenshot:
-
Read
-
Create
-
Edit
-
Delete
-
View All Records
-
Modify All Records
-
View All Fields
-
-
Save your changes.
-
Return to the Ingenius_Messaging_Session_Permission_Set page once again by selecting it from the related list.
-
Select App Permissions and then click Edit.
-
Check the box for End Messaging Session and Initiate Messaging Sessions and then click Save.

Assign the Permission Sets
-
From Setup, in the Quick Find Box, search for and select Users.
-
Select the standard user profile you wish to grant access to.
-
In the Permission Set Assignments related list, click Edit Assignments.
-
Assign all three of the permission sets created in this section (Omni_Channel_Permission_Set, Ingenius_Voice_Permission_Set, and Ingenius_Messaging_Session_Permission_Set) for the standard user by selecting the permission set from under the Available Permission Sets list and clicking Add.
-
Save your changes.
Authentication
-
Open the InGenius Admin App and navigate to Support.
-
Under Salesforce Messaging for In-App and Web Authentication, click Download JWK.

-
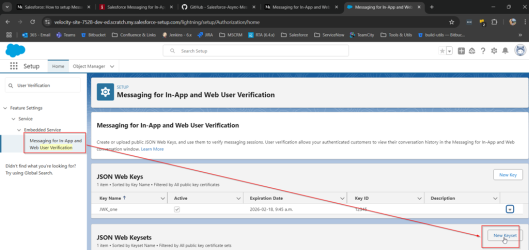
Navigate to your Salesforce Org and select Setup
-
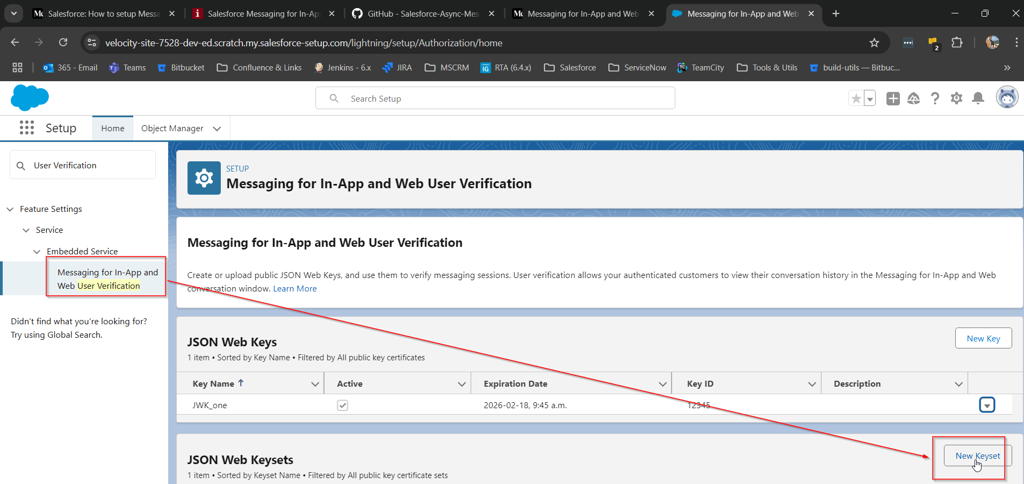
Search for 'User Verification' and select 'Messaging for In-App and Web User Verification' or 'Enhanced User Verification' depending on your Org
-
Click 'New Key' in the JSON Web Keys section
-
Fill in the following information and click Save:
-
Name: InGenius_Json_Web_Key
-
API Name: InGenius_Json_Web_key
-
-
Upload the JSON file downloaded previously from the Admin App in step 2.
-
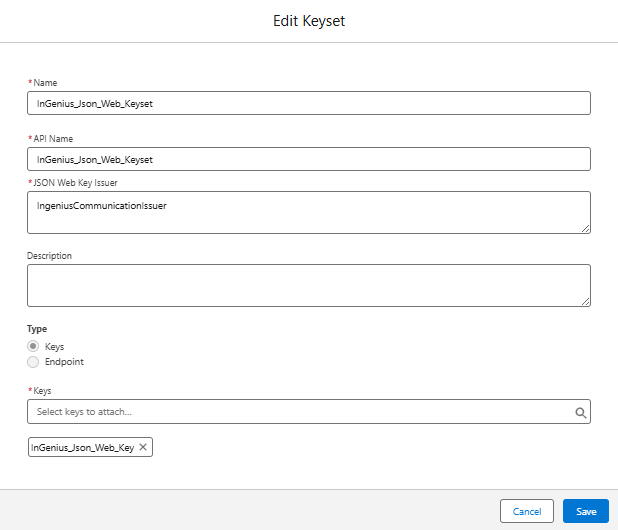
Click the 'New Keyset' button in the JSON Web Keysets section
-
Ensure the 'JSON Web Key Issuer' is the IngeniusCommunicationIssuer, then select the key created in step 6 and save.
-
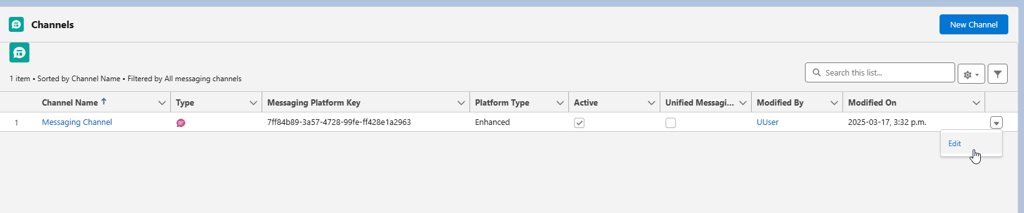
Navigate to Setup | Messaging Settings, and then on the messaging channel select the arrow on the right-hand side and click Edit.
-
In the Messaging Channel, enable 'Add User Verification'
-
Save your changes.
-
Return to Messaging Settings and click on the channel name
-
Scroll down to User Verification Configuration, click on the New button.
-
Select the keyset created previously and give it the name "InGenius_Verificiation_config"
-
Click Save.