Configure a cascading options data field
Cascading options data fields contain a list of values that is dependent on a selection in a different field. A data source is set up to store the information for the cascading options fields. Up to 8 related drop-down lists can be configured using a single data source. See Data Sources for more information.
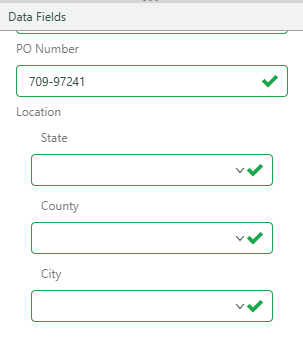
Field values must be defined by users in the order they are configured. For example, for a project that contains three cascading options fields, State, County, and City, users will be unable to specify a city until values have been selected for both state and county.
Example: You have documents that need to be indexed with the vendor location. When users select a state, you want the county list to be filtered to only counties located in that state. And then, when a county is selected, you want only cities in that county to be available in the list. By creating a separate data source with this information and then configuring a cascading options data field, you can limit the selections in the drop-down lists to only those selections that apply.
Example of a cascading options data field in the Data Fields Panel. Click to play.
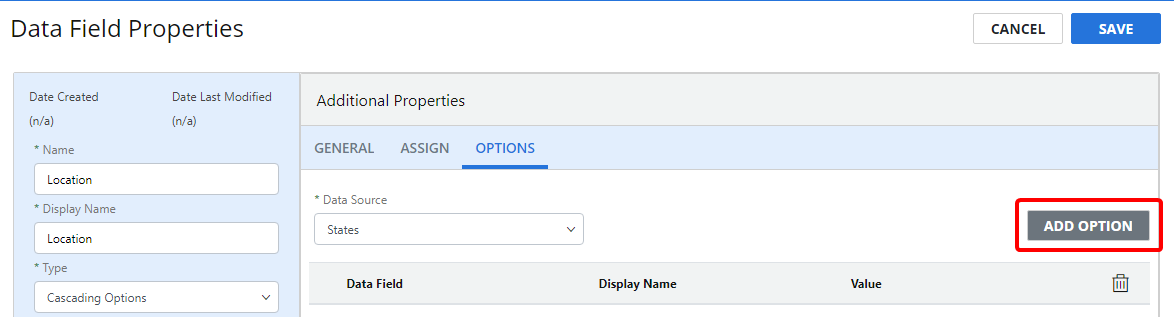
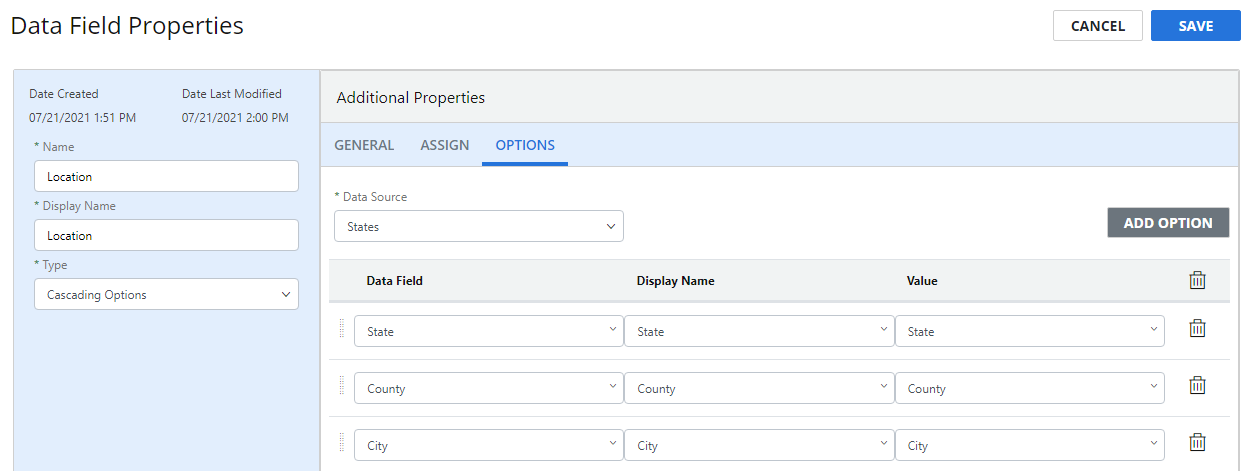
Cascading options fields have an additional set of field properties, which are located on the Options tab of the Additional Properties pane.
Note: Data fields must be added to the Data Dictionary before they can be used in the configuration of a cascading options data field. We recommend setting up these data fields as text type.
Tip: Data fields must be configured in the same order that you want them to appear when a document is indexed.
- Select a data source from the Data Source drop-down list. Data sources store information for cascading options fields. See Data Sources for more information.
-
Click Add Option.
-
Select an existing data field from the Data Field drop-down list. Data from the data source will be mapped to this field.
-
Select the name of the data source column that contains the information you want to display from the Display Name drop-down list.
-
Select the name of the data source column that contains the values you want to store from the Value drop-down list.
Note: The display name/value relationship is useful when you want the drop-down list to display a full name, but only store an identifier as the data value. This may be required for integration with a 3rd party data source or when you want to export data. For example, you may want to store the state postal code for use when printing address labels, but display the full state name in the drop-down list. In this example, the two letter state abbreviation is considered the "Value" and the full state name is the "Display Name." When a display name/value relationship isn't required, you can select the same data source column for both drop-downs .
-
Repeat Steps 2 - 5 to add additional data fields.
-
Click Save.