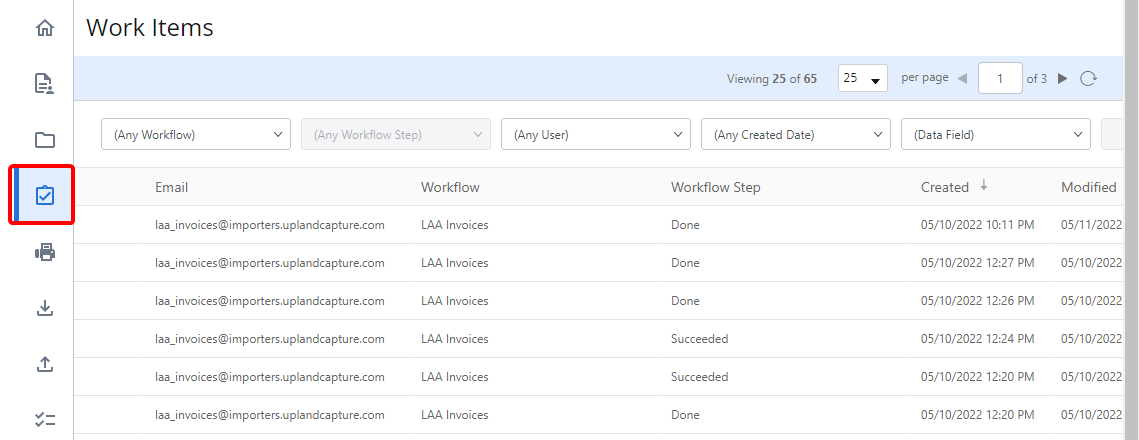
Work Items
Work Items allows you to view all history for documents that have traveled through workflows in Intelligent Capture.
Any user that is assigned to a role with the Manage Work Items permission can view and delete items in Work Items.
You can do the following from Work Items:
Download a document from Work Items
Resubmit a document to a workflow
Submit a work item to a workflow
View work item information
-
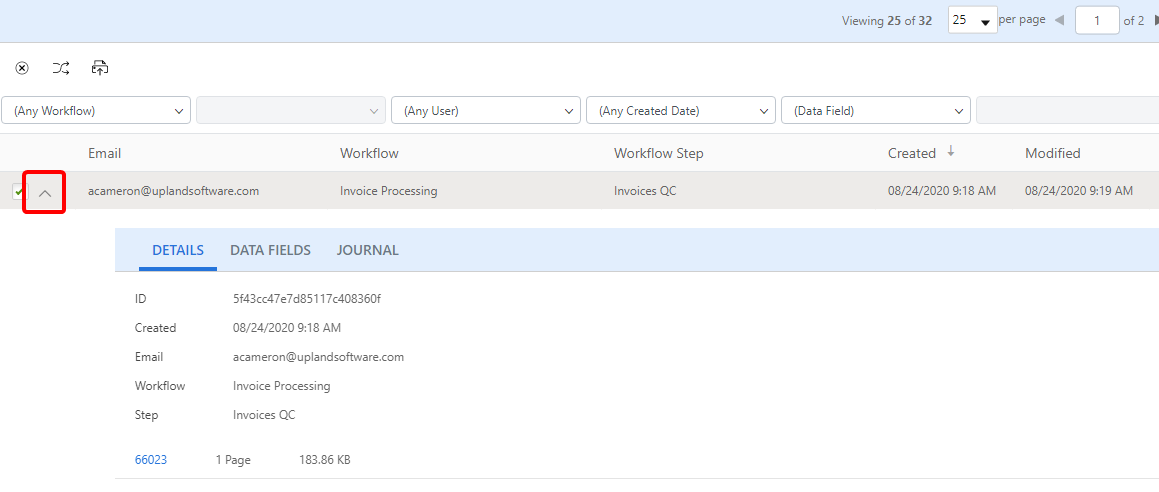
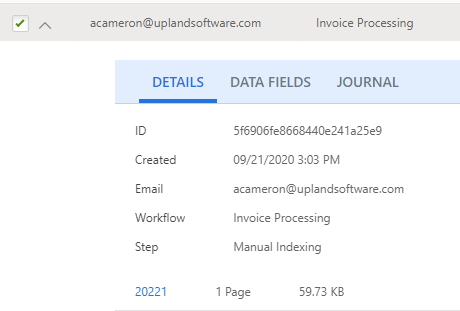
Click the down arrow next to a work item to expand it.
-
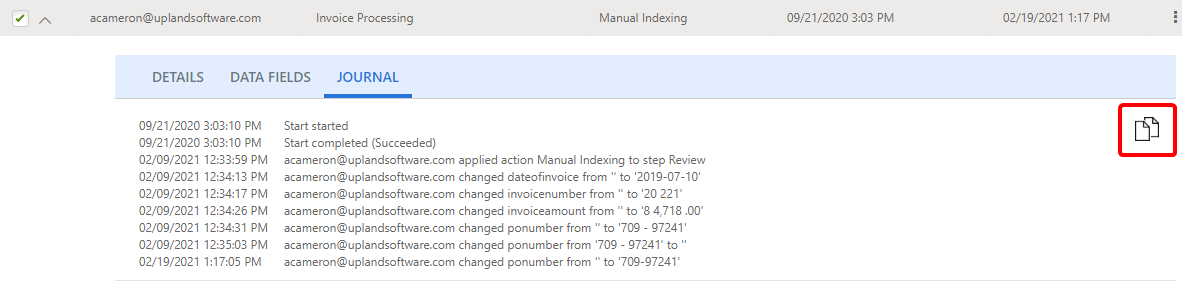
Select the tab that contains the information you want to view. There are three tabs:
-
Click Copy to Clipboard.
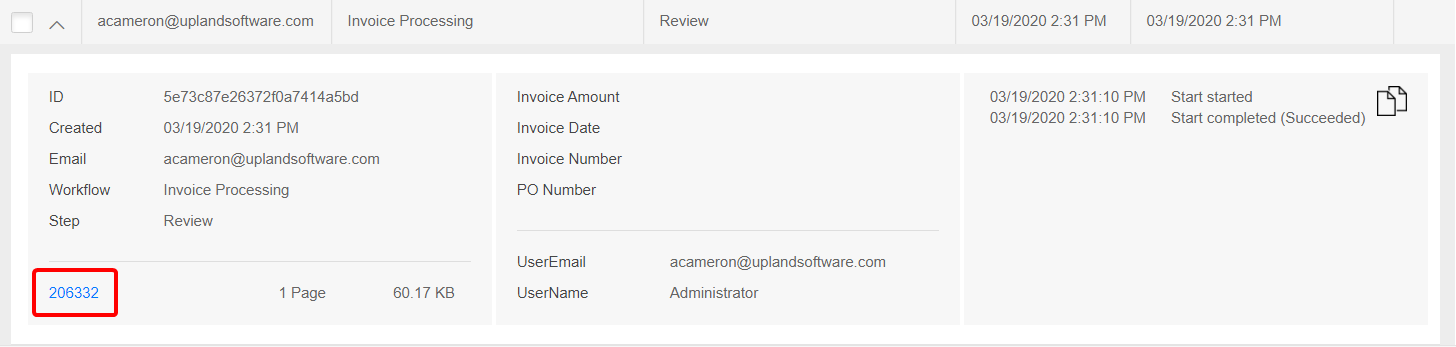
The General tab lists general information related to the work item, such as the ID and current workflow step.
You can download the work item by clicking on the name.
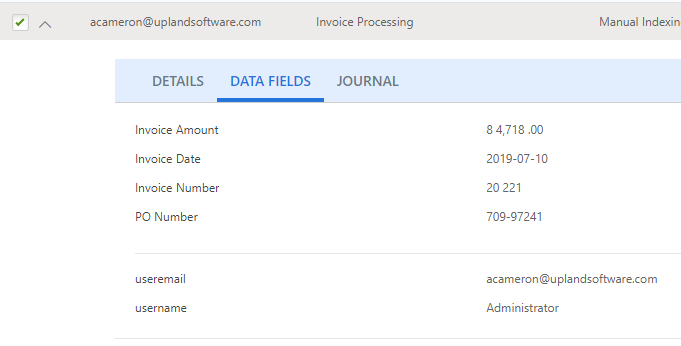
The Data Fields tab lists all data fields and line items associated with the work item.
The Journal tab displays a list of all activity related to the work item. If there is an error or problem with a workflow, this data can be copied and sent to support for troubleshooting.
You can modify Work Items to display only the information you want to see. See Modify a page view for more information.
Filter work items
Work items can be filtered by workflow name, workflow step, user, date created or any defined data field.
-
Select filter criteria from the drop-down lists at the top of the page. For data fields, select a data field from the drop-down list, then enter the value you want to filter on in the box to the right.
The page will automatically refresh to display only work items meeting the specified criteria.

Download a document from Work Items
- Click the arrow next to a work item to expand it.
-
Click the document name.
- In the Save As dialog box, navigate to the location where you want the document to be saved.
- Edit the file name as necessary, then click Save.
Cancel a work item
From Work Items, you can cancel an in-progress work item. When canceled, the document will be set to Done.
-
Perform one of the following:
- Right-click anywhere in the work item row or click the three dots next to the in-progress work item you want to cancel, then select Cancel from the drop-down menu
- Or, select the check box next to one or multiple in-progress work items, then click Cancel.
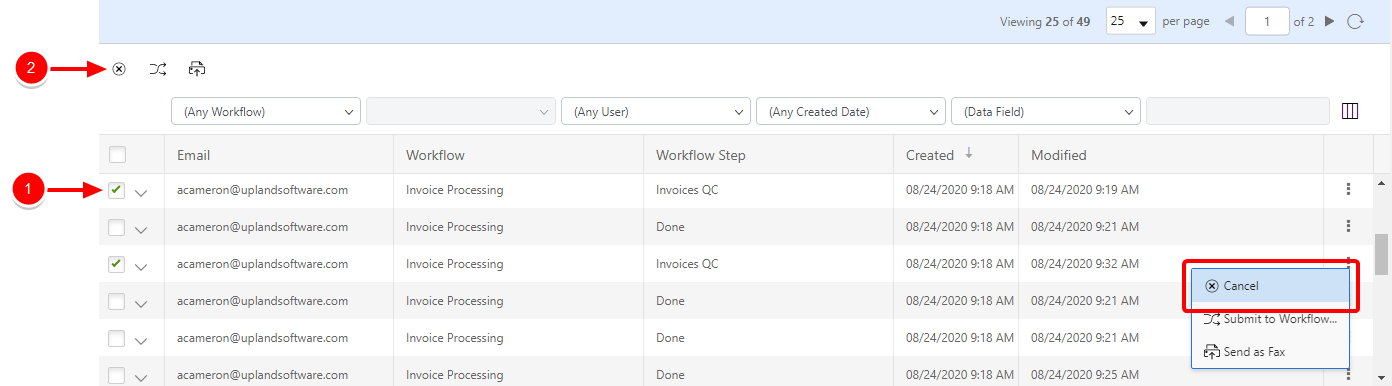
- Click Cancel to confirm the cancellation.
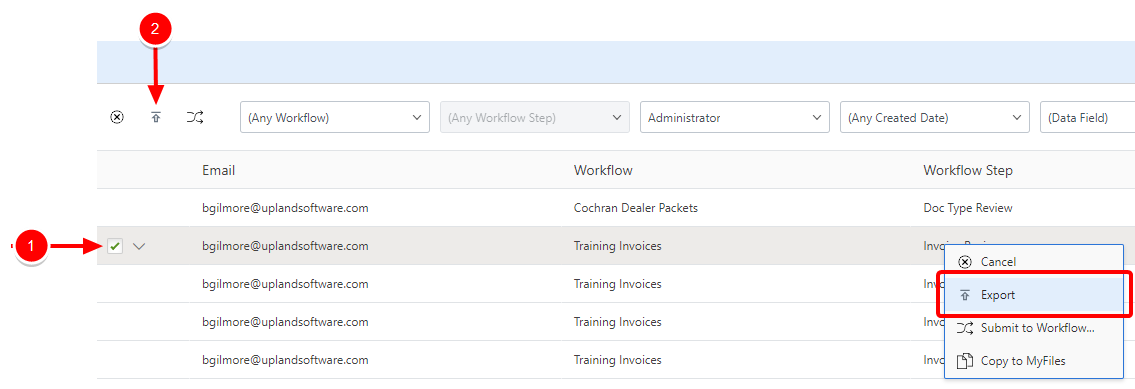
Export as CSV or XML
You can export CSV or XML file that contains information for all of your work items, or for specific work items. The following information is included in a CSV or XML export.

Note: Data in export files is based on the timezone supplied by the browser.
-
Ensure that you don't have any work items selected, then click Export.

-
Select a file format.
-
In the Save As dialog box, navigate to the location where you want the file to be saved.
-
Edit the file name as necessary, then click Save.
-
Perform one of the following:
-
Right-click anywhere in the work item row or click the three dots next to the work item you want to export as a file, then select Export from the drop-down menu.
-
Or, select the check box next to one or multiple faxes, then click Export.
-
-
Select a file format.
-
In the Save As dialog box, navigate to the location where you want the file to be saved.
-
Edit the file name as necessary, then click Save.
Resubmit a document to a workflow
From Work Items, you can resubmit a completed document to a workflow. The document will be sent to the first step in the workflow and will follow the workflow process again.
-
Perform one of the following:
- Right-click anywhere in the work item row or click the three dots next to the completed work item you want to resubmit to a workflow, then select Resubmit from the drop-down menu
- Or, select the check box next to one or multiple completed work items, then click Resubmit.
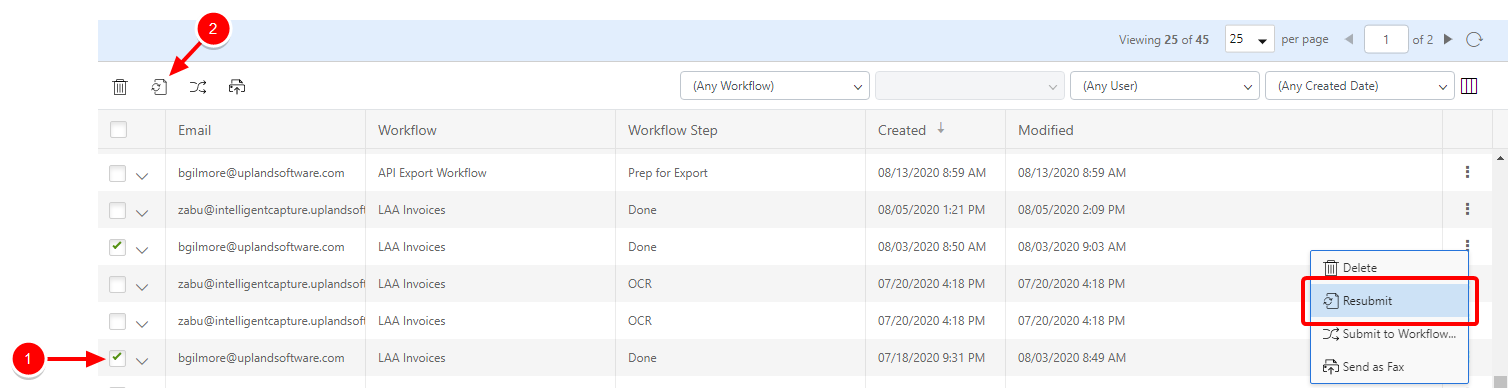
- Click Resubmit to confirm the resubmission.
Submit a work item to a workflow
-
Perform one of the following:
- Right-click anywhere in the work item row or click the three dots next to the work item you want to submit to a workflow, then select Submit to Workflow... from the drop-down menu.
- Or, select the check box next to one or multiple work items, then click Submit to Workflow....
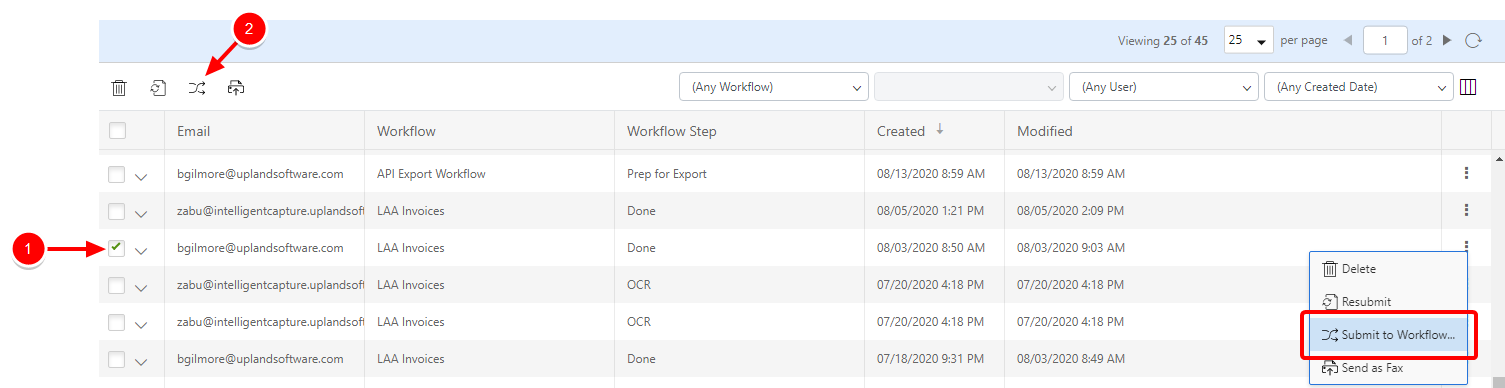
- Click the name of the workflow you want to submit the work item to.
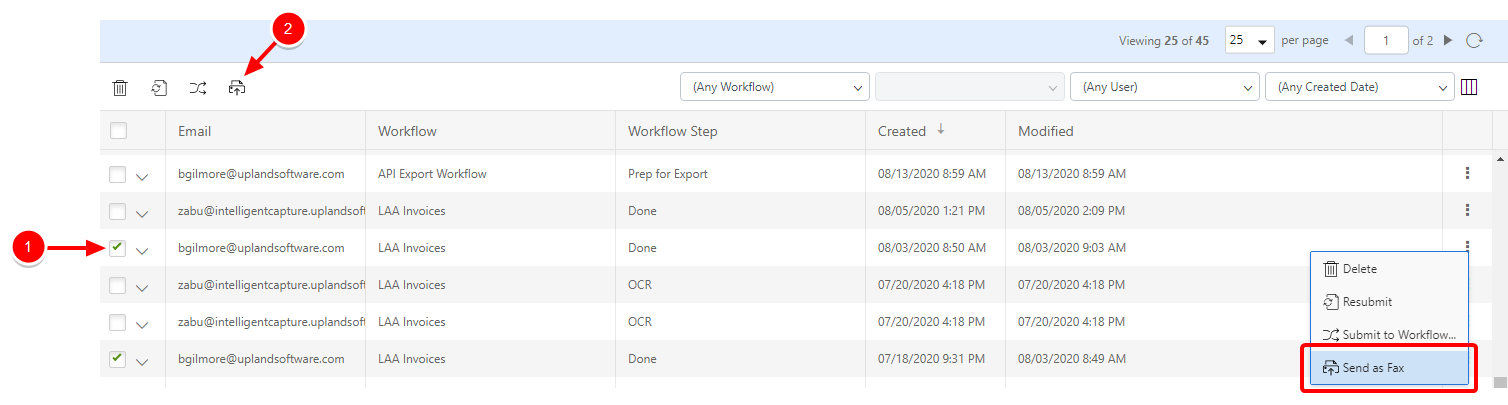
Send a work item as a fax
This option will only be available if the CloudFAX integration has been enabled for your account and you are assigned to a role that has permission to the integration.
-
Perform one of the following:
- Right-click anywhere in the work item row or click the three dots next to the work item you want to send as a fax, then select Send as Fax from the drop-down menu.
- Or, select the check box next to one or multiple work items, then click Send as Fax.
Send Fax will open with the selected work item attached. See Send Fax for more information.
Copy to OneDrive
You can copy work items to your Microsoft OneDrive folders. This option will only be available if the OneDrive integration has been enabled for your account and you are assigned to a role that has permission to the integration.
-
Perform one of the following:
- Right-click anywhere in the work item row or click the three dots next to the work item you want to copy to OneDrive, then select Copy to OneDrive from the drop-down menu.
- Or, select the check box next to one or multiple work items, then click Copy to OneDrive.

- Select the appropriate OneDrive folder to copy to.
- Click Copy.
Delete a work item
When a work item is deleted, the document and all logging are removed from Intelligent Capture completely. Only work items that have completed a workflow route can be deleted.
-
Perform one of the following:
- Right-click anywhere in the work item row or click the three dots next to the completed work item you want to delete, then select Delete from the drop-down menu.
- Or, select the check box next to one or multiple completed work items, then click Delete.
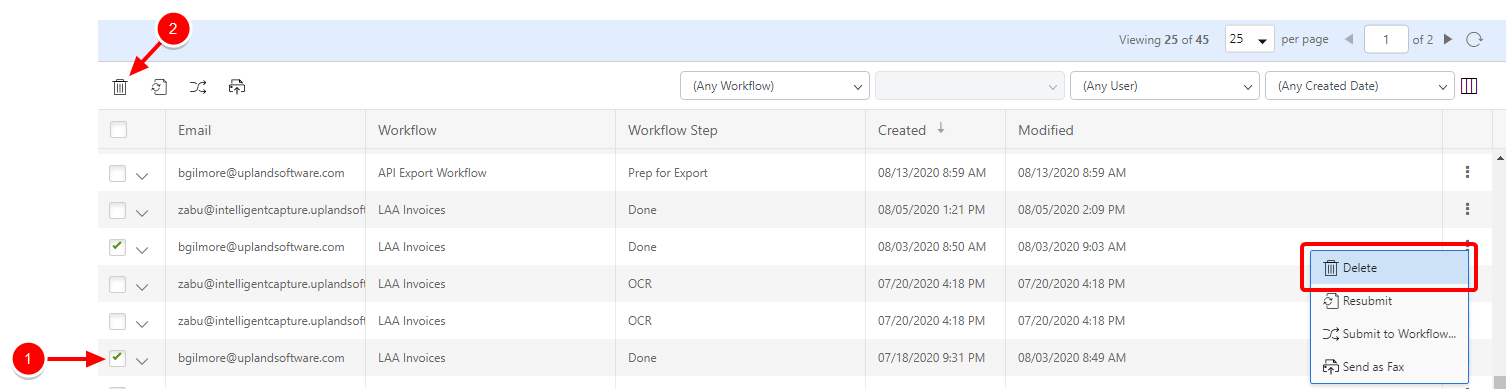
- Click Delete to confirm the deletion.