InterFAX App for Konica Minolta
With the InterFAX App, documents can be scanned from your Konica Minolta device then faxed.
Before using the InterFAX App, your MFP must be configured in InterFAX. See Devices for more information.
Topics include:
Scan to fax
Documents can be scanned from your Konica Minolta device and sent as a fax.
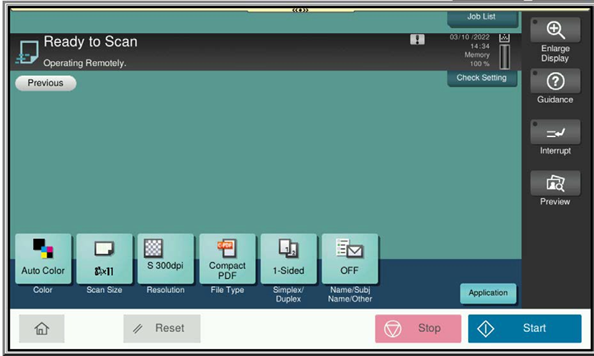
- Set up your documents at your device.
-
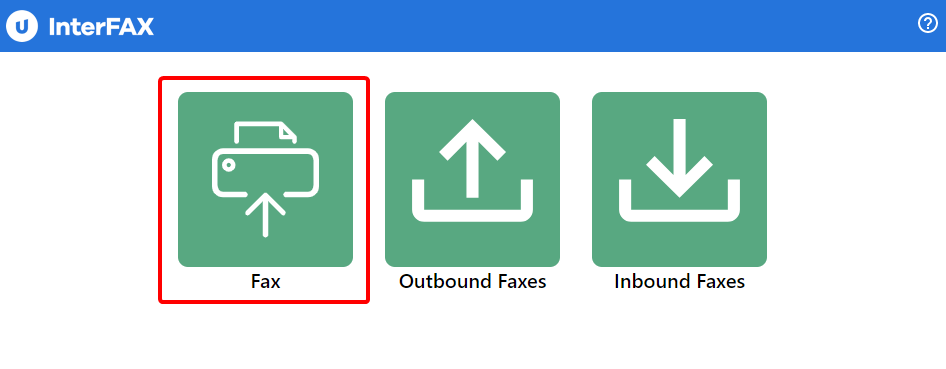
Click Fax. The Scan to Fax dialog box appears.
-
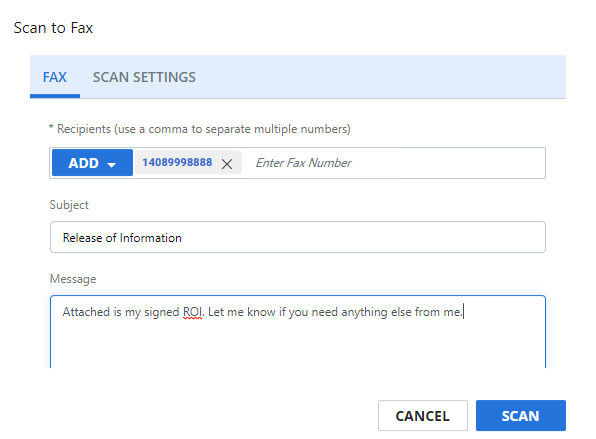
Enter the fax number you are sending the fax to in the Fax Number box. Use the following format:
- Enter a subject for the fax in the Subject box.
- To add text that will appear on the first page of your fax, enter the text in the Message box.
-
Click Scan.
-
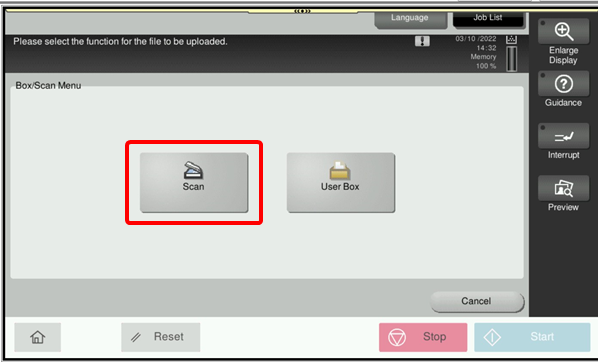
In the Box/Scan Menu, click the Scan function.
-
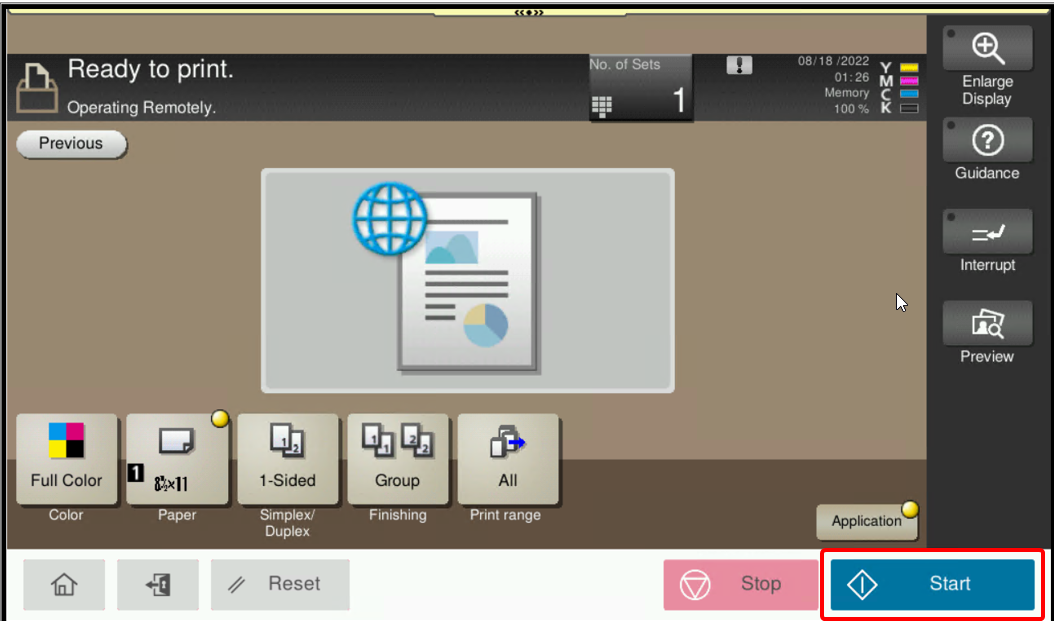
Specify your scan settings, then click Start.
+(country code)(area code)(fax number)
For example: +1-212-9876543 or +44-208-1234567
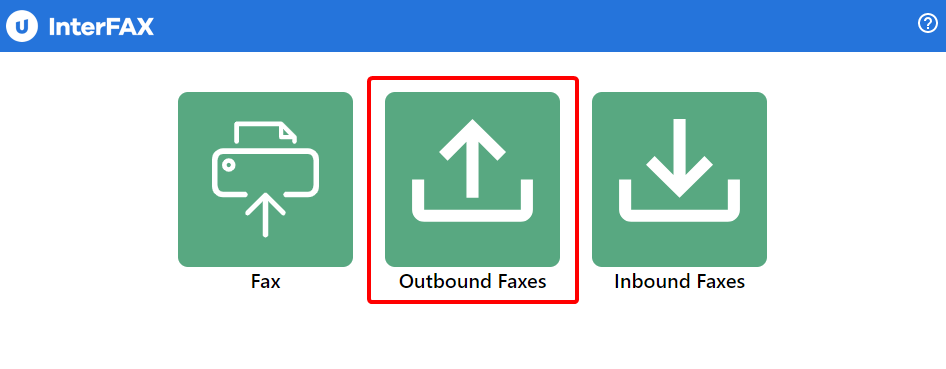
View outbound faxes
Outbound Faxes allows you to view information for all faxes that you have sent. Only users with the outbound service will have this option.
-
Click Outbound Faxes. The list of outbound faxes appears.
-
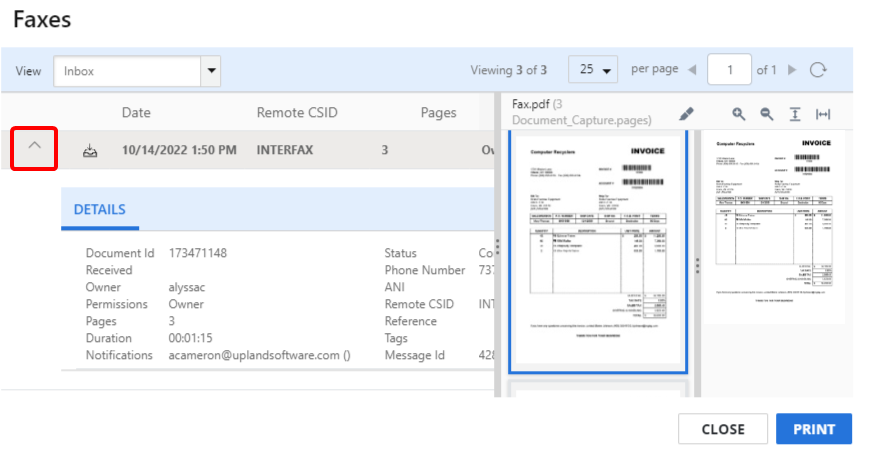
Click the arrow next to a fax to view fax details.

-
Click Close to return to the main screen.
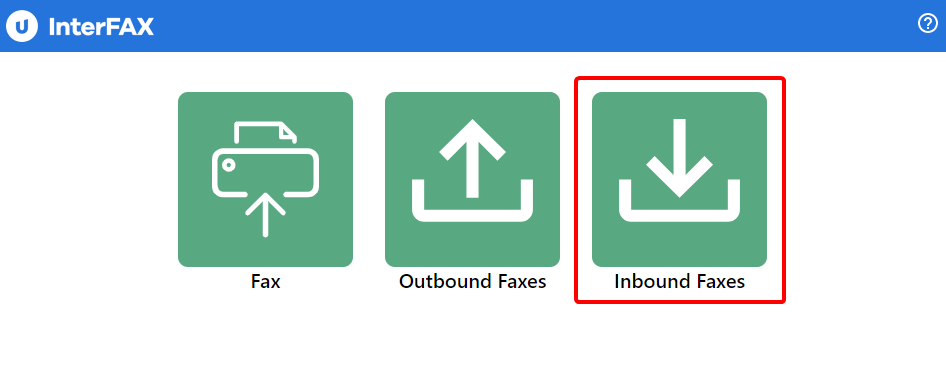
View inbound faxes
Inbound Faxes is where you can see all of your received faxes. Only users with the inbound service will have this option.
-
Click Inbound Faxes. The list of received faxes appears.
-
Click the arrow next to a fax to view fax details.
-
Click Close to return to the main screen.
Print an inbound fax
-
Click Inbound Faxes. The list of received faxes appears.
-
Select the fax you want to print, then click Print.

-
Modify Konica Minolta print settings as needed, then click Start.