Account Managers can create groups of users to which faxes can be shared either individually or automatically, rather than having to define the sharing settings of each fax and user individually.
To manage groups, log into InterFAX as an Account Manager. In the Navigation Menu, click Settings, then click Groups.
From the Groups page, you can:
Add a group
-
Click New...

-
Configure the group using the following tabs, then click Save.
Members Tab
-
In the Name box, enter a name for the group.
-
In the Members section, click Add (>) next to the user(s) you want to add to the group. Or, move users from the Available box to the Selected box using a drag-and-drop operation.
To remove a user from a group, click Remove (X) next to the user in the Selected box.

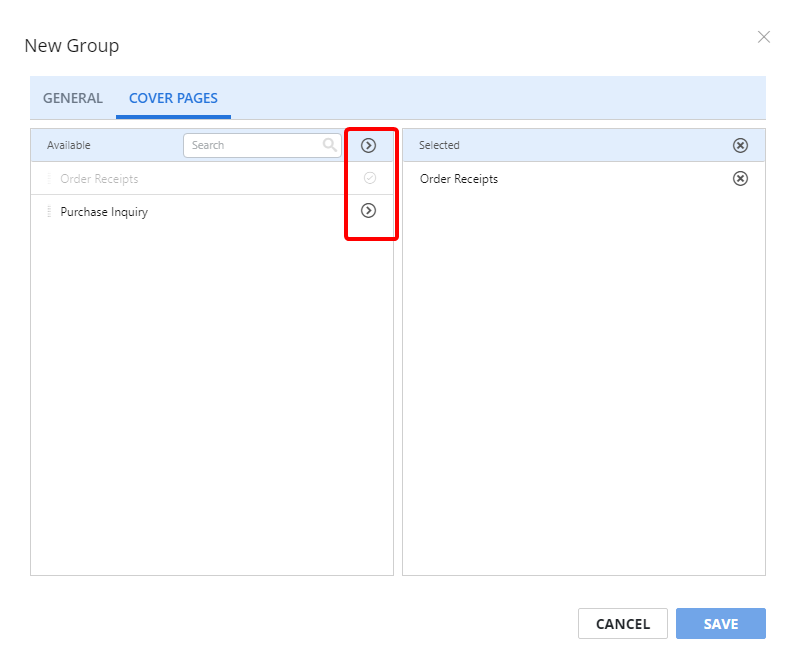
Cover Pages tab
Templates can be assigned as cover pages for users in groups. The cover pages selected on this tab will be available to users in the group in the Cover Page drop-down list when sending a fax. Groups can also be added when configuring a template. See Templates for more information.
Click Add (>) next to the cover page(s) you want to add for the group. Or, move cover pages from the Available box to the Selected box using a drag-and-drop operation.
To remove a cover page from a group, click Remove (X) next to the cover page in the Selected box.

View or edit group properties
In Group Properties, you can rename the group and add or remove users.
-
Click the three dots next to the group you want to view properties for, then select Properties from the drop-down menu. Or, click the name of the group you want to view properties for.

-
Modify group properties as needed, then click Save.
Delete a group
Deleting a group will remove all shared users and close the group completely.
-
Click the three dots next to the group you want to delete, then select Delete from the drop-down menu. Or, select the check box next to one or multiple groups, then click Delete.
