Fax from the Control Panel
All users with the Send Fax service can log in to the Control Panel and send faxes quickly and easily using the a simple web form. The form allows you to send faxes to multiple recipients, assign subjects for internal use, and attach files. It also provides advanced options for fax transmission.
If you wish to broadcast to multiple recipients see Contact Lists.
-
In the Navigation Menu, click Send Fax.
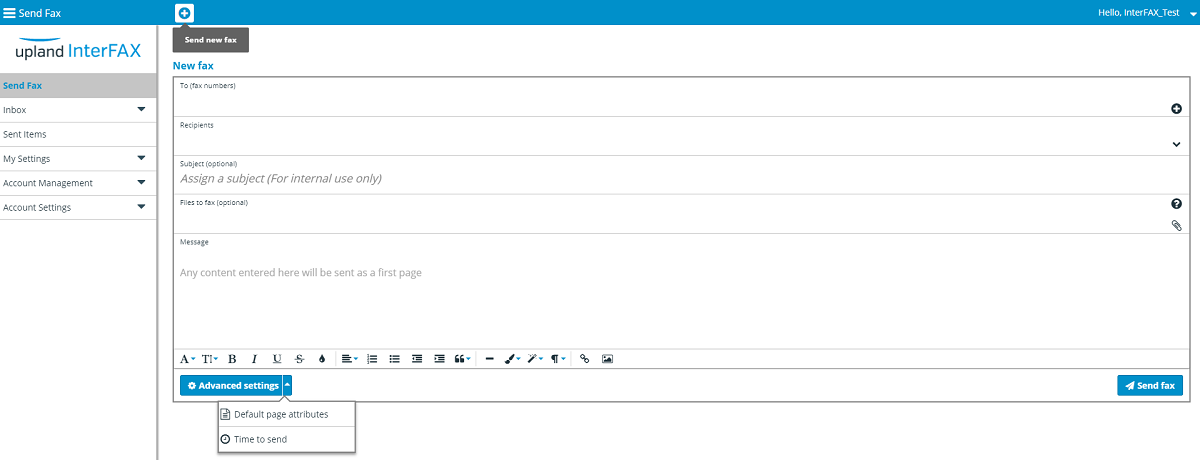
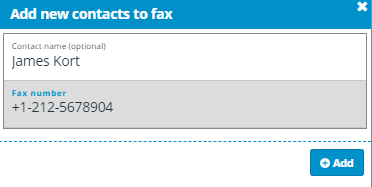
- Click the + icon on the right-hand side of the To (fax numbers) field to open theAdd new contacts to fax window.
- In the Contact name field, a name can be added to the contact for your own reference.
- Add the fax number you wish to send the fax to in the Fax number field, being sure that the number is formatted correctly. For more information regarding the correct formatting of fax numbers, see Fax number formats.
-
Click Add to return to the Send Fax form.
- To send a fax to a contact list, select the contact list from the Recipients drop-down. See Contact Lists for more information.
- To add one or more attachments to be faxed, click the Files to fax field to open your local file explorer where you can locate and select the files to be attached.
- To add a first (or cover page) to your fax, you can enter the information to be faxed in the Message field, and use the formatting options along the bottom.
-
By default, the settings for sending a fax using the web form are taken from your user settings; however, you can tweak these options before sending a fax by clicking Advanced Settings. The following options are available under Advanced Settings:
 Default page attributes
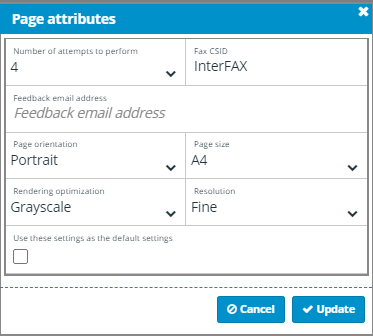
Number of attempts to perform: The number of attempts to perform in cases of fax transmission failure.
Fax CSID: Your identification as seen in your outgoing fax.
Feedback email address: An optional email address to which feedback messages are sent.
Page orientation: Specify landscape or portrait page orientation for the transmission.
Page size: Specify the page size to be transmitted (A4, Letter, Legal, B4).
Rendering optimization:Specify whether to render documents in black and white or greyscale.
Resolution: Specify standard or fine resolution for the transmission.
Use these settings for all faxes: Select this check box to quickly update settings to save and reflect those used for this transmission.
Time to send
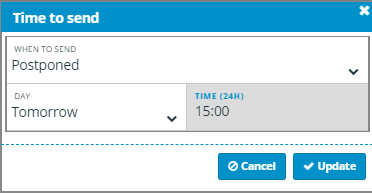
Time to Send allows users to specify whether to submit the fax immediately (ASAP) or to delay submission of the fax into the system for up to 30 days. Simply change the When to send drop-down to Postponed, select a future date and time for submission, then click Update. You will only be able to select a
-
When you are happy with the information to be faxed and the required settings, click Send fax to submit the fax into the InterFAX systems for sending.
You will be prompted with a confirmation window. Click Send new fax to compose a new fax, Sent items to track the status of your submissions or click OK to be returned to the form you just submitted.