Kapost allows you to track analytics on Marketo Landing Pages by "Approving" the page in Kapost, which in turn activates it in Marketo. Please note, your Kapost instance must be connected to Google Analytics to get Marketo Landing Page analytics.
First, make sure you have a Marketo connection and it is connected to your Marketo Landing Page content type.
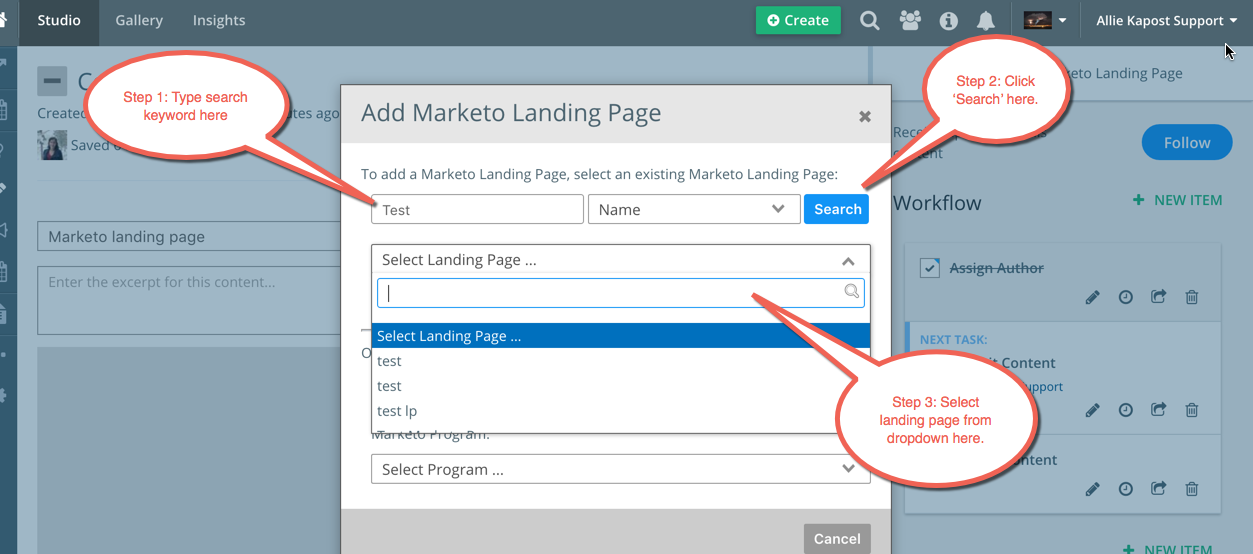
Once you've created your Marketo Landing Page post, pull one of your landing pages into Kapost by clicking the blue "add landing page" button. Enter a keyword into the top left field and click "search." Then, use the dropdown at the bottom to choose your email.

Best practice is to have someone make notes on the landing page in Kapost, and then have someone make those edits in Marketo. You can then bring in the updated landing page by going to the "Landing Page" menu and clicking "Refresh."

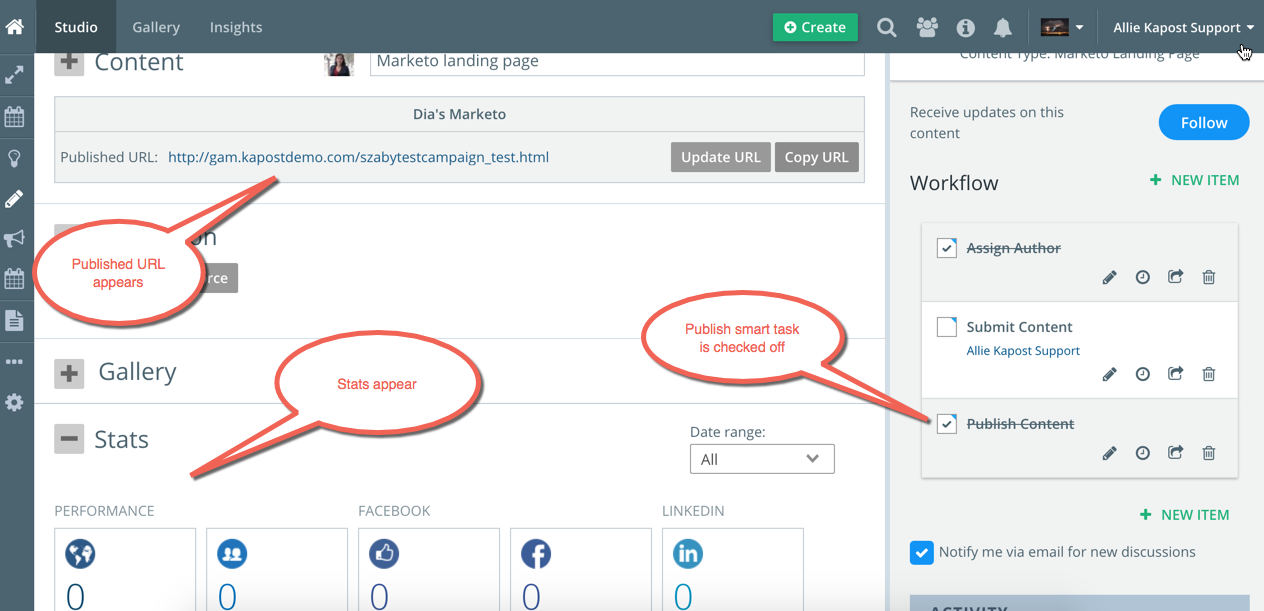
Once your landing page is finished, go to the "Landing Page" menu again and click "Approve." This will activate your landing page in Marketo and effectively publish it in Kapost. If you have a task that is completed by publishing, it will check itself off, and a published URL will appear.

When your landing page is approved and activated, your analytics stats will appear at the bottom of the post. If your analytics are not populating, make sure the published URL in Kapost matches the URL of your landing page. To read more about how to interpret analytics, click here.

Feel free to send an email to support at kapost dot com if you have questions or feedback!