Adding a recording
When making a new recording for callers who will be routed to a legislator, keep the following guidelines in mind:
-
Keep it short, under 45 seconds in length.
-
State your organization's name clearly.
-
At the beginning of a long recording, tell callers that they can bypass the recording by pressing # (pound sign).
-
State where the call is being routed (for example, give the senator's or representative's name).
-
Provide talking points on the position you want your callers to support.
-
Thank your supporters and tell them to stay on the line to be connected at the end of your recording.
-
Call the VoIP number directly to test your message. You can re-record and update your recording, if necessary.
Tip: You will have the option to select audio prompts for recordings in English and Spanish, so you may want to add duplicate messages, one in English and one in Spanish.
To work with recordings:
-
Select
 Phone Calls in the left pane, and then select Recordings.
The Recordings table lists the available audio recordings, the duration of the recording, and the date it was created.

The Recordings table is sorted by the Created On column, starting with the most recent recordings.
Tip: To sort the Recordings table by date, select
 Ascending or
  Descending order to the right of the Created On header.
 About the Recordings table
The Recordings table contains the following information:
Column Description Audio file The name of the audio recording Duration The length of the recording Created on The date the recording was made Audio The audio file name
Tip: Select
 to listen to the recording.
Actions Available actions for a recording:
-
Download: Download the recording.
-
Edit: Rename the recording file. Select Update to save your changes.
-
Delete: Delete the recording file. Select OK to confirm.
-
If the table is longer than one page, use the page-navigation options on the lower-right to select the number of rows per page and to navigate to the ![]() next or
next or ![]() previous page.
previous page.
Tip: To navigate directly to a specific page, select the page field, enter the page number, and then press ENTER.
From the Recordings table:
Recordings listed in the Recordings table are available to add to an mConnect. For more information, see Adding a new mConnect.
Searching the Recordings table
To search by audio file name:
-
Select
Phone Calls in the left pane, and then select Recordings. -
Above the Recordings table, on the right, enter a search term in the Search box, and then select
 Search.
The Recordings table displays audio files that match the search term.
Creating a recording
To create a new audio recording:
-
Select
Phone Calls in the left pane, and then select Recordings. -
Above the Recordings table, select Actions, and then select
 Call to Record.
The Call to Record page provides a call-in phone number and four-digit PIN number for your account.
Note: The phone number and PIN will never expire and can be used to create multiple recordings.
-
When you are ready to record a message, call the phone number provided.
-
When prompted, enter the PIN number.
The phone system will provide instructions for recording your message.
-
Record your message.
-
When you are satisfied with your message, save it in the phone system and hang up.
-
To return to the Recordings table, select
Phone Calls in the left pane, and then select Recordings.Check the Recordings table to ensure that your new recording is available.
Uploading a recording
If you have an existing audio recording in MP3 format, you can upload it for use in an mConnect.
To upload an existing audio recording:
-
Select
Phone Calls in the left pane, and then select Recordings. -
Above the Recordings table, select Actions, and then select
 Upload Recording.
 -
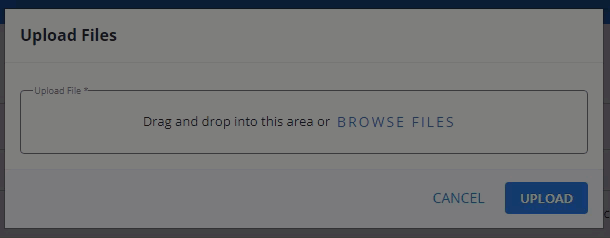
Select the Choose File button, locate the MP3 file in the window that appears, and then select Open
OR
Drag and drop the MP3 file directly into the window:

Click thumbnail to play.
-
Select Upload.
The recording file is added to the Recordings table.
-
To play the recording, locate the recording in the Audio column, and then select
Play. -
To download the recording, locate the recording in the Recordings table, and then select Download from the
 Menu on the right.
-
Editing a recording name
To edit a recording name:
-
Select
Phone Calls in the left pane, and then select Recordings. -
Locate the recording in the Recordings table, and then select Edit from the
Menu on the right.The Edit recording form opens. You can change the name of the recording only.
-
To rename the recording, change the entry in the Name field.
-
When you are done, select Update.
Deleting a recording
To delete a recording:
-
Select
Phone Calls in the left pane, and then select Recordings. -
Locate the recording in the Recordings table, and then select Delete from the
Menu on the right. -
To confirm, select OK.
Exporting recording data
To export the recording data to a CSV (comma-separated values) file:
-
Select
Phone Calls in the left pane, and then select Recordings. -
Above the Recordings table, select Actions, and then select Save as CSV.
The records in the Recordings table are downloaded in a CSV file containing the following columns:
Column Description filename The file name of the MP3 recording size The size (in bytes) of the recording file content_type The content type, for example, audio/mpeg created_at The date and time when the file was created updated_at The date and time when the file was last updated -
To download the CSV file, select
 Home in the left pane, and then select Reports.
 -
Locate the CSV file in the Exports table, select the link in the Name column, and then open the downloaded file.